Installing Lync 2013 Server – Configuring DNS Records for Lync.
In our last post, we learned “How to install prerequisites before installing Lync Server 2013“. In this article, we will configure and add DNS records which is absolutely necessary for lync client login, dial-in, meet, access admin url etc to work.
Configuring DNS Records for Lync 2013 Server:
In order to configure DNS entries, you need to login to the server where you installed Domain controller (DC)/Certificate Authority (CA) roles.
- Login to Domain Controller Server / CA Authority Server
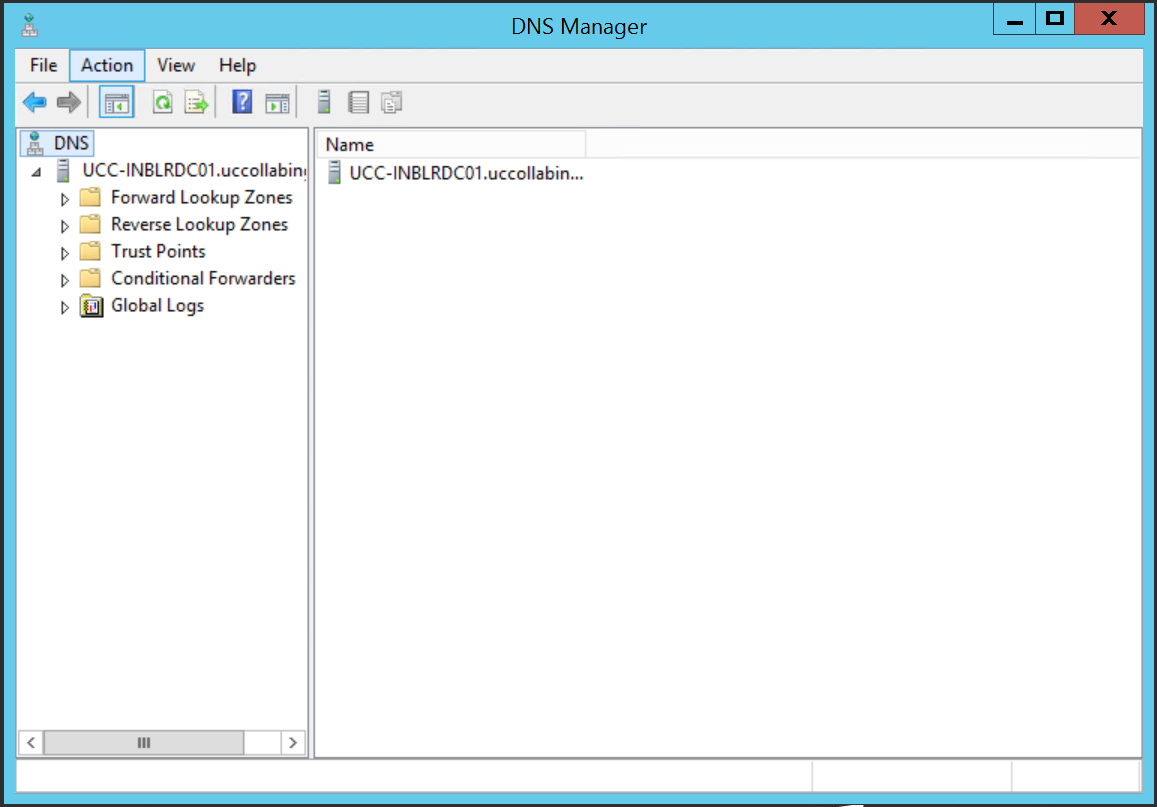
- Go to Run and Type “dnsmgmt.msc” without quotes and hit enter.
- DNS Manager window will open
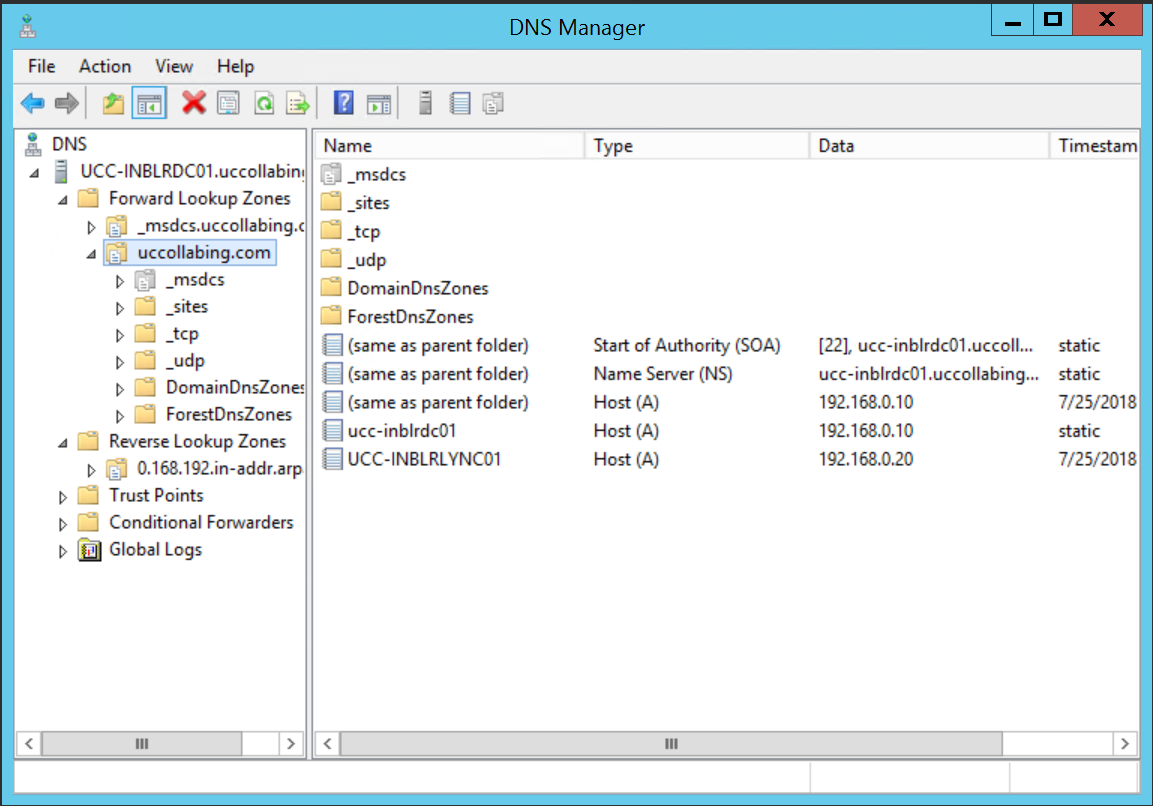
- Expand Forward Lookup Zones > Expand domainname.com

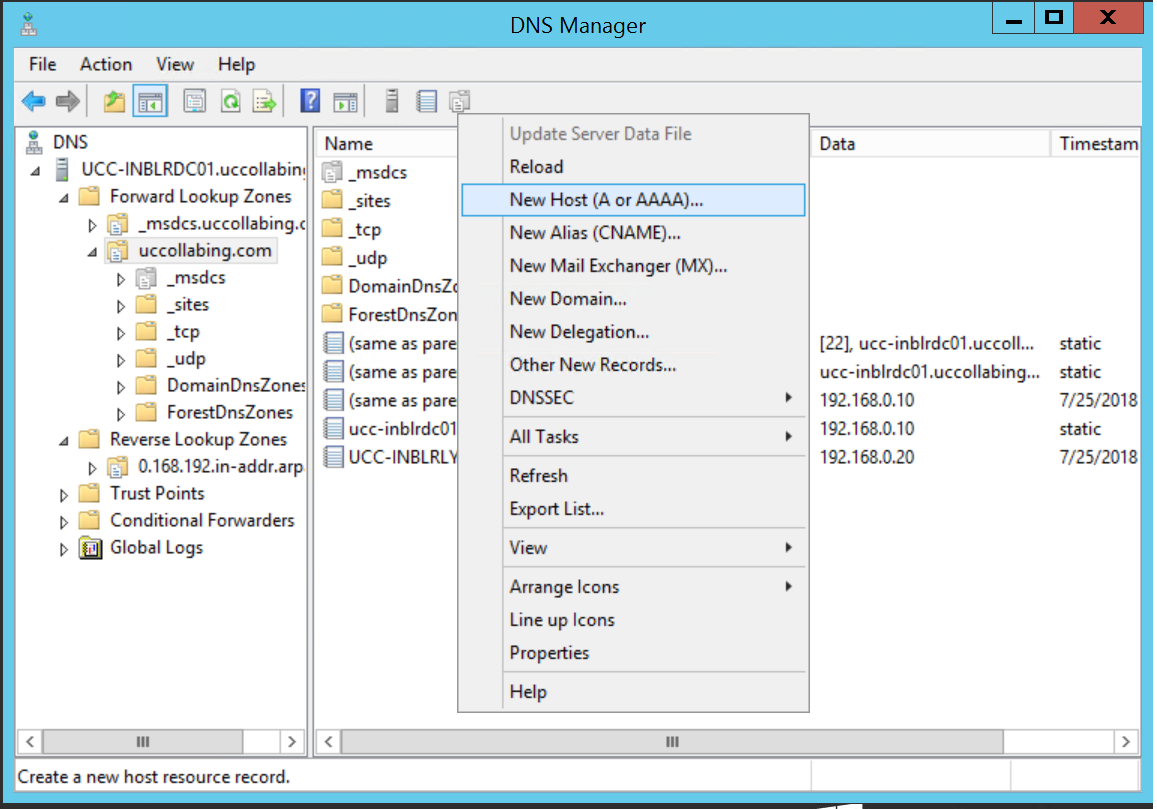
- Right Click on the Window and Click on New Host (A or AAAA)…
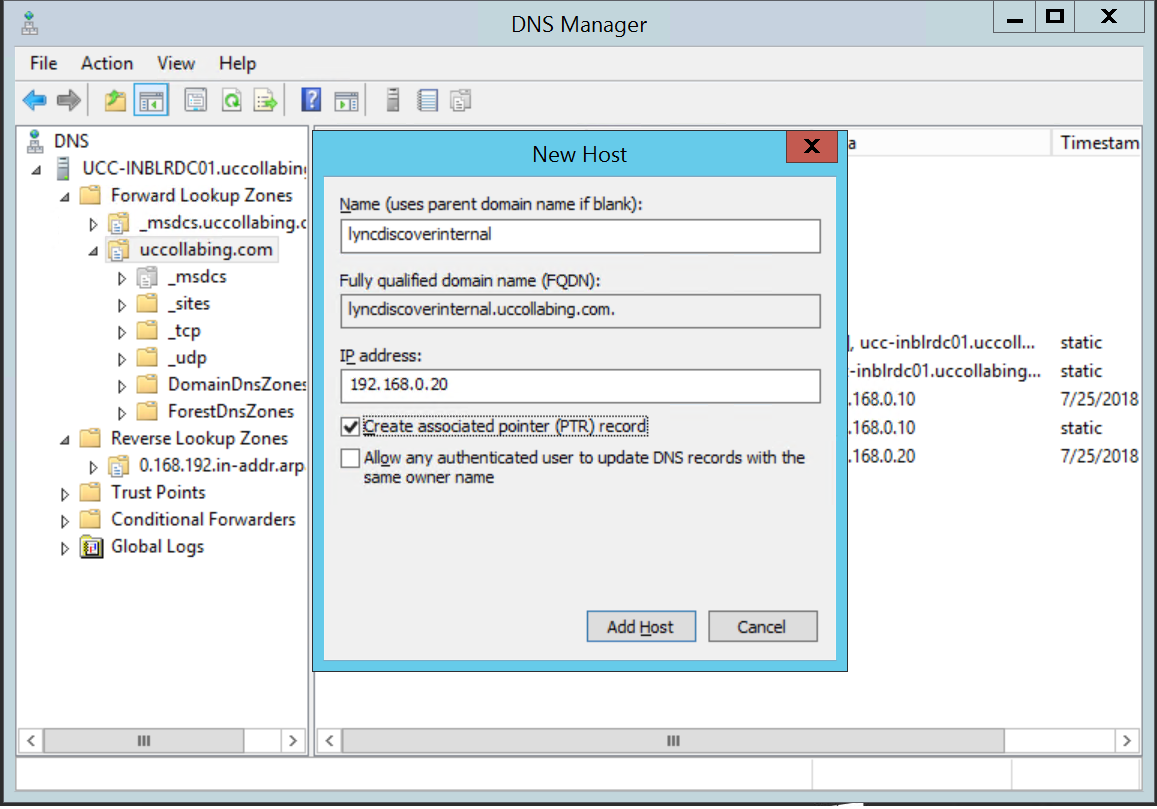
- Enter “Name (uses parent domain name if blank)”, “IP Address” and checkbox “Create associated pointer (PTR) record”. Once done, click on Add Host
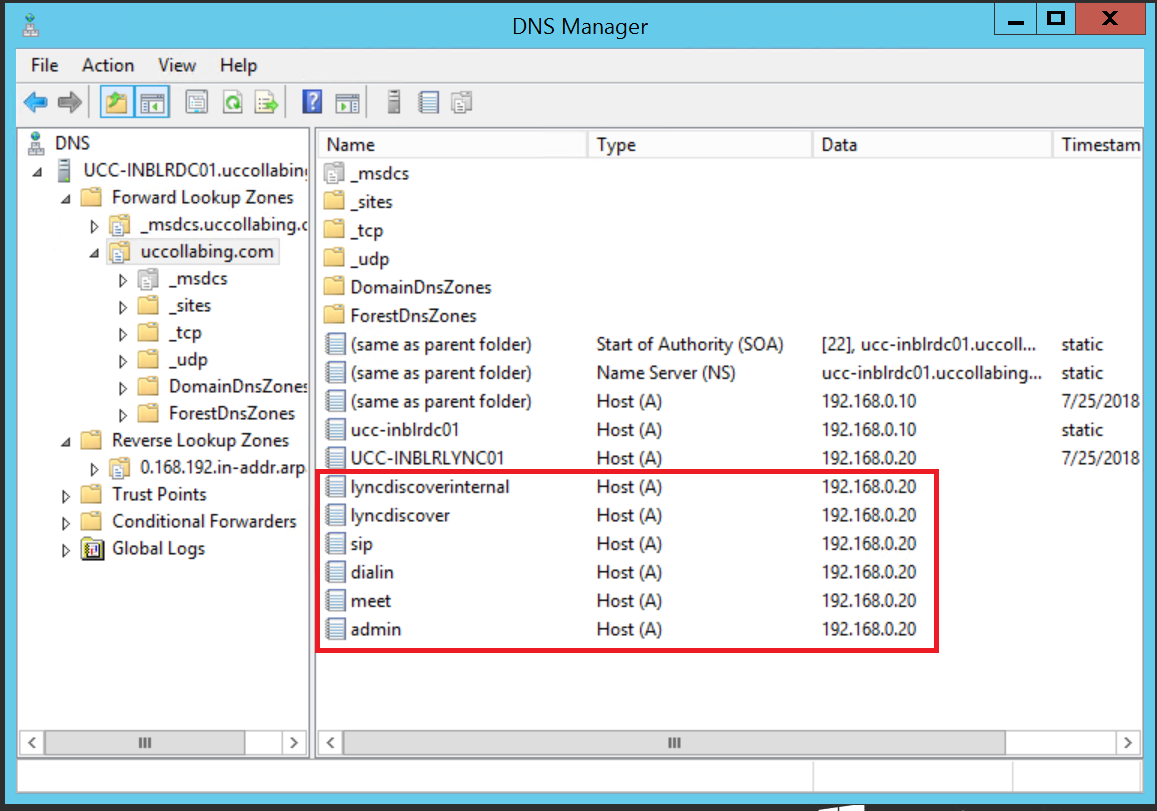
DNS Records to be created:
Create the below A type records in the DNS Server
Record Type Value FQDN Points to A lyncdiscoverinternal lyncdiscoverinternal.uccollabing.com Lync front end server/Front End Pool A lyncdiscover lyncdiscover.uccollabing.com Lync front end server/Front End Pool A sip sip.uccollabing.com Lync front end server(multiple A records if enterprise pool) A dialin dialin.uccollabing.com Lync front end server/Front End Pool A meet meet.uccollabing.com Lync front end server/Front End Pool A admin admin.uccollabing.com Lync front end server/Front End Pool Finally after creating all the above A type records, the configuration will look like this:
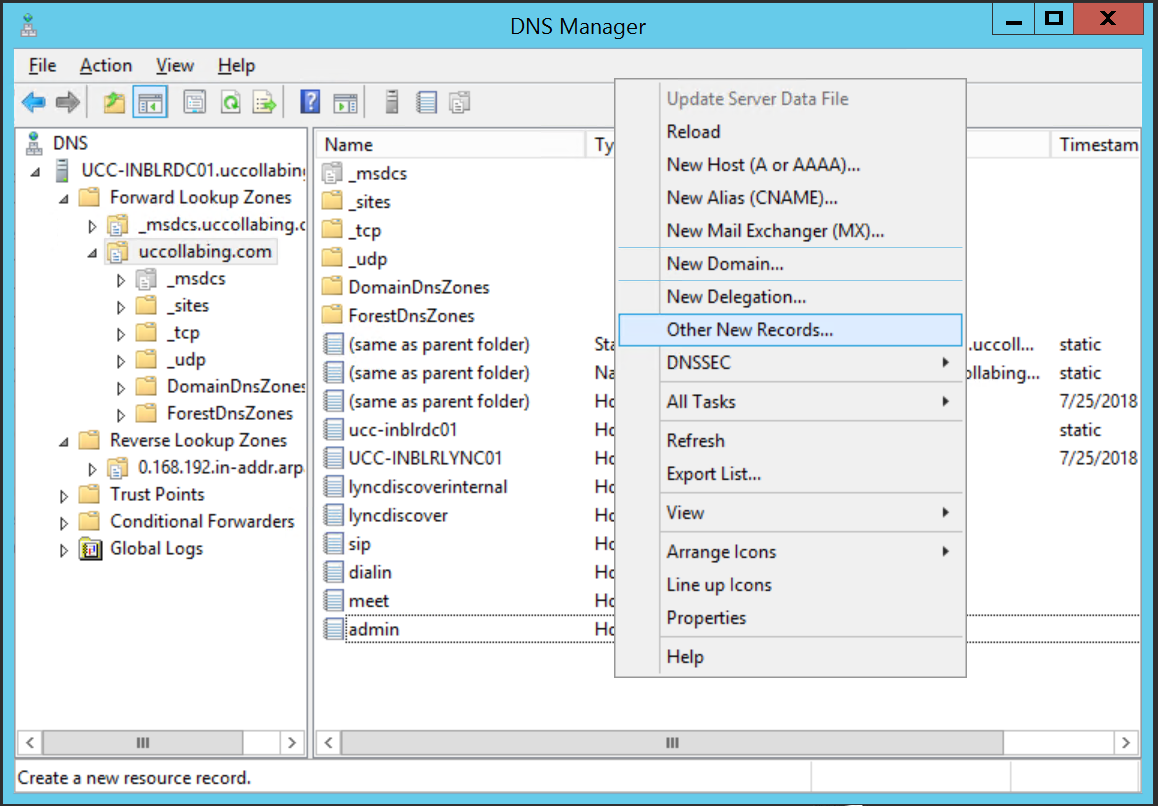
- Now you need to create SRV records. To create SRV records, Right Click on the window, Click on “Other New Records…”
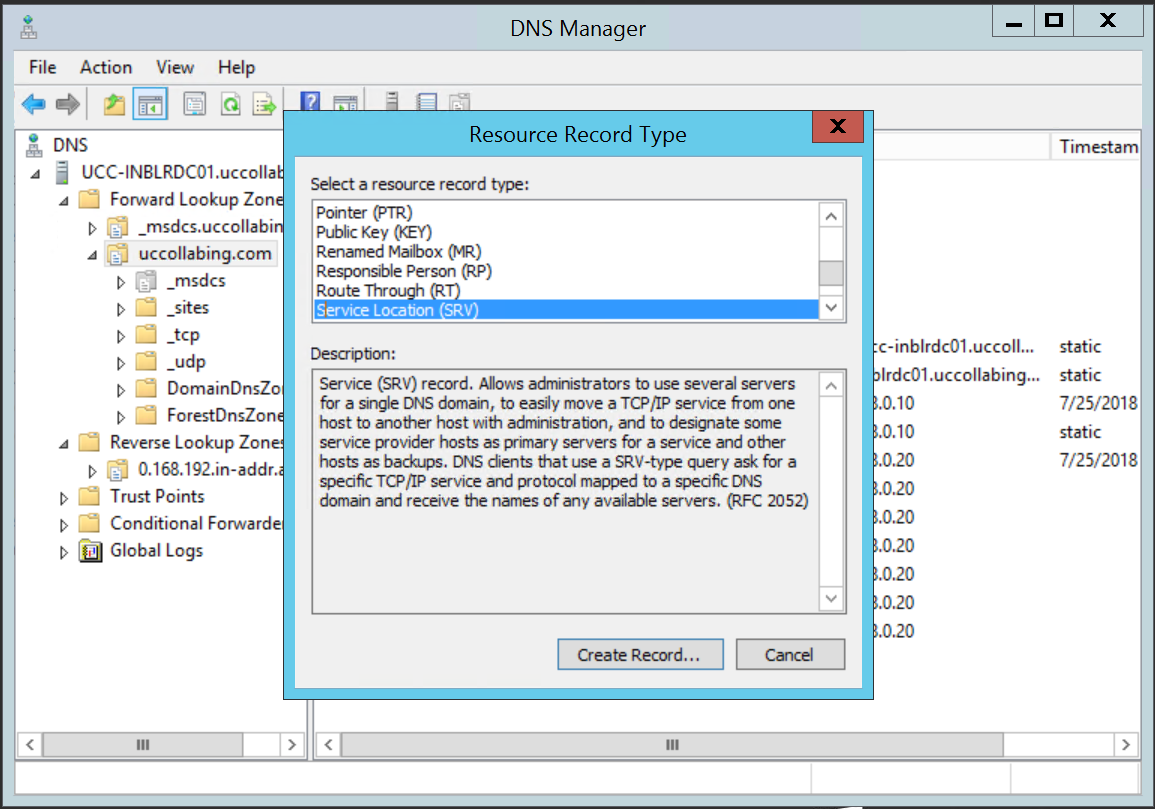
- Select Service Location (SRV) and click on Create Record…
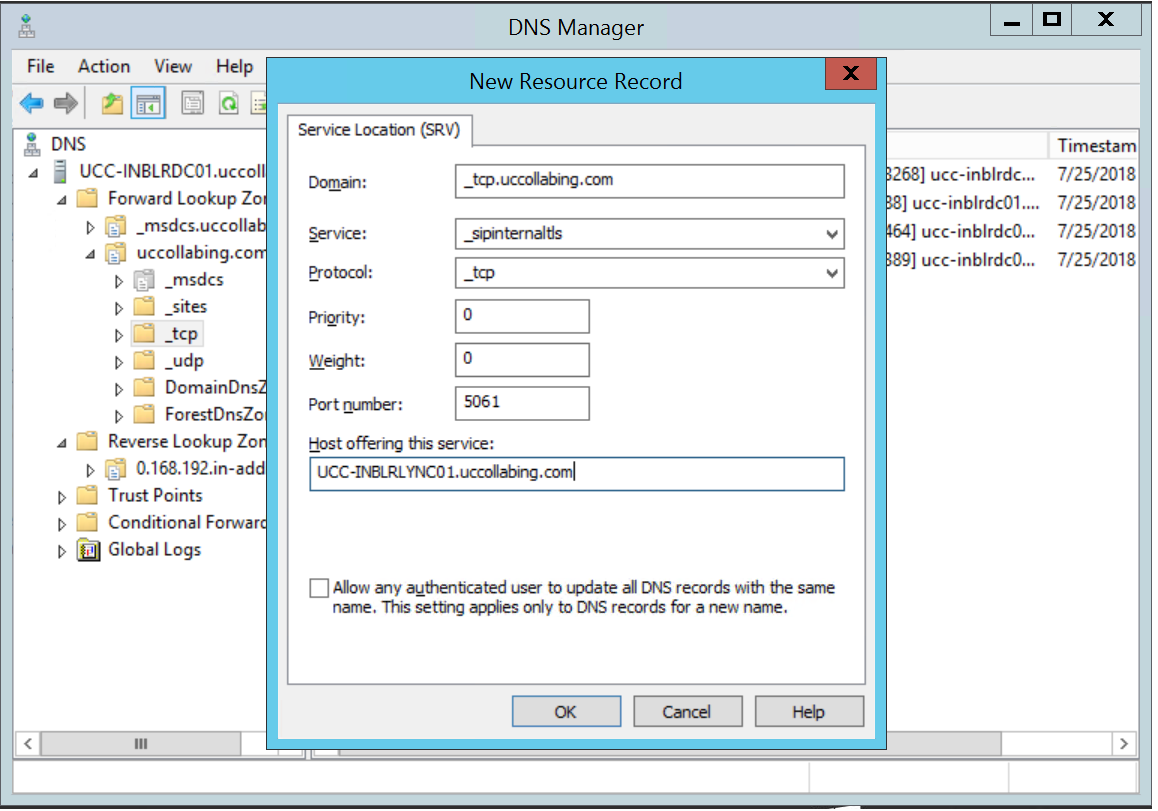
- Enter “Service”, “Protocol”, “Port number” and “Host Offering this service” information.
DNS SRV Records to be created:
Create the below SRV type records in the DNS Server
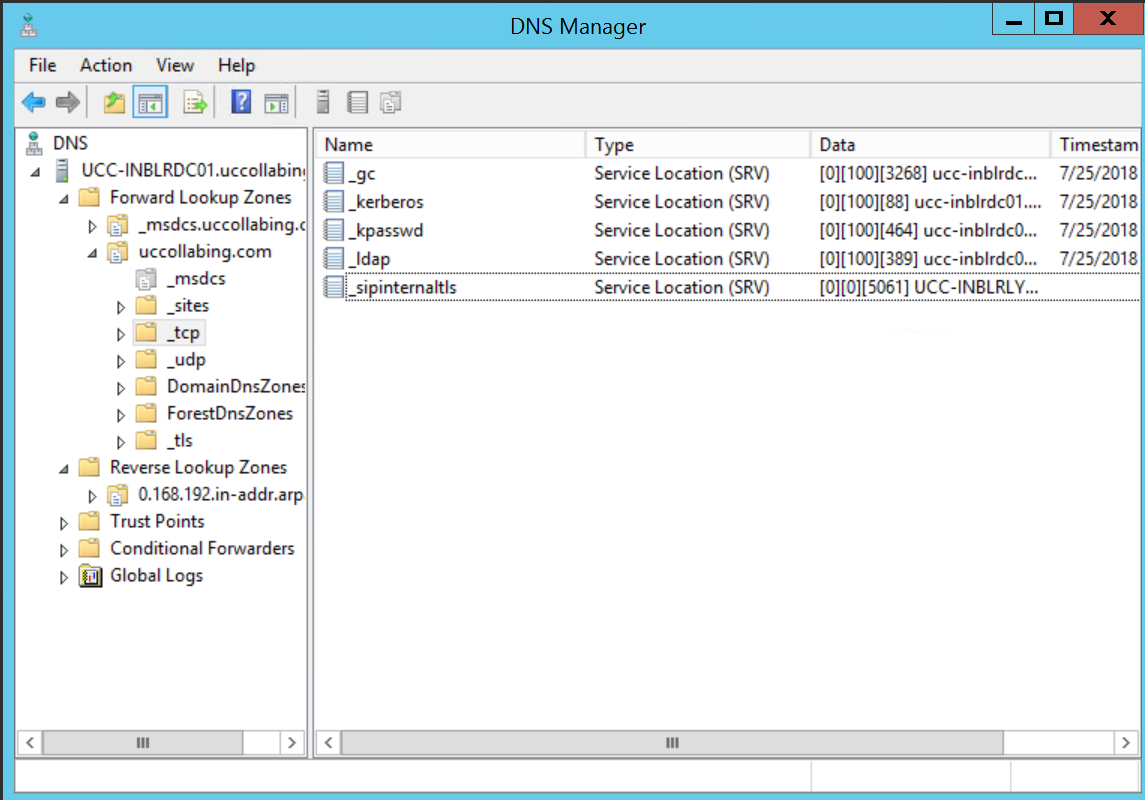
Record Type Service Protocol Port Number Host offering this service SRV _sipinternaltls _tcp 5061 Lync front end Server/Front End Pool Finally after creating the above SRV type records, the configuration will look like this:
That’s all, DNS configuration is completed.
Note: The above DNS configuration is provisioned and will provide features/access like dialin, meet, login etc only within the internal network.
To access the features like dialin, meet etc from outside the network/organization, relevant DNS entries should be created in External DNS Server and Edge Server should also be configured.
Hope this helps!
Go back to – Step by Step Lync Server 2013 Installation & Configuration

I am working in an IT company and having 10+ years of experience into Cisco IP Telephony and Contact Center. I have worked on products like CUCM, CUC, UCCX, CME/CUE, IM&P, Voice Gateways, VG224, Gatekeepers, Attendant Console, Expressway, Mediasense, Asterisk, Microsoft Teams, Zoom etc. I am not an expert but i keep exploring whenever and wherever i can and share whatever i know. You can visit my LinkedIn profile by clicking on the icon below.
“Everyone you will ever meet knows something you don’t.” ― Bill Nye

Pingback: Installing Lync 2013 in Lab – Prepare Active Directory Wizard
Pingback: Step by Step Lync Server 2013 Installation & Configuration