Installing Lync 2013 in Lab – Proceeding with Install or Update Lync Server System
In our last post, we learned “How to build a topology and publish it”. In this article we will learn how to install or update Lync Server System?
This is the last step to complete Lync Server 2013 installation and post this we can start logging in the users.
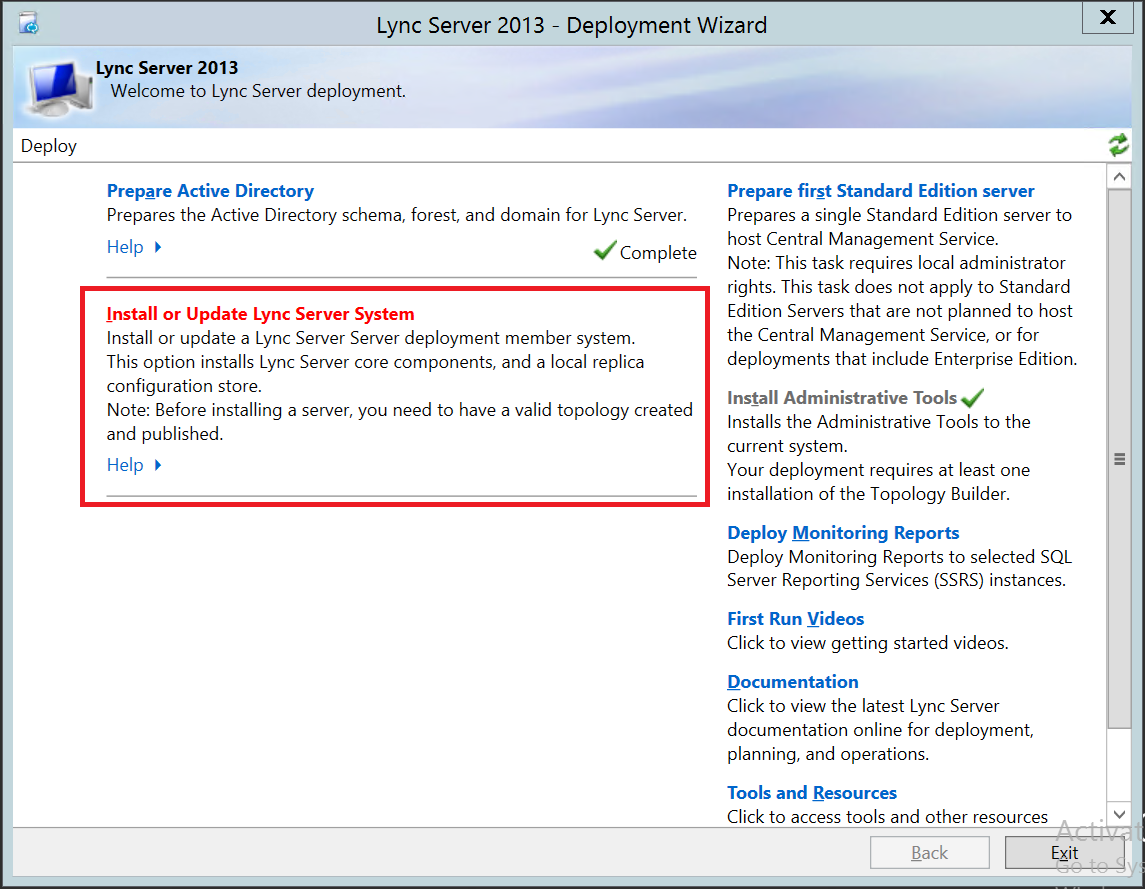
Install or Update Lync Server System:
- Login to Lync Server 2013 Server.
- Click on Install or Update Lync Server System
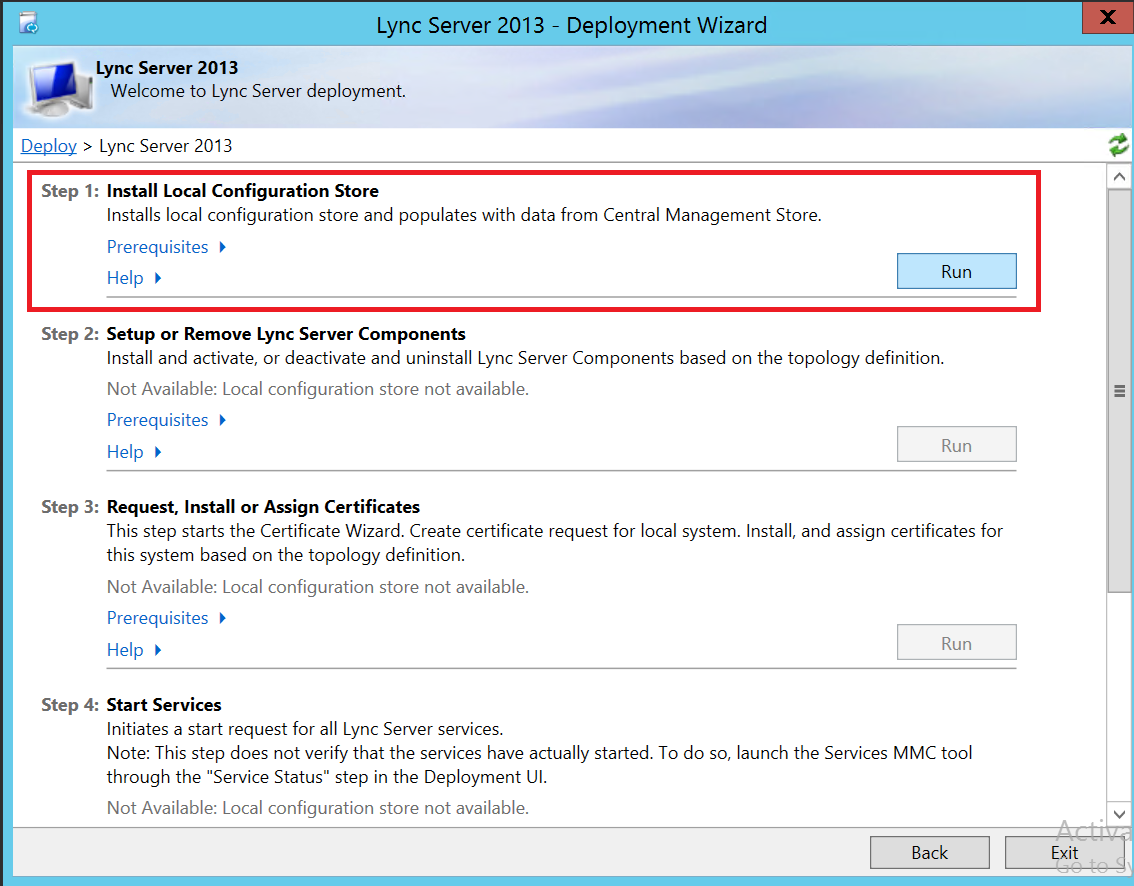
Install Local Configuration Store: - Lync Server 2013 – Deploy – Install Local Configuration Store – Click on Run
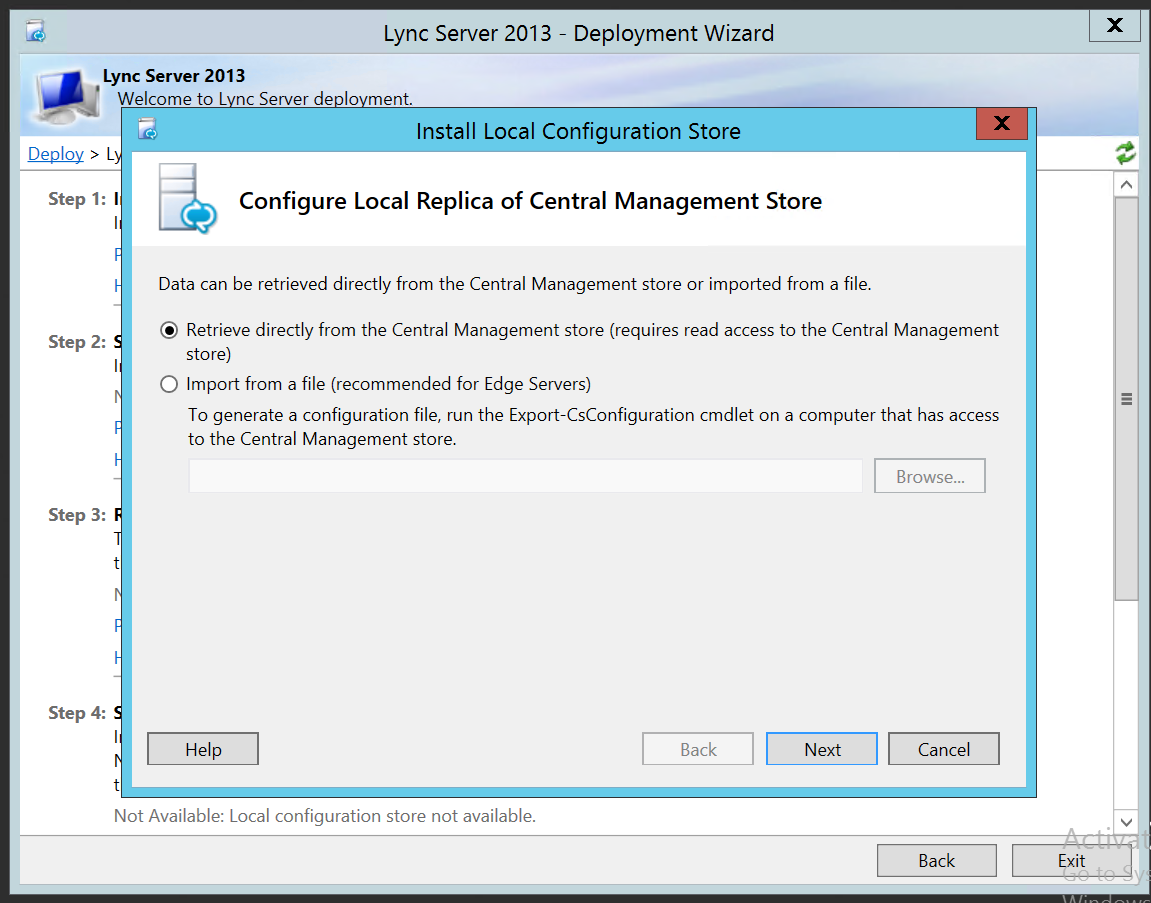
- Lync Server 2013 – Deploy – Install Local Configuration Store – Radio check “Retrieve directly from the Central Management Store (requires read access to the Central Management store)” and click on Next
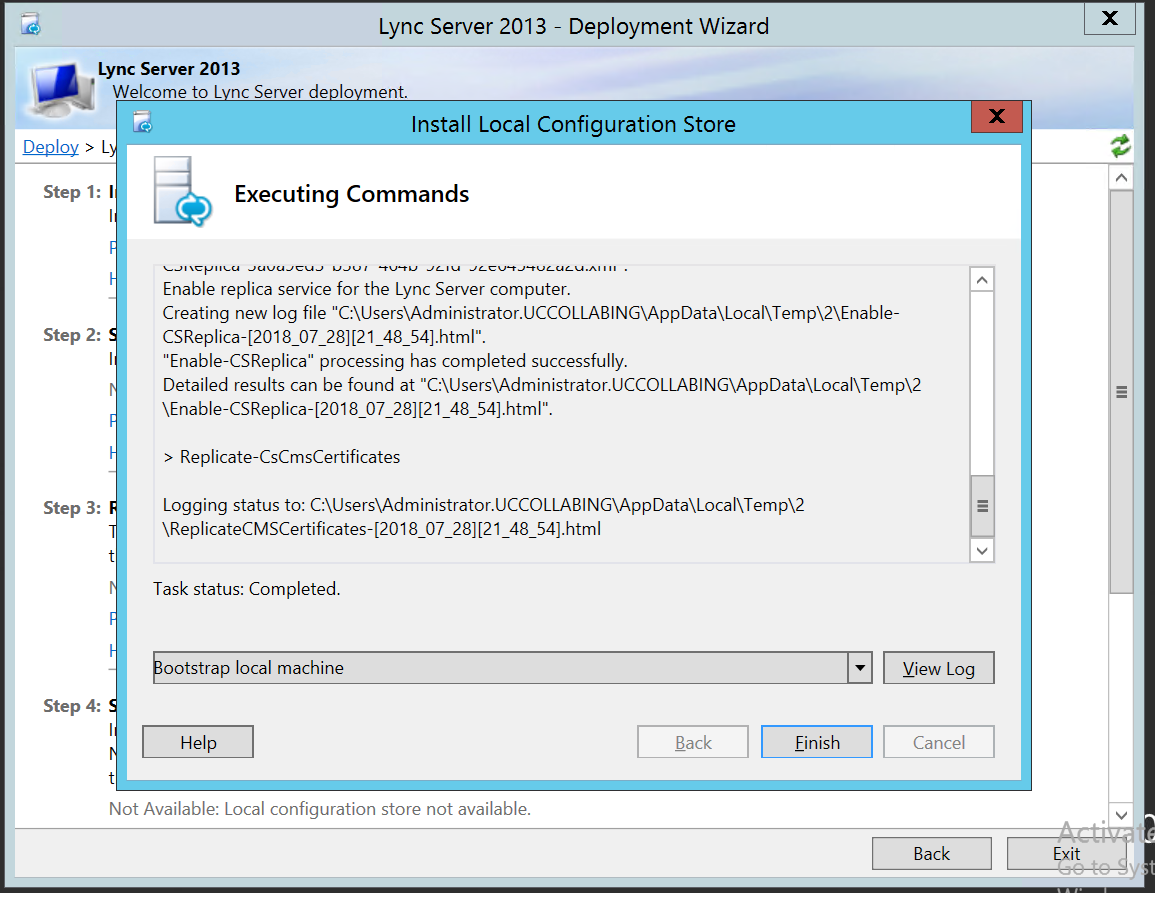
- Lync Server 2013 – Deploy – Install Local Configuration Store – Once the commands are completed executing, click on Finish
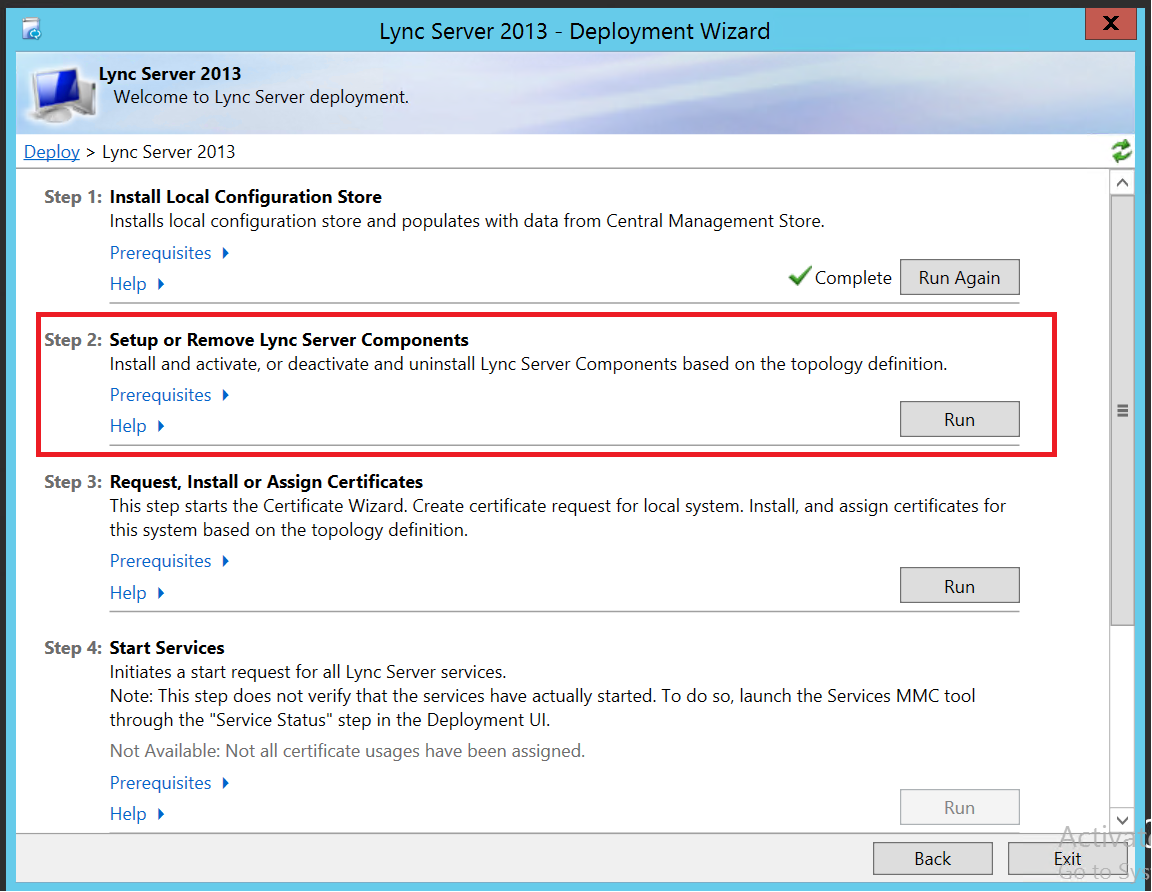
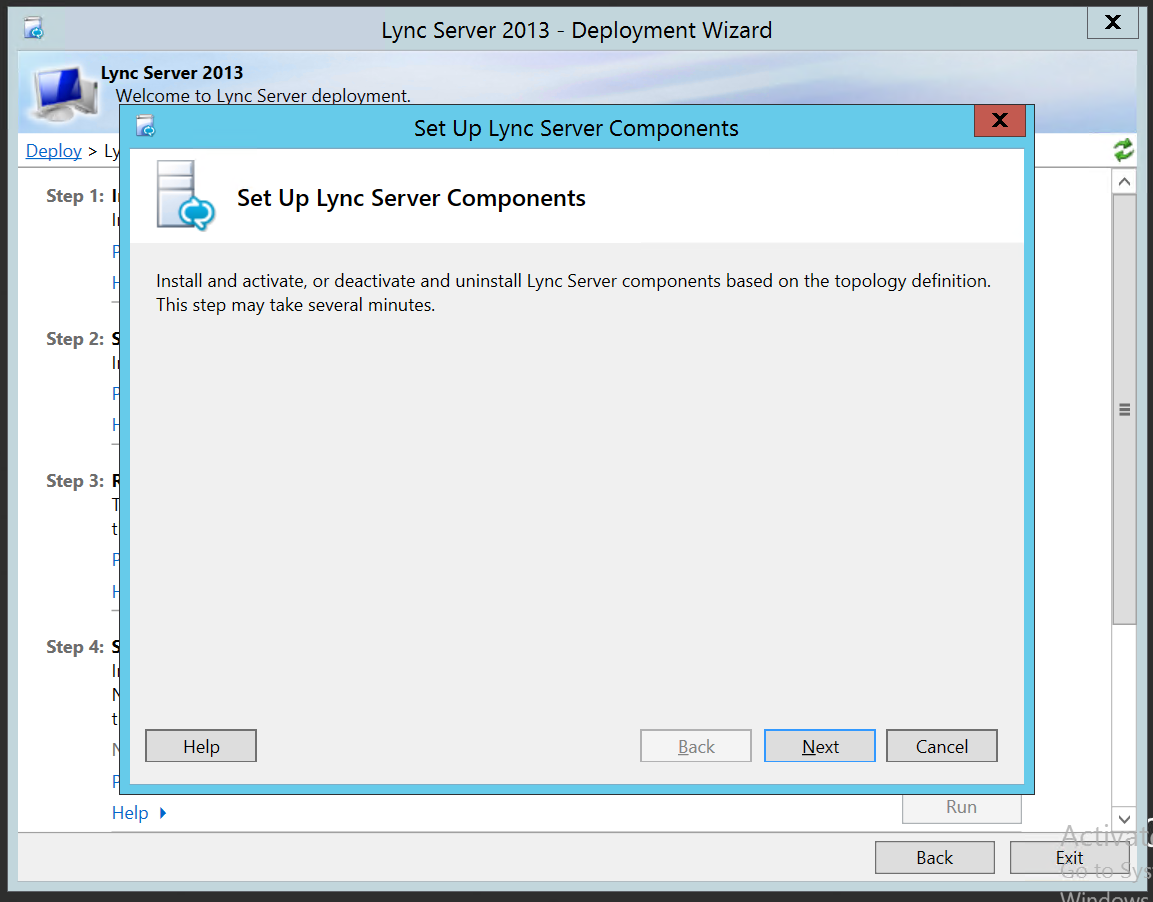
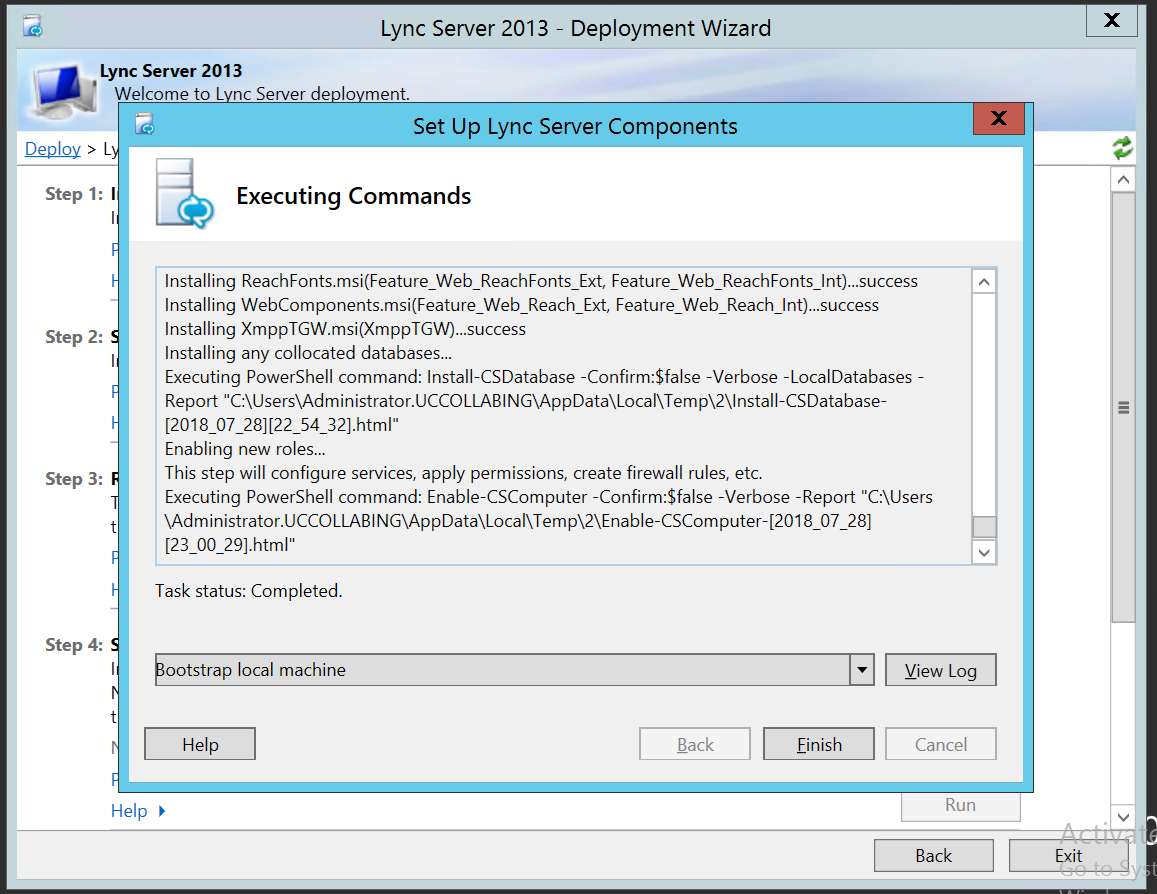
Setup or Remove Lync Server Components:
- Lync Server 2013 – Deploy – Setup or Remove Lync Server Components – Click on Run
- Lync Server 2013 – Deploy – Setup Lync Server Components – Click on Next
- Lync Server 2013 – Deploy – Set Up Lync Server Components – Once the commands are completed executing, click on Finish
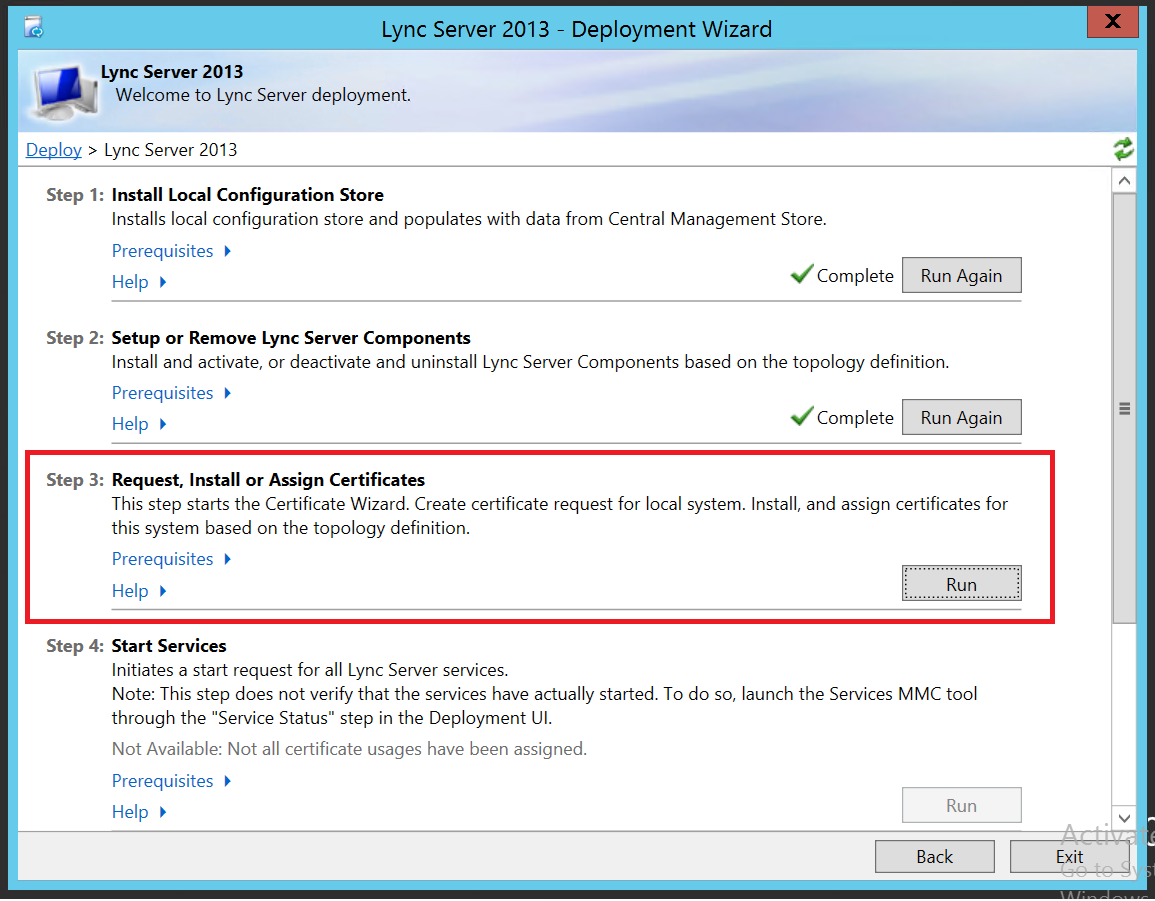
Request Install or Assign Certificates:
- Lync Server 2013 – Deploy – Request, Install or Assign Certificates – Click on Run
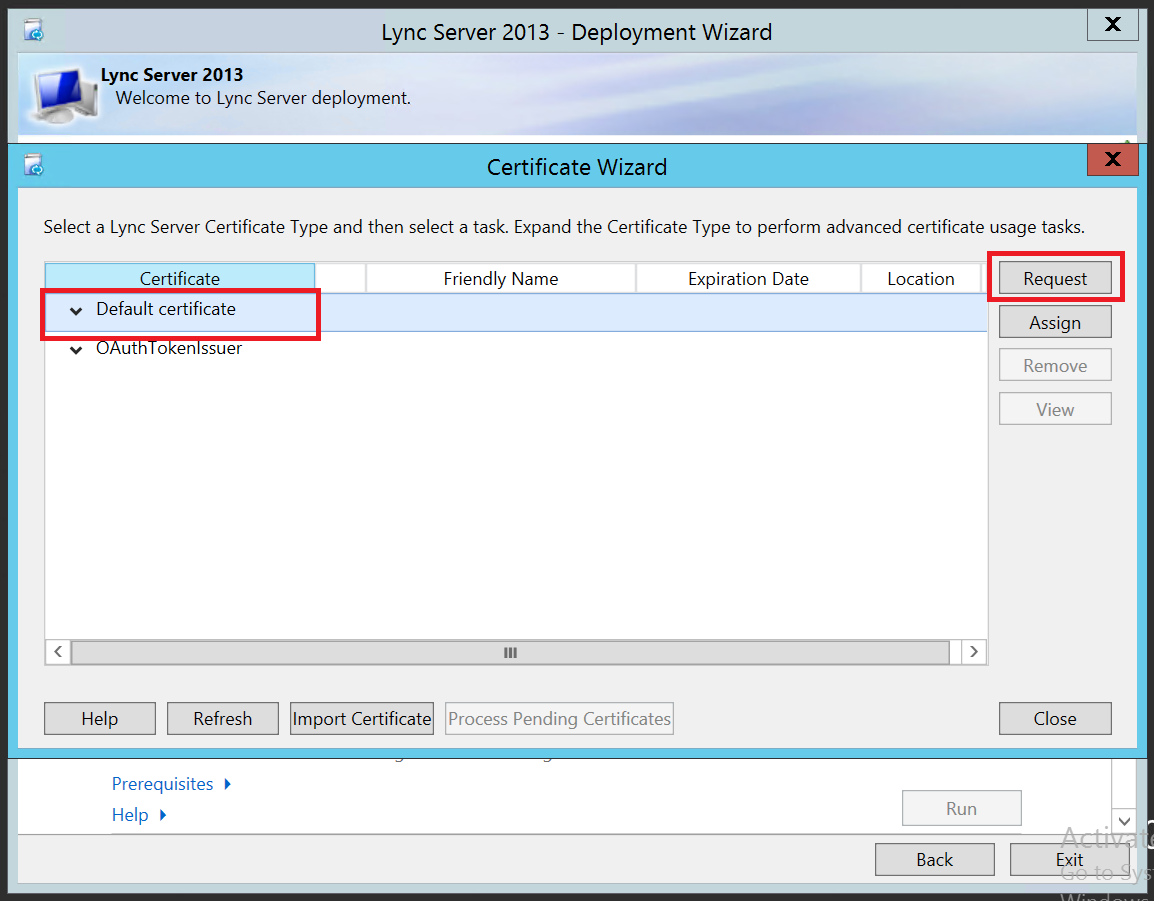
- Lync Server 2013 – Deploy – Certificate Wizard – Select Default Certificate and Click on Request
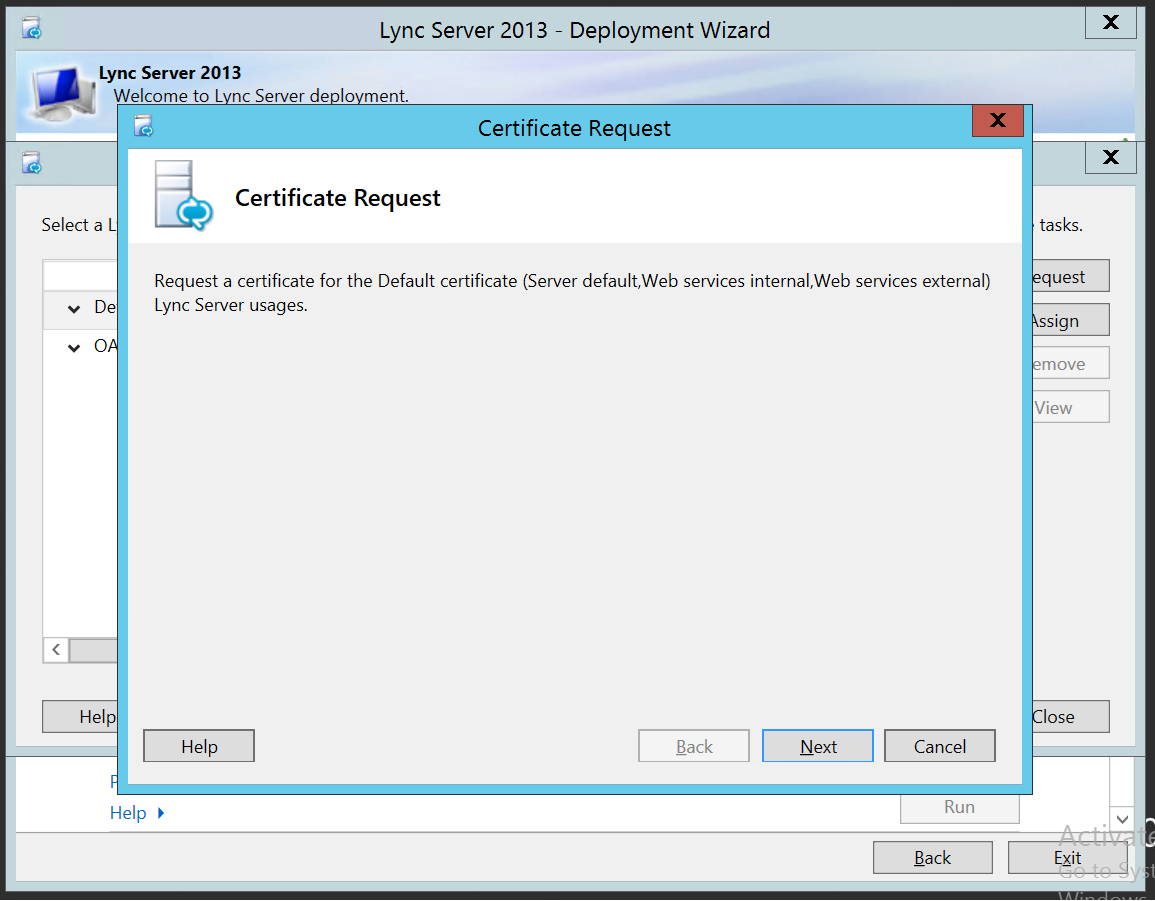
- Lync Server 2013 – Deploy – Certificate Request – Click on Next
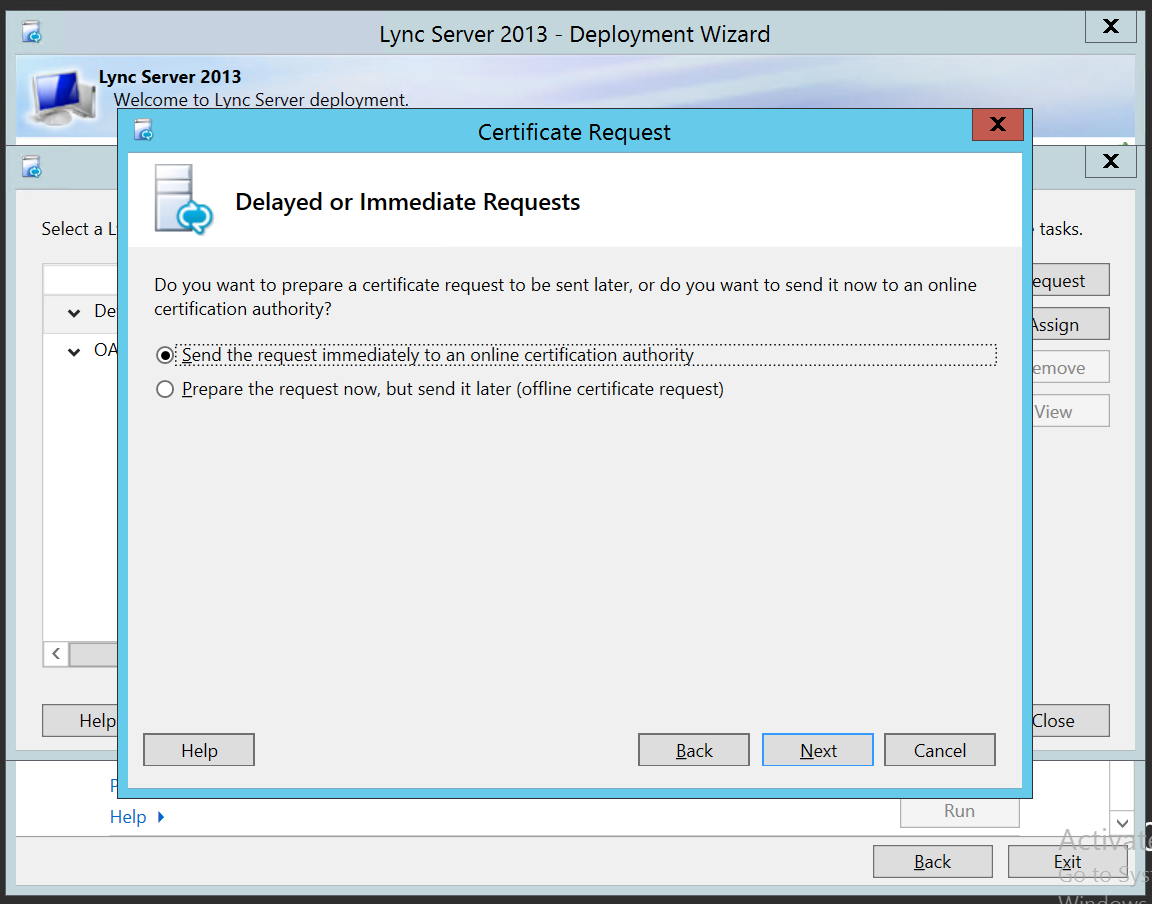
- Lync Server 2013 – Deploy – Delayed or Immediate Request – Radio Check Send the request immediately to an Online Certificate Authority and Click on Next
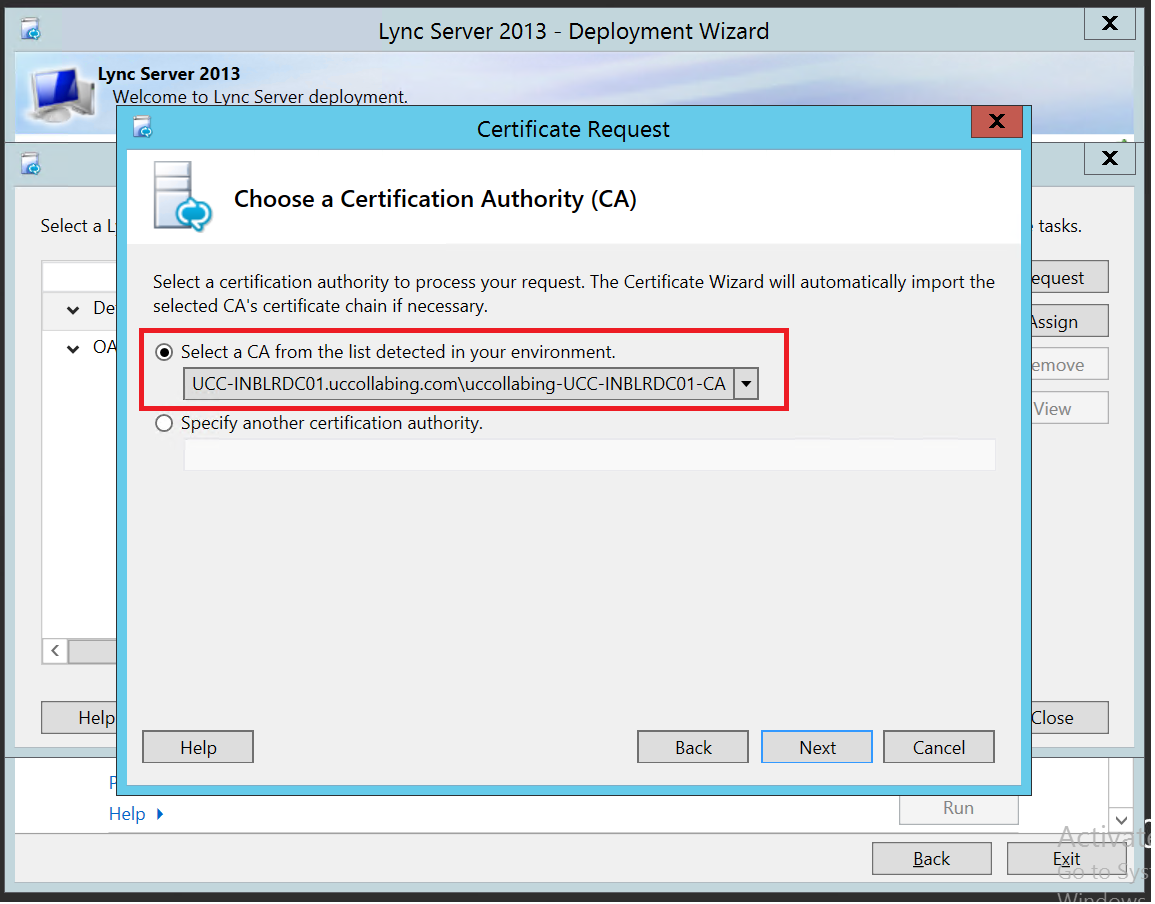
- Lync Server 2013 – Deploy – Choose a Certificate Authority (CA) – Radio Check Select a CA from the list detected in your environment and Select the CA/DC server that you have installed in your lab setup. Click on Next
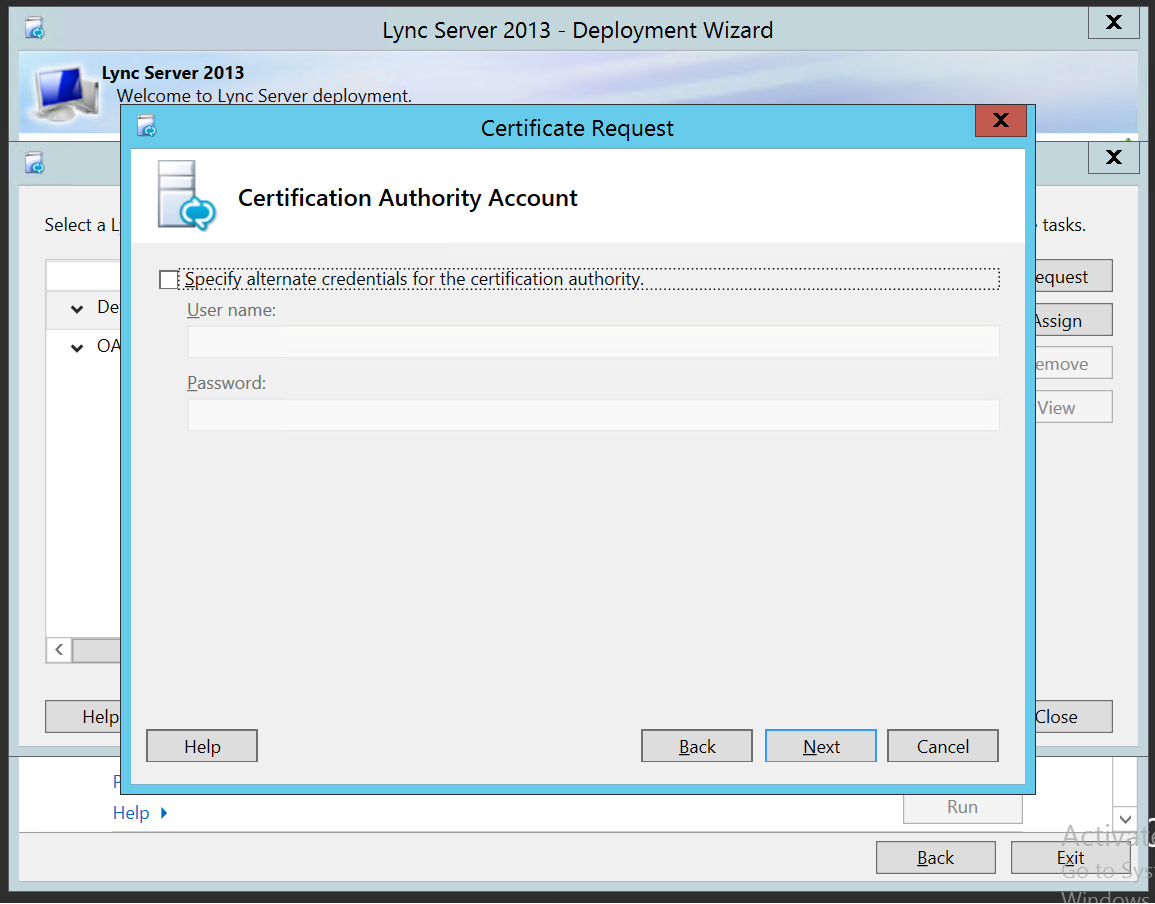
- Lync Server 2013 – Deploy – Certificate Authority Account – If you are using a different credentials for the certificate authority, then specify the username and password and click on Next, else just click on Next
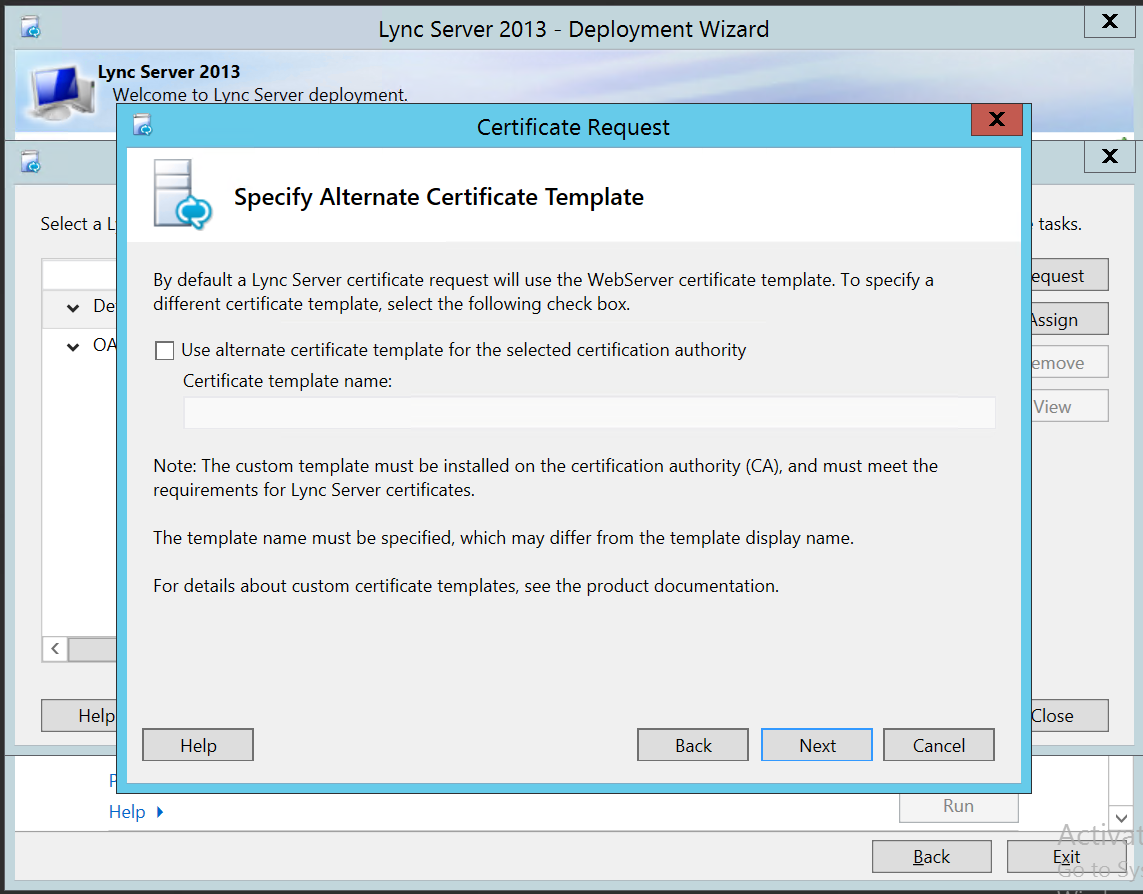
- Lync Server 2013 – Deploy – Specify Alternate Certificate Template – If want to use a specific Template other than the default, specify the template name and click on next, else just click on Next without specifying any template name.
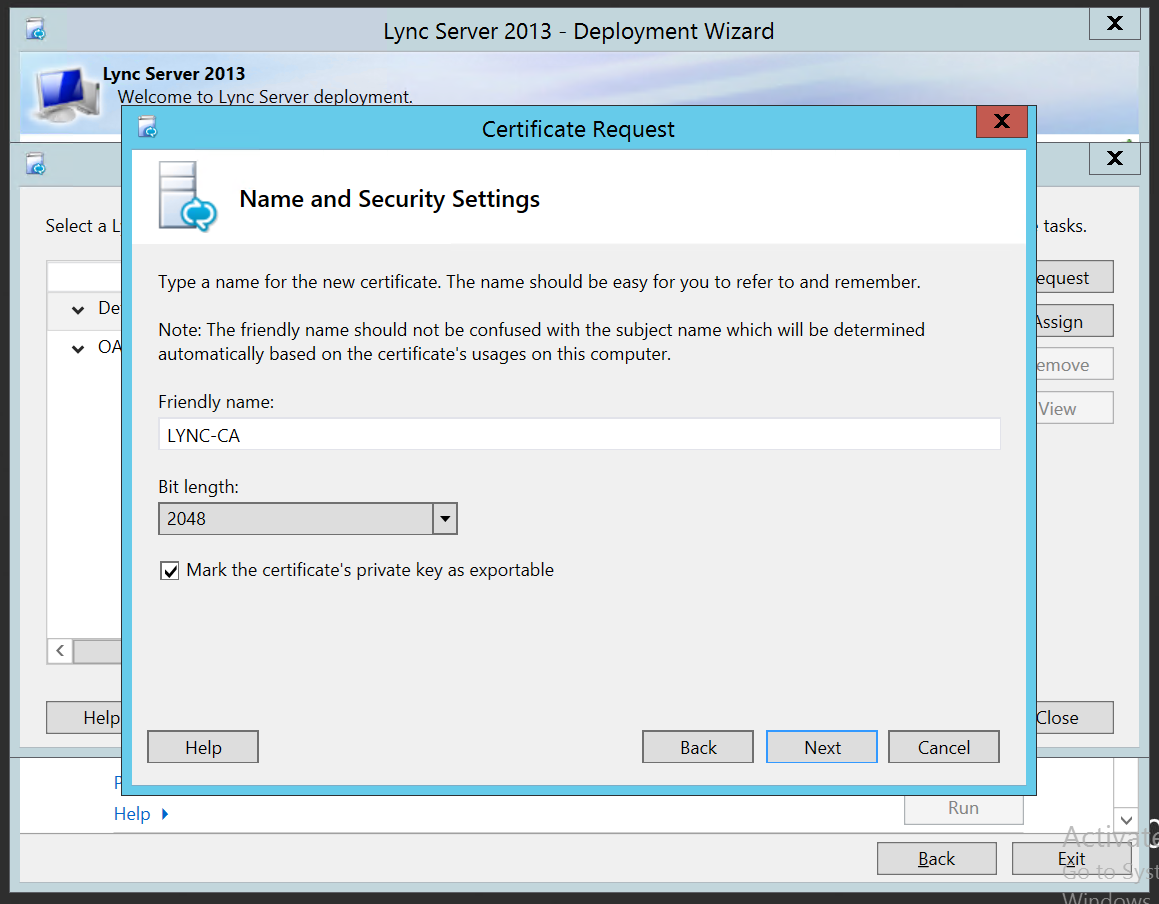
- Lync Server 2013 – Deploy – Name and Security Settings – Enter any friendly name of the New Certificate and Check Mark “Mark the certificate’s private key as exportable” and click on Next
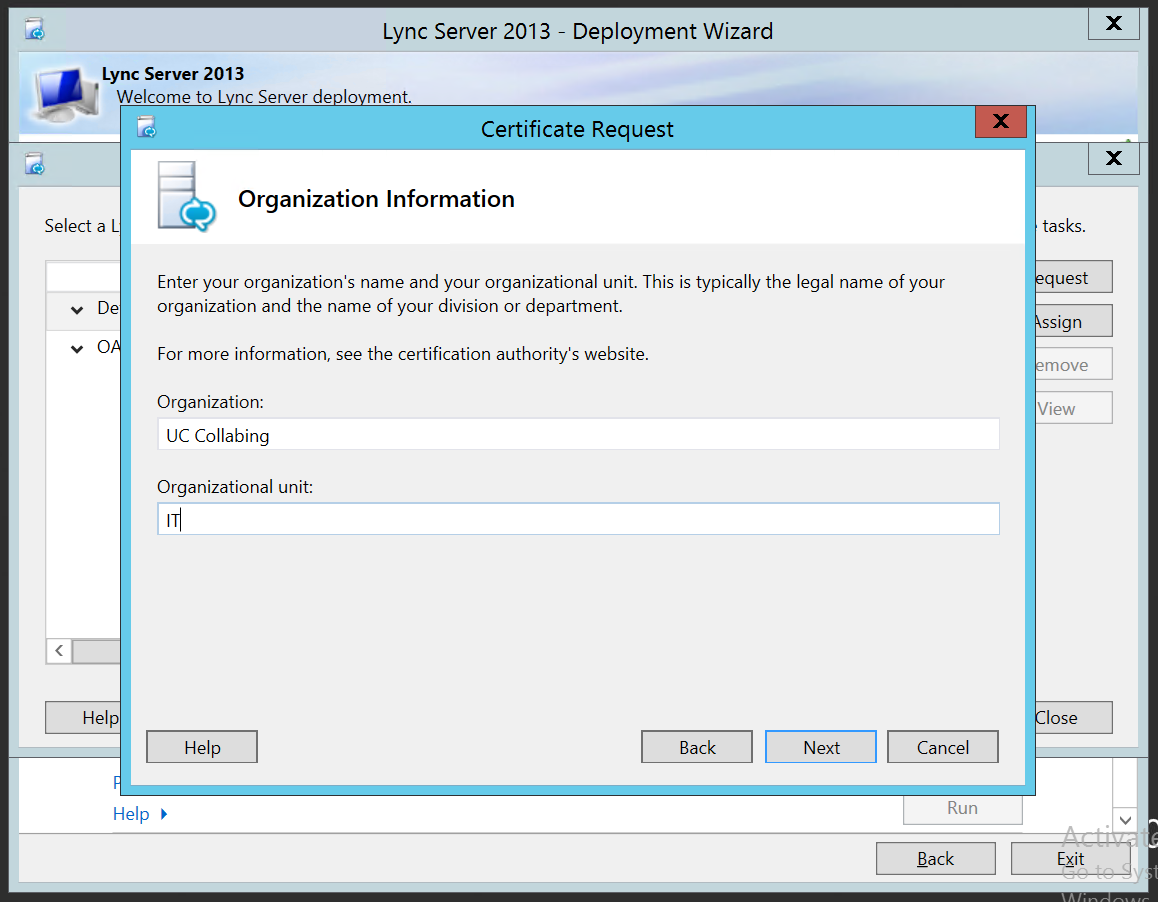
- Lync Server 2013 – Deploy – Organizational Information – Enter Organization and Organization Unit and Click on Next
- Lync Server 2013 – Deploy – Geographical Information – Enter County, State/Province and City/Locality information and click on Next
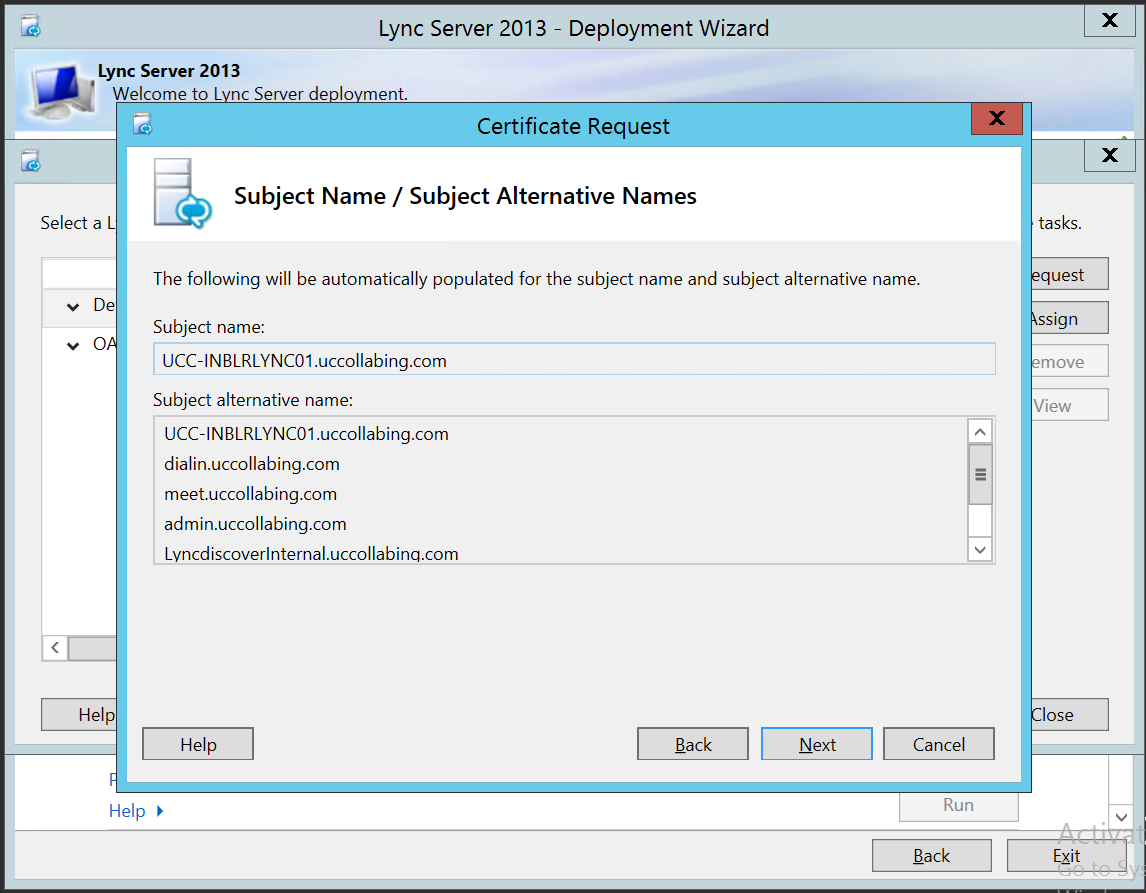
- Lync Server 2013 – Deploy – Subject Name/ Subject Alternative Names – Click on Next
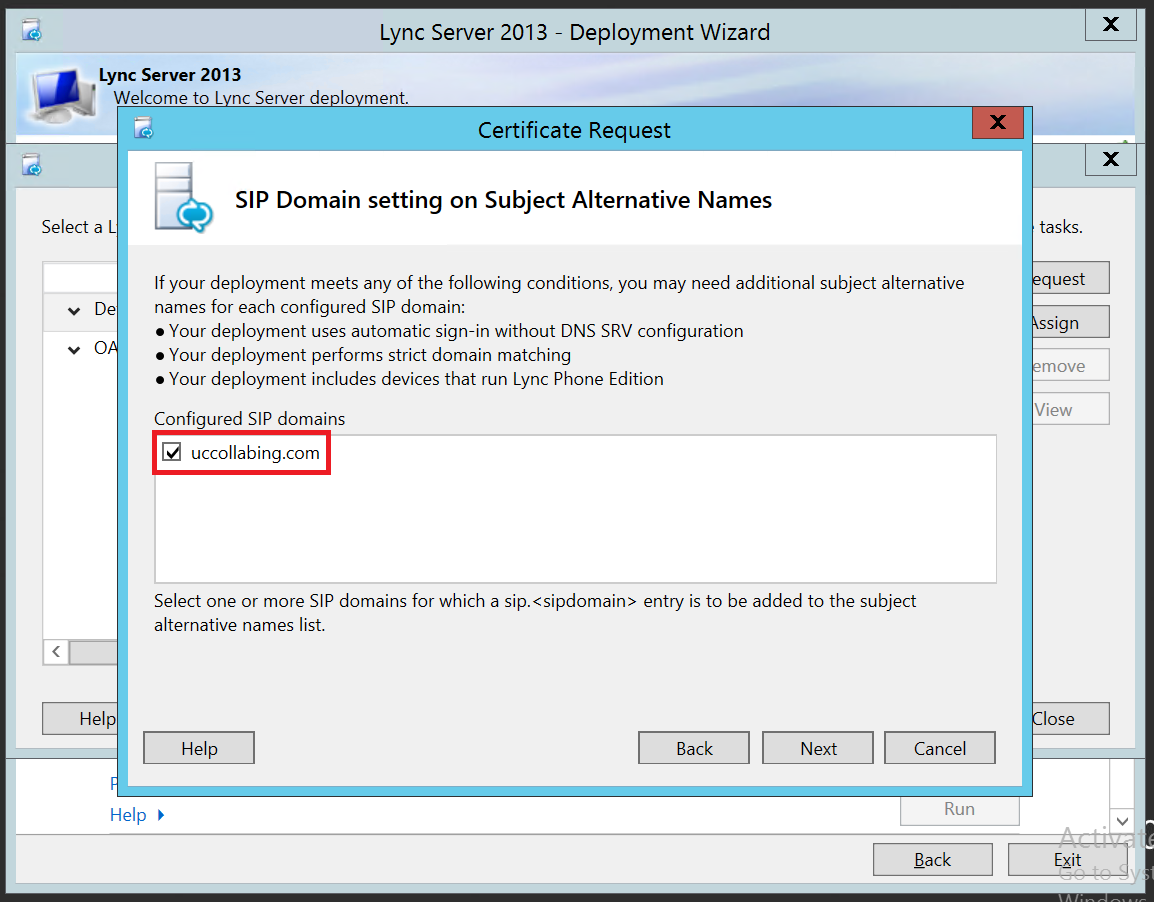
- Lync Server 2013 – Deploy – SIP Domain setting on Subject Alternative Names – Check Mark “domain.com” under Configured SIP domains. In our case it will be “uccollabing.com” and click on Next
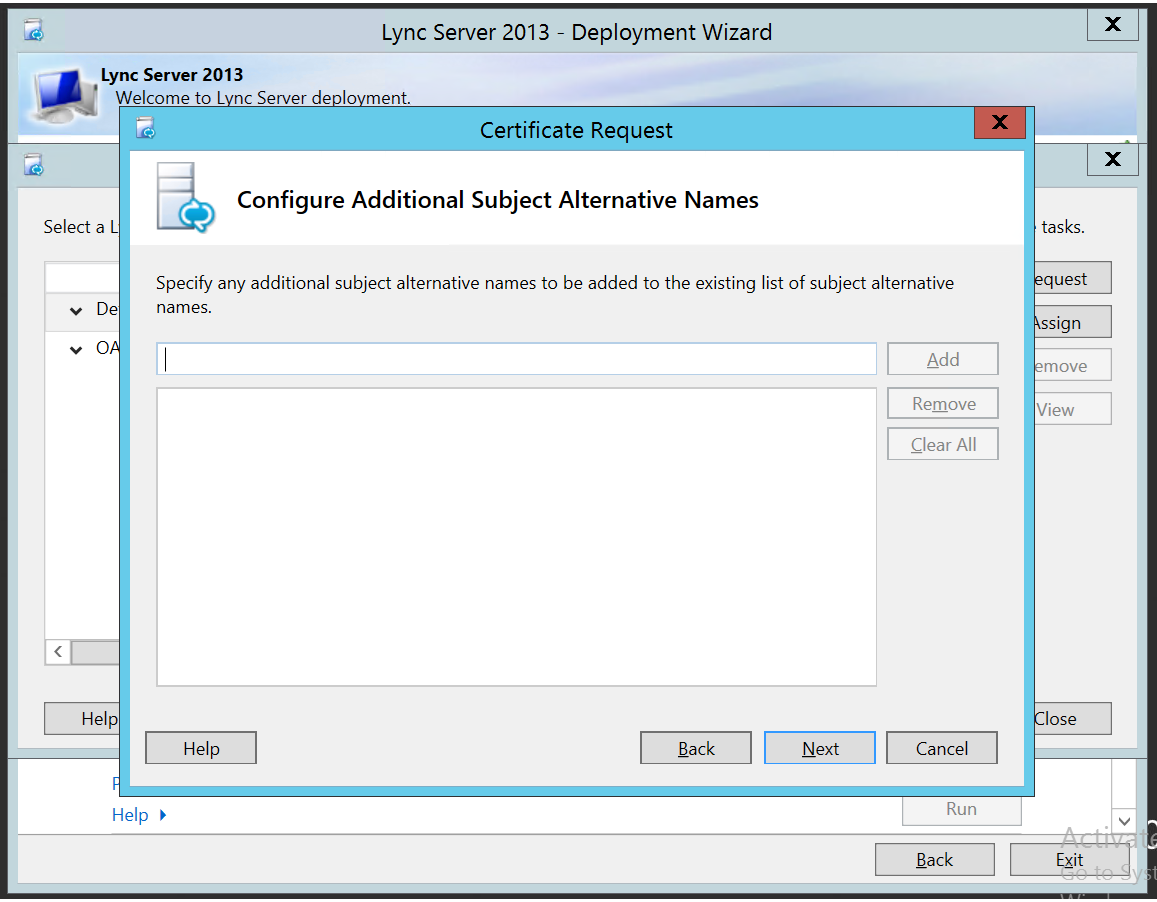
- Lync Server 2013 – Deploy – Configure Additional Subject Alternative Names – If you have any Subject Alternative Names (SAN) for your certificate then enter SAN. Else Click on Next
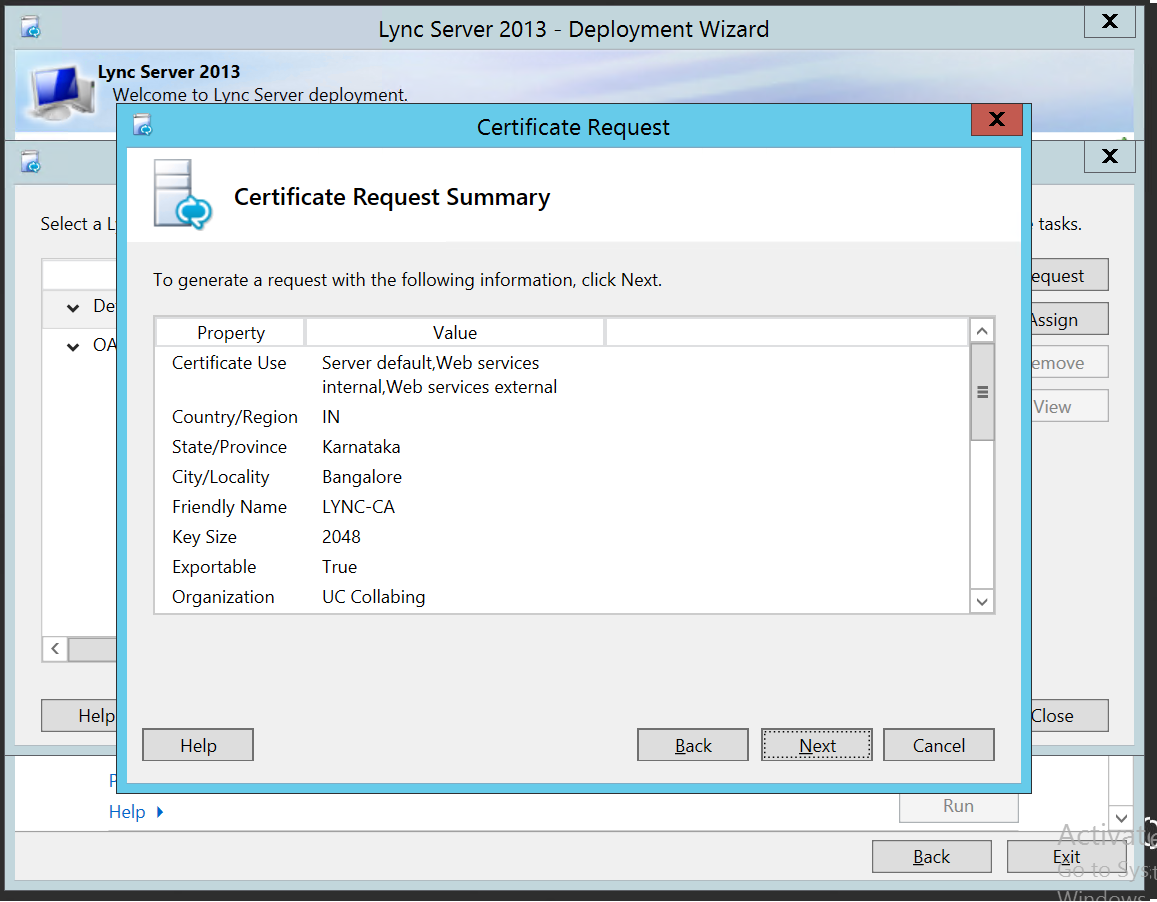
- Lync Server 2013 – Deploy – Certificate Request Summary – Click on Next
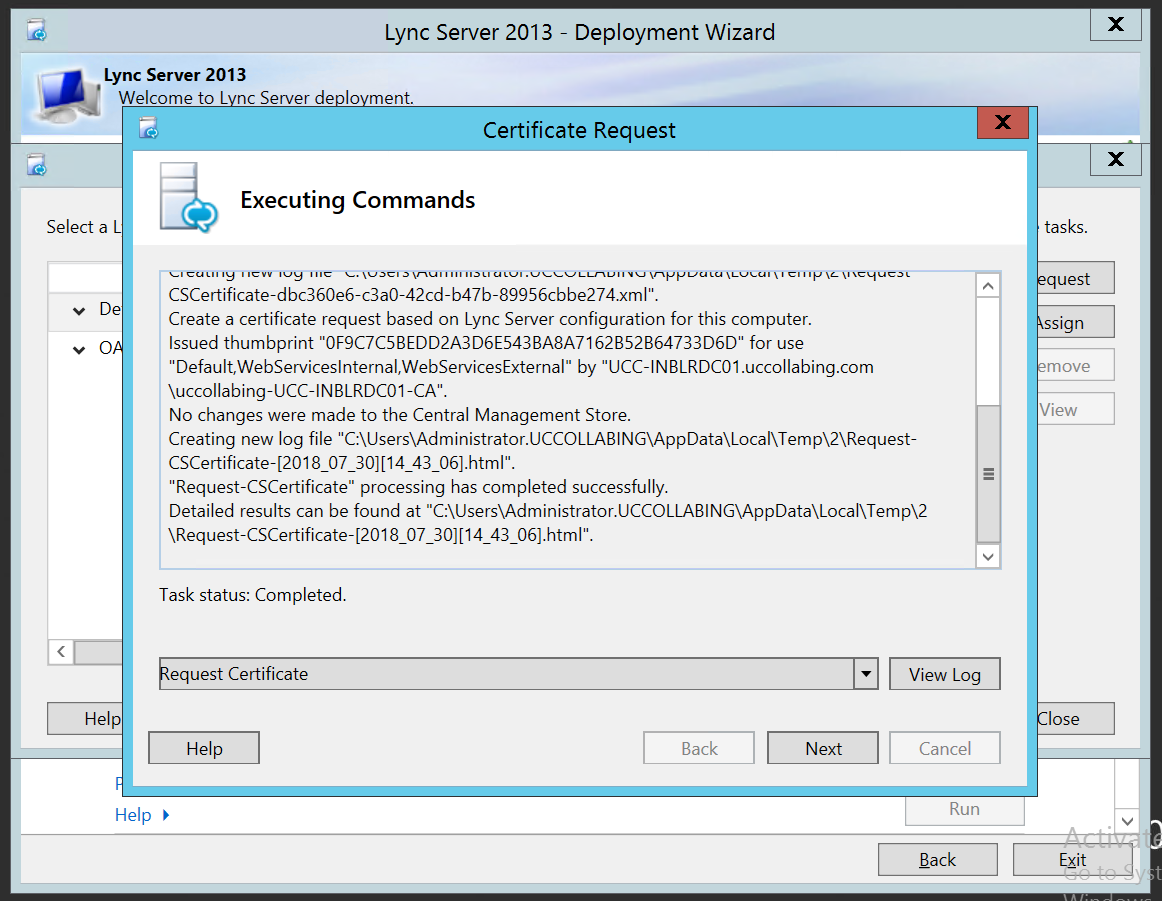
- Lync Server 2013 – Deploy – Once the commands are completed executing, click on Finish
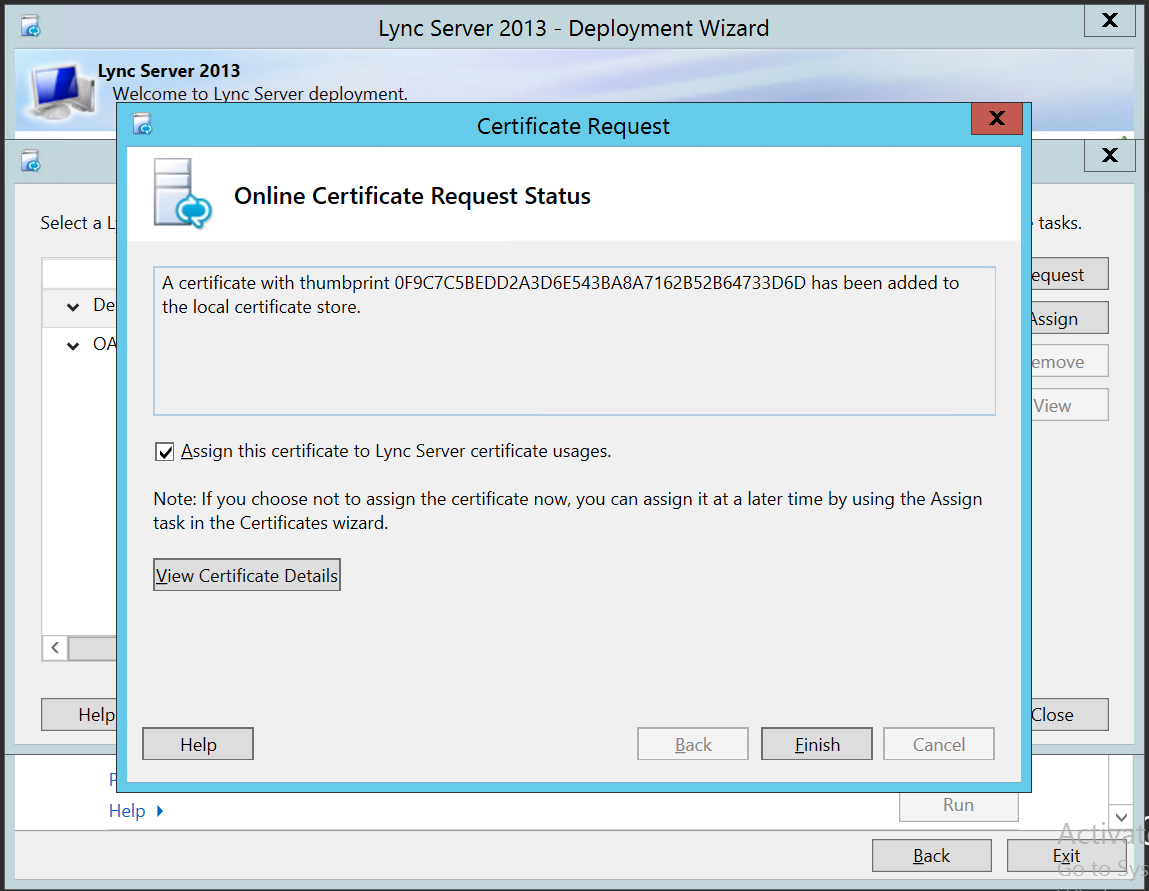
- Lync Server 2013 – Deploy – Certificate Request – Ensure “Assign this certificate to Lync Server certificate usages” is checked – Click on Finish
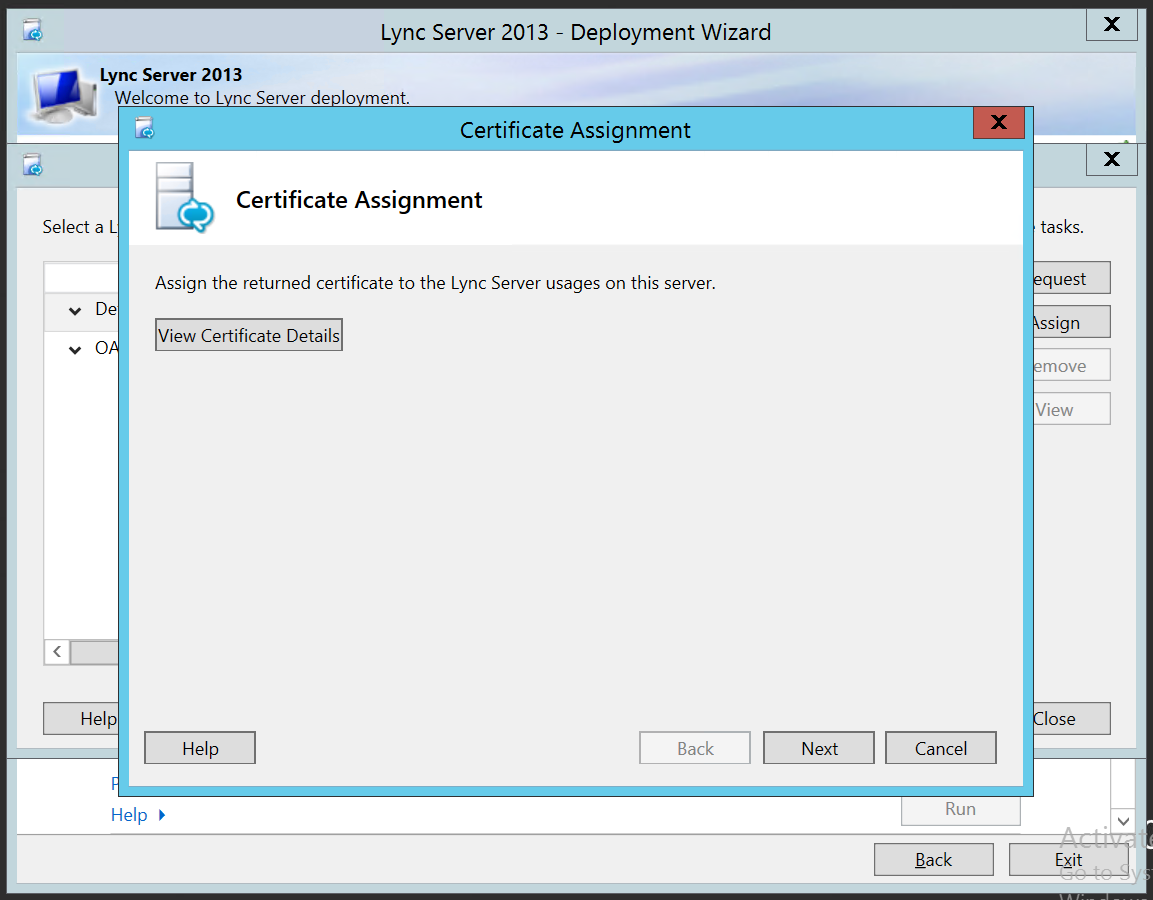
- Lync Server 2013 – Deploy – Certificate Assignment – Click on Next
- Lync Server 2013 – Deploy – Certificate Assignment Summary – Click on Next

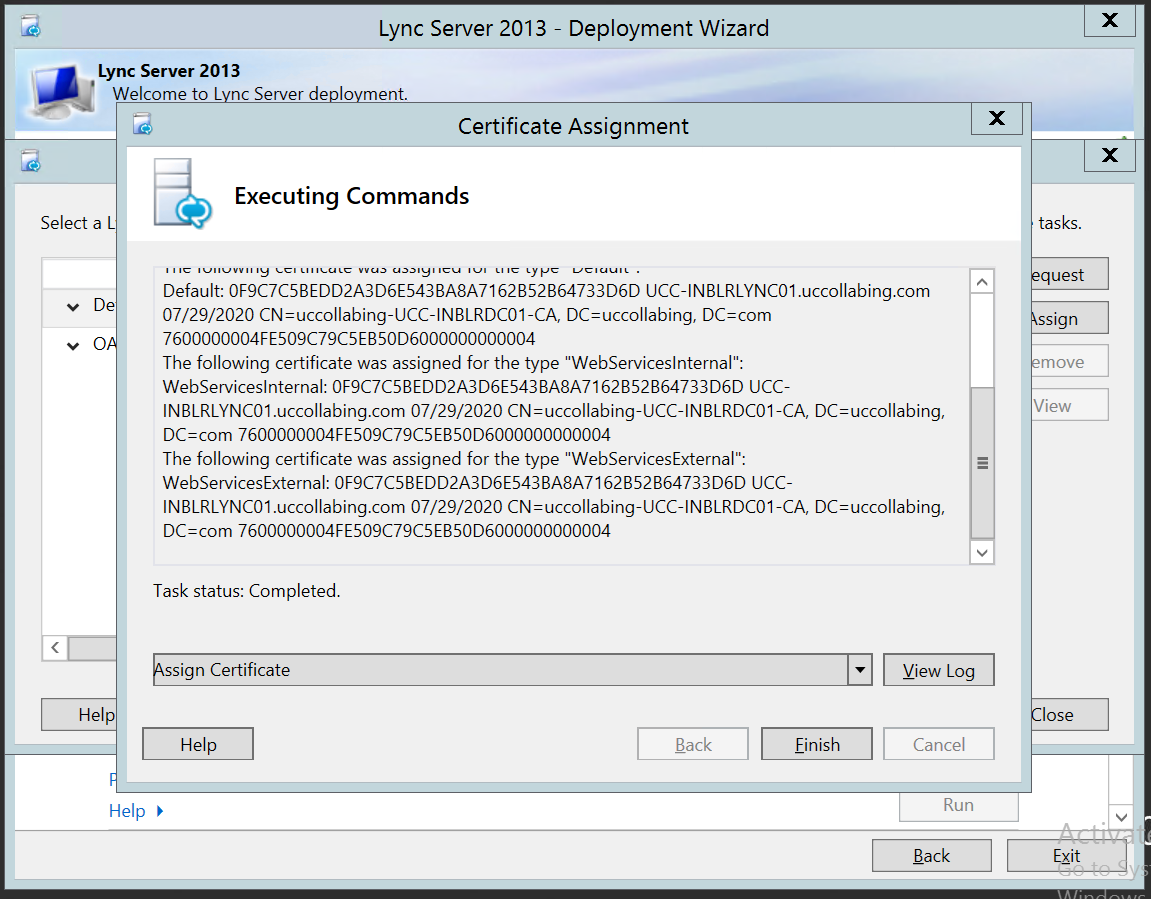
- Lync Server 2013 – Deploy – Certificate Assignment – Once the commands are completed executing, click on Finish
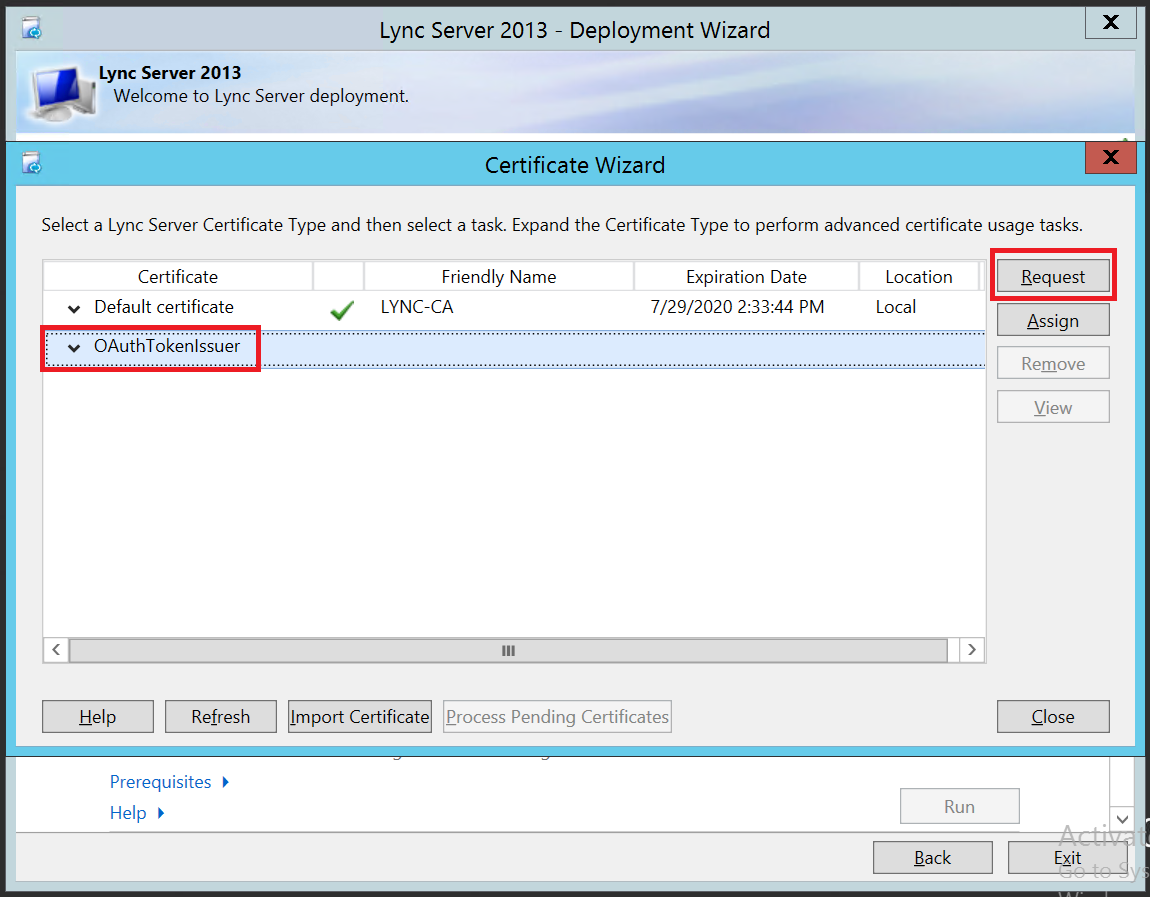
- Lync Server 2013 – Deploy – Select OAuthTokenIssuer and click on Request.
Follow the steps from Step 11 till Step 27 and finally the status should be green tick for both Default and OAuthTokenIssuer Certificates.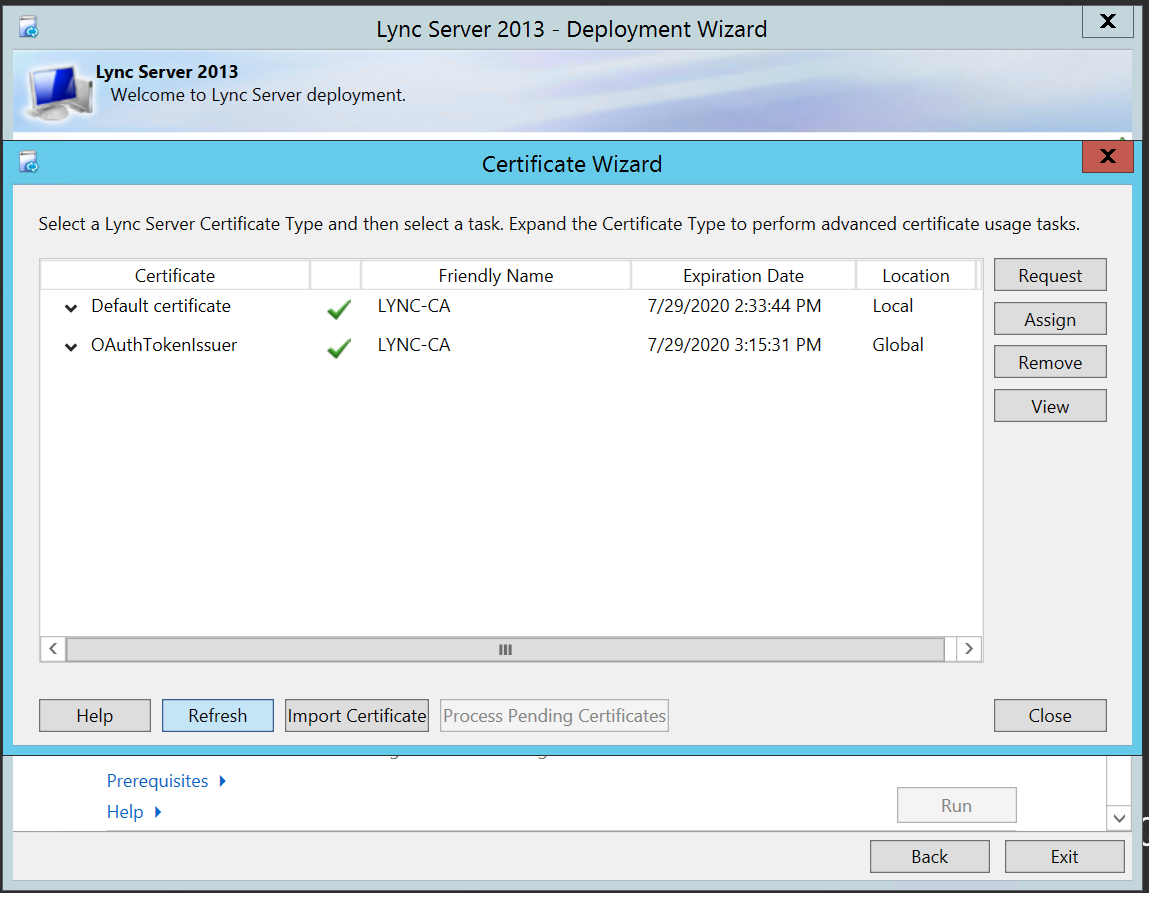
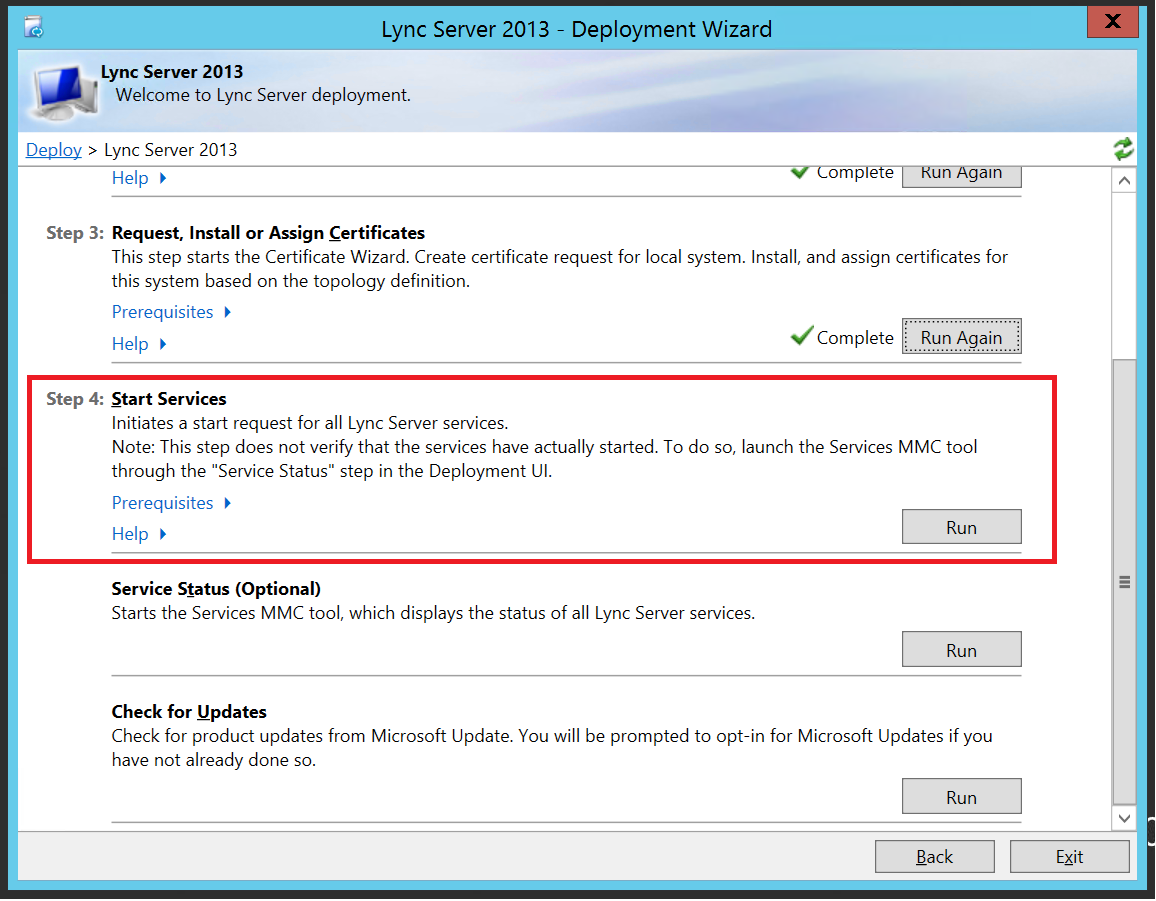
Starting Lync 2013 Services:
- Lync Server 2013 – Deploy – Start Services – Click on Run
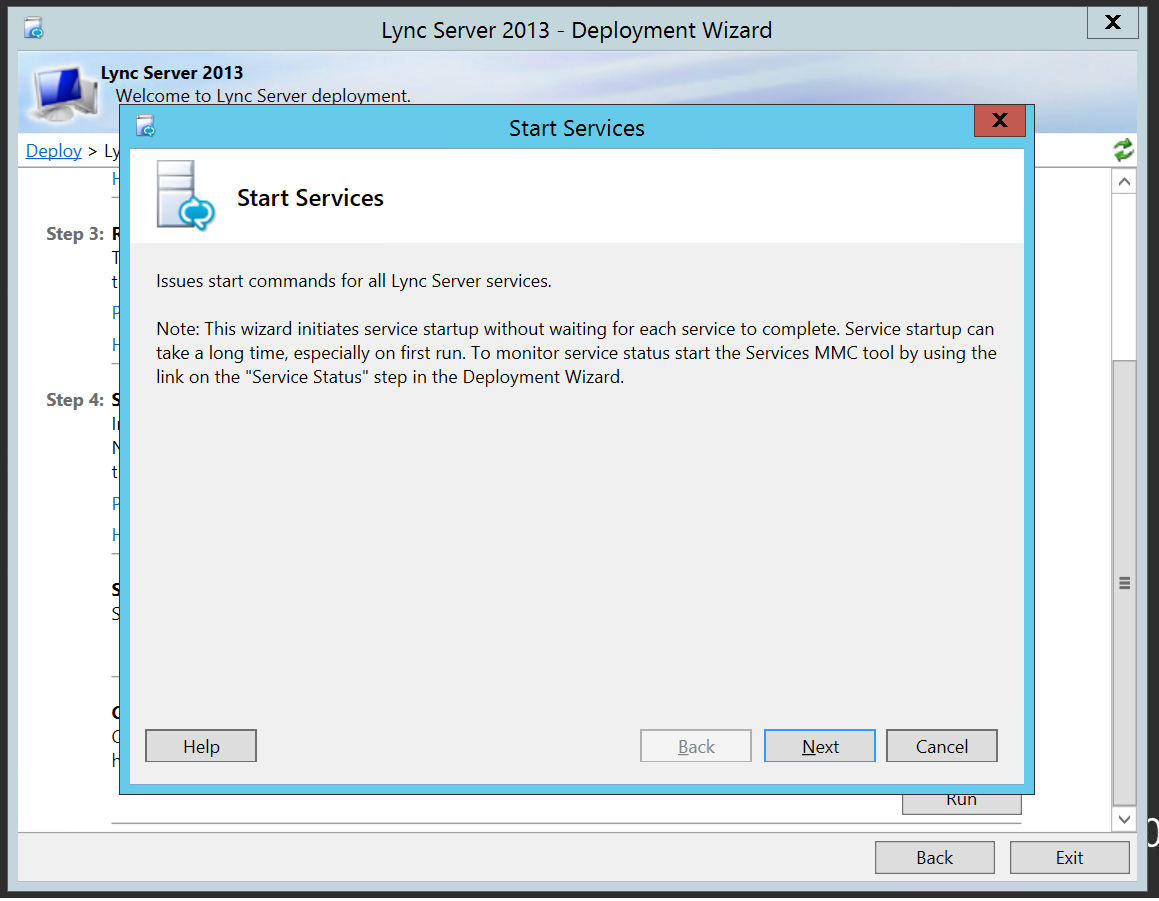
- Lync Server 2013 – Deploy – Start Services – Click on Next
- Lync Server 2013 – Deploy – Start Services – Once the commands are completed executing, click on Finish
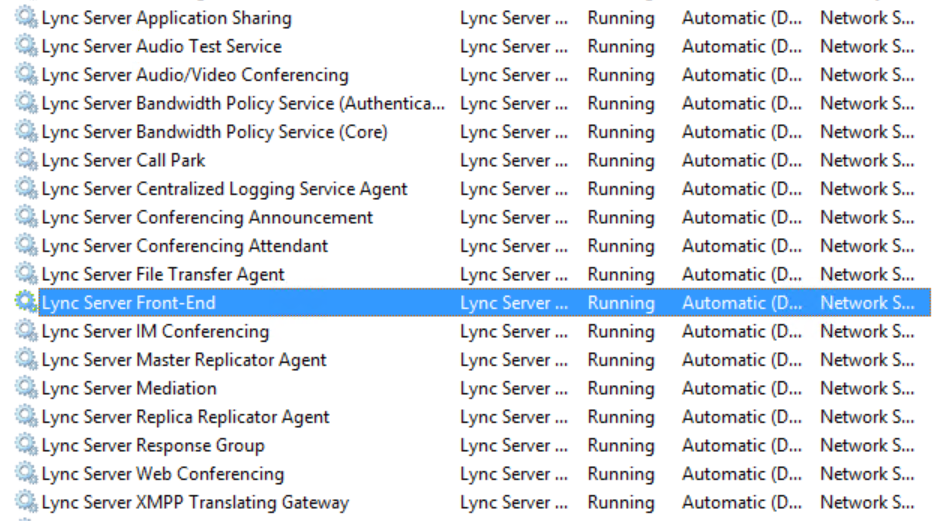
- Go to Run > Type “services.msc” without quotes
- Ensure that all Lync Server Services has started
That’s all ! In the next article we will create two users and will try to login them into Lync Client and make some tests.
Hope this helps!
Go back to – Step by Step Lync Server 2013 Installation & Configuration
