Intercom is a type of line which combines both speed dial and a phone line functionality respectively. It allows the callee to place the call on a predefined destination. The called destination auto answers the phone with mute activated in speaker phone mode, regardless of called party is busy.
We can use an intercom line to dial any other intercom line in the intercom partition, or we can preconfigure the line to target an intercom line outside the intercom partition.
A beep is heard when the call is auto answered to alert the recipient to the incoming call. We can also open a two-way voice path, if the recipient deactivates the mute function by pressing the mute button.
It is useful in order to deliver short messages or from receptionist to the manager or vice versa.
So, let’s get started folks.
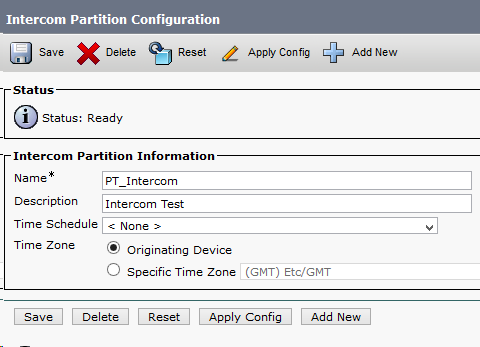
- Create an intercom partition: Call routing–> Intercom–>Intercom Partition.
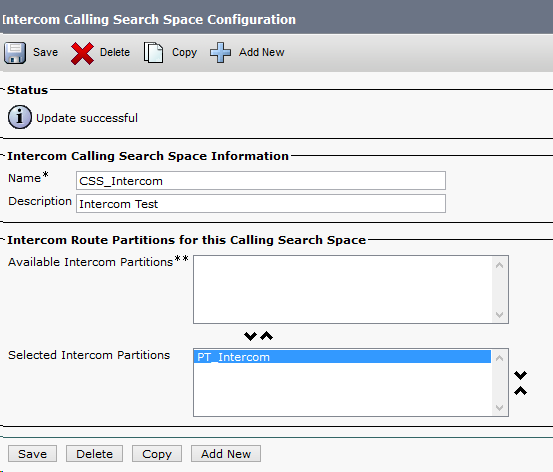
- Create an intercom CSS, which contains the partition which you’ve created (PT_Intercom).
- Call routing–> Intercom–> Intercom CSS
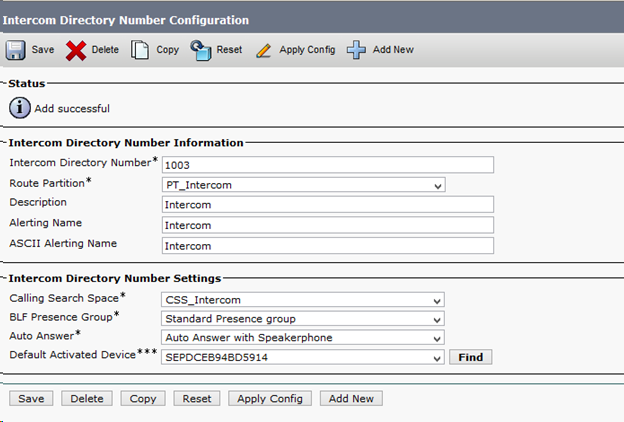
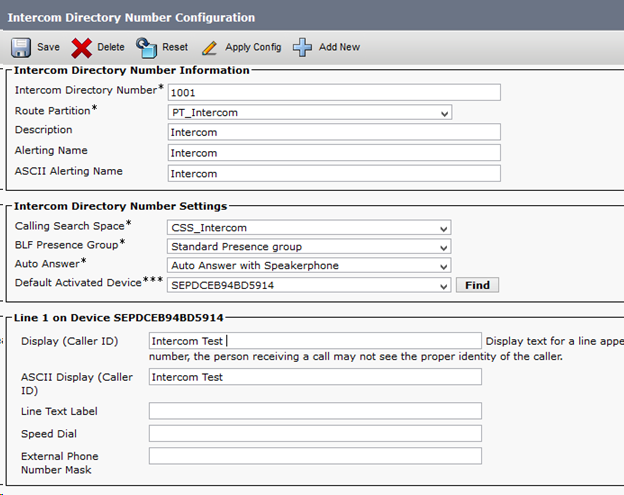
- Create Intercom directory umber, and here’s the case create two directory numbers which would be communicating with each other.
Call Routing–>Intercom–> Intercom Directory Number
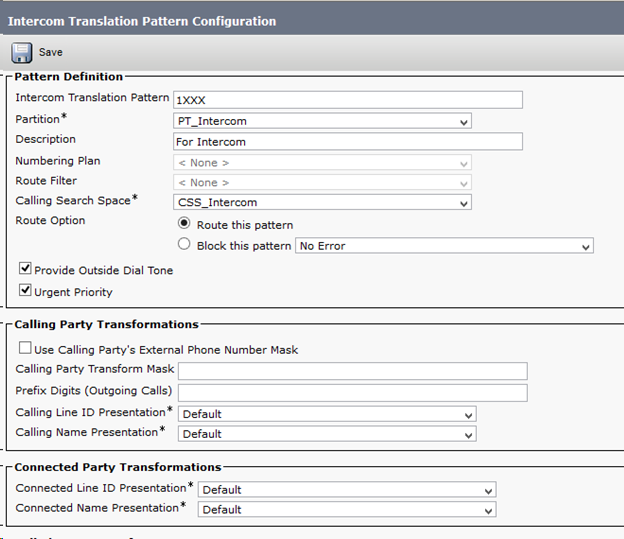
- Now, create translation pattern which would be used when the intercom line A would dial the other intercom number.
Call Routing–>Intercom–>Intercom Translation Pattern
- Now, associate intercom line with the device, i.e add an intercom line to the phone.
Phone–> Intercom directory number (Add)
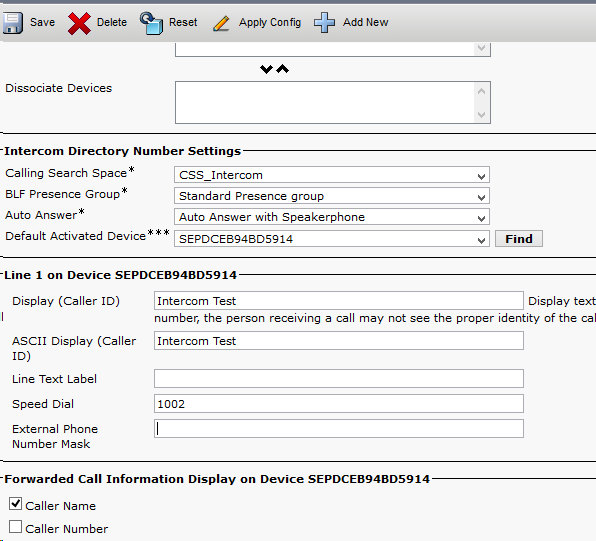
- Most importantly, add the intercom line which you’d want to dial in the speed dial section, when you are configuring the Intercom line on the device.
Tada…. That’s it folks and you are all set now.
I hope this would’ve been informative for you. I’d like to thank you for viewing.

CCNA Routing and Switching
I am a technology enthusiast. I work in network support providing support with implementation, maintaining and precisely troubleshooting the infra. Am having 3.9+ years of experience working with Cisco Collaboration platforms: CUCM, Cisco Unity Connection, IM and Presence, VCS C and E, Expressway C and E, Cisco Meeting Server,Solarwinds, Gateways. Realm of collaboration makes me want to learn and face new challenges more and more. Feel free to reach out to me.
Learn-Create-Share
