In our last post, we understood the functionality of VoIP Detective. In this article, we will focus on how to install and configure VoIP Detective.
How to install VoIP Detective?
To install VoIP Detective, you need to get the license and OVA file from VoIP Detective official website.
Downloading the OVA file
- Navigate to VoIP Detective and create an account by opening the following url.
https://www.voipdetective.com/install-voip-detective-now/ - Click on Register for an account
- Enter your personal/official details and submit the form.
- Once account is created, click on Log In
- Enter your email address and password to login.
- Once logged in, you will be redirected to VoIP Detective – License and Download page.
- Go to Step 1 – Choose Free or Pro step and click on Generate VoIP Detective Free License.
- Go to Step 2 – Note your License Key and make a note of your License Key.
- Go to Step 3 – Download the VoIP Detective Virtual Machine and click on Download.
Deploying the OVA file
- Open VMware ESXi
- Click on File > Deploy OVF Template.
- Select the OVA File which you downloaded and follow the steps.
- Once the import is completed, Power On the Virtual Machine.
Setting up the Virtual Machine
- By default, the virtual machine will be DHCP enabled. It is recommended to setup a Static IP Address. To setup a Static IP Address, follow this article.
- To use a DNS name (Hostname/FQDN) instead of IP Address, follow this article.
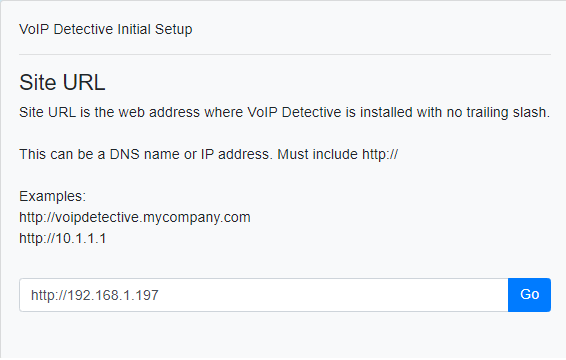
VoIP Detective Initial Setup
- Open the IP Address/FQDN/Hostname in the browser
- VoIP Detective End User License Agreement (EULA) – Read the agreement.
- You will be prompted to enter the Username and Password. The default username is ‘admin‘ and the default password is ‘voip‘.
- Enter the URL and click on Go.
- Enter the License Key you generated from VoIP Detective
- Click on Go
- On successful validation, the License will be activated (Make sure your VoIP Detective system is connected to Internet).
- The default GUI username and password is ‘admin‘ and ‘voip‘.
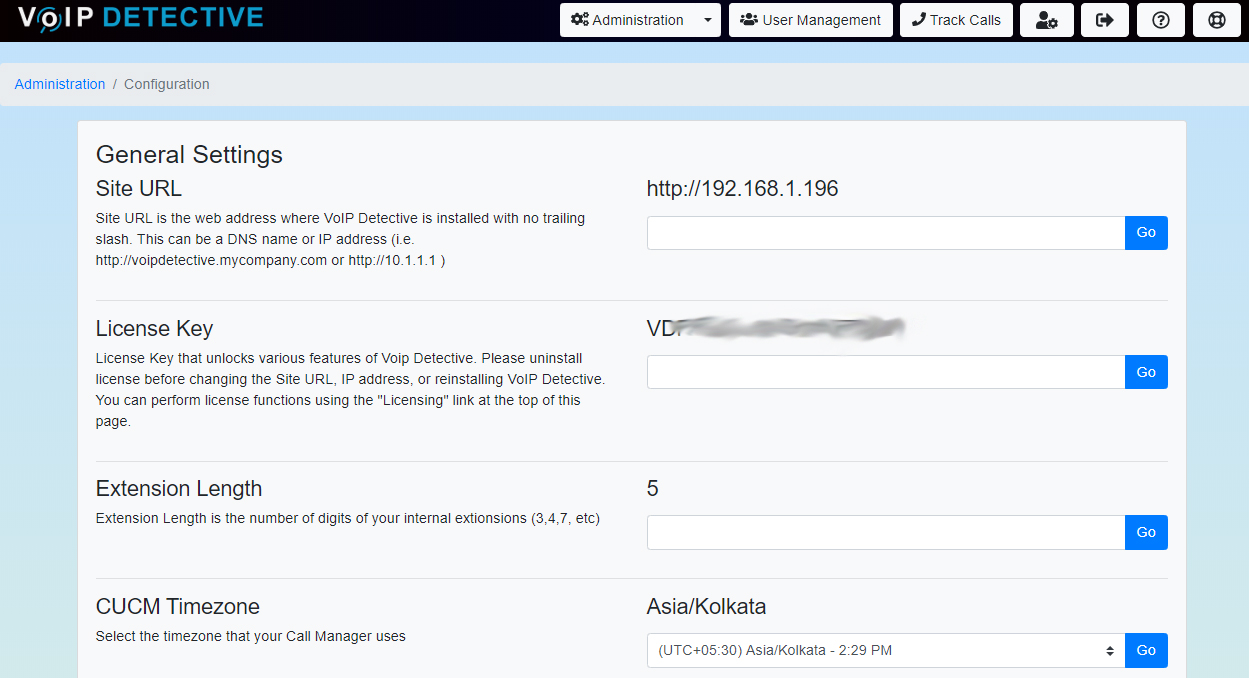
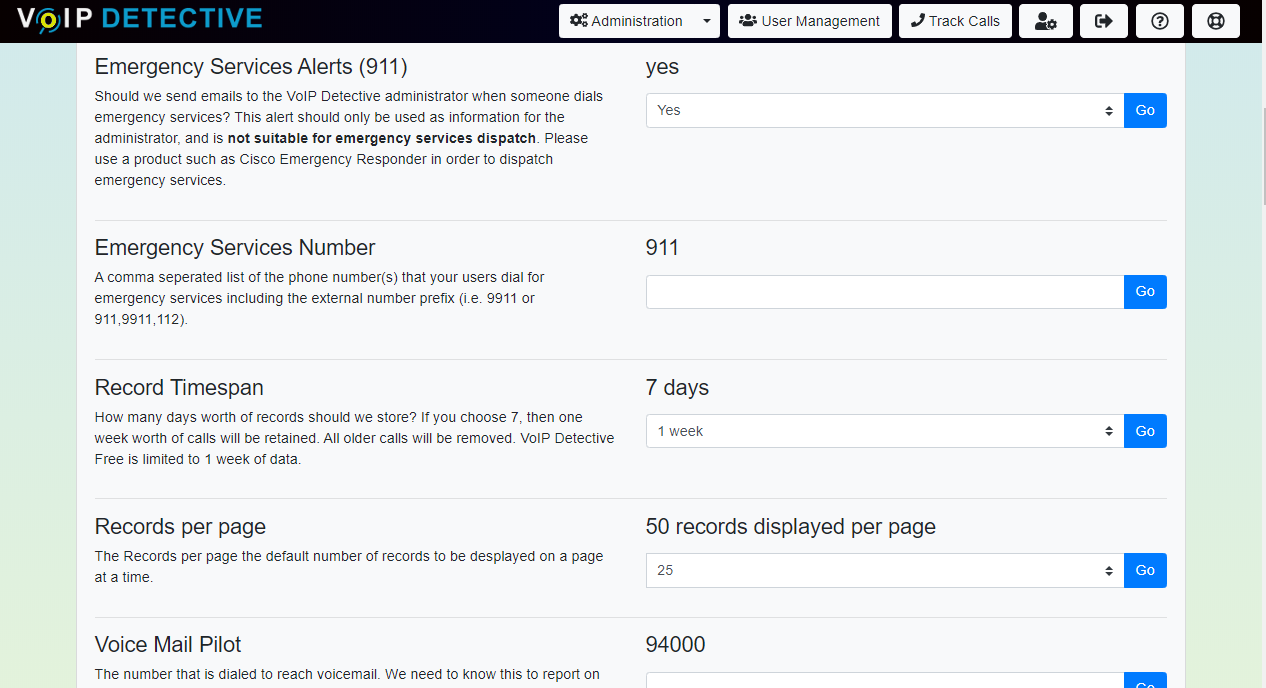
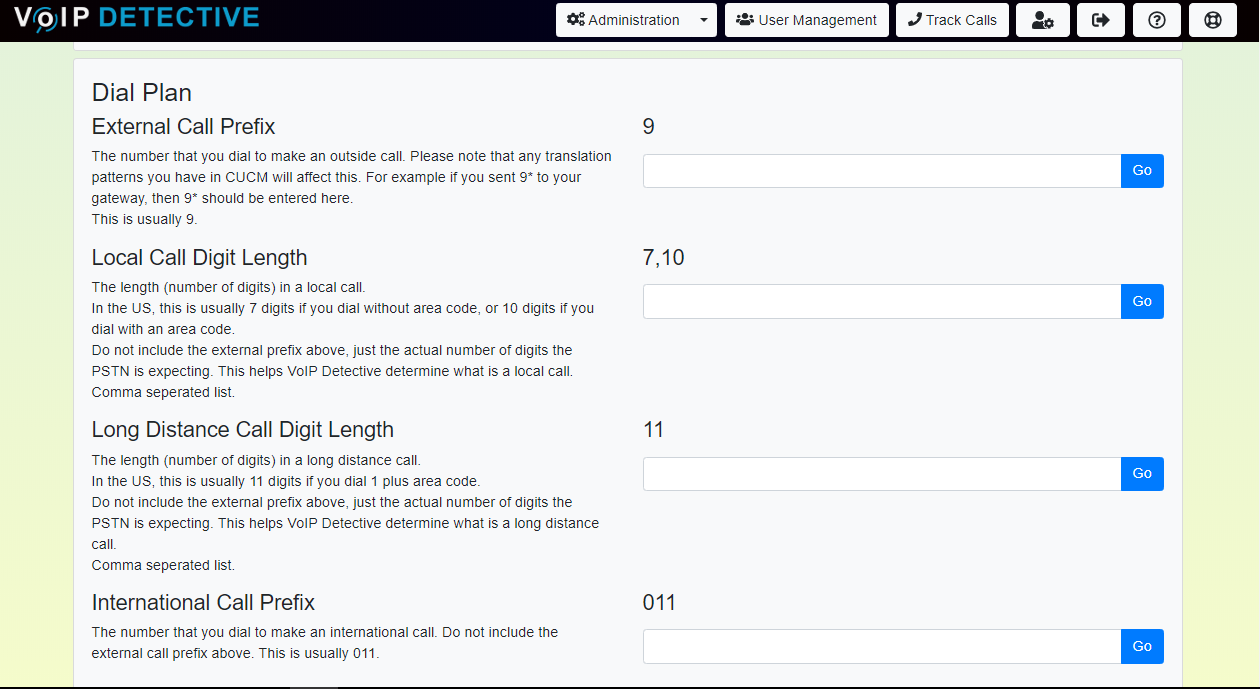
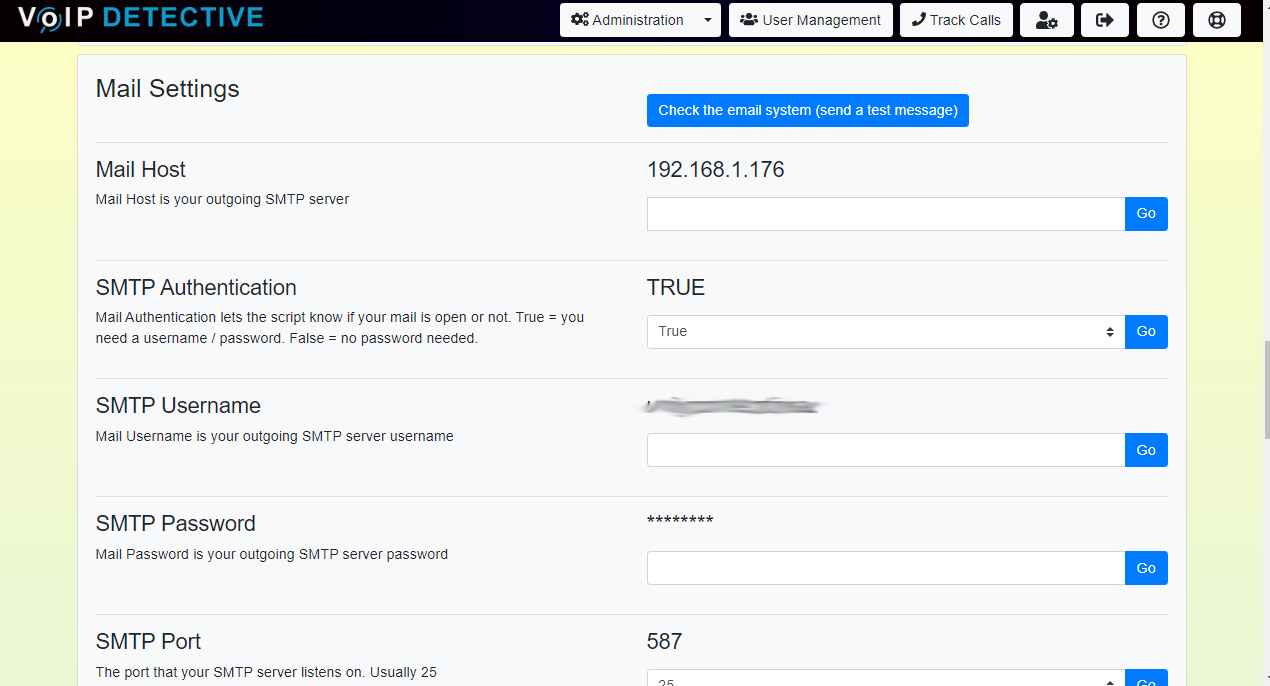
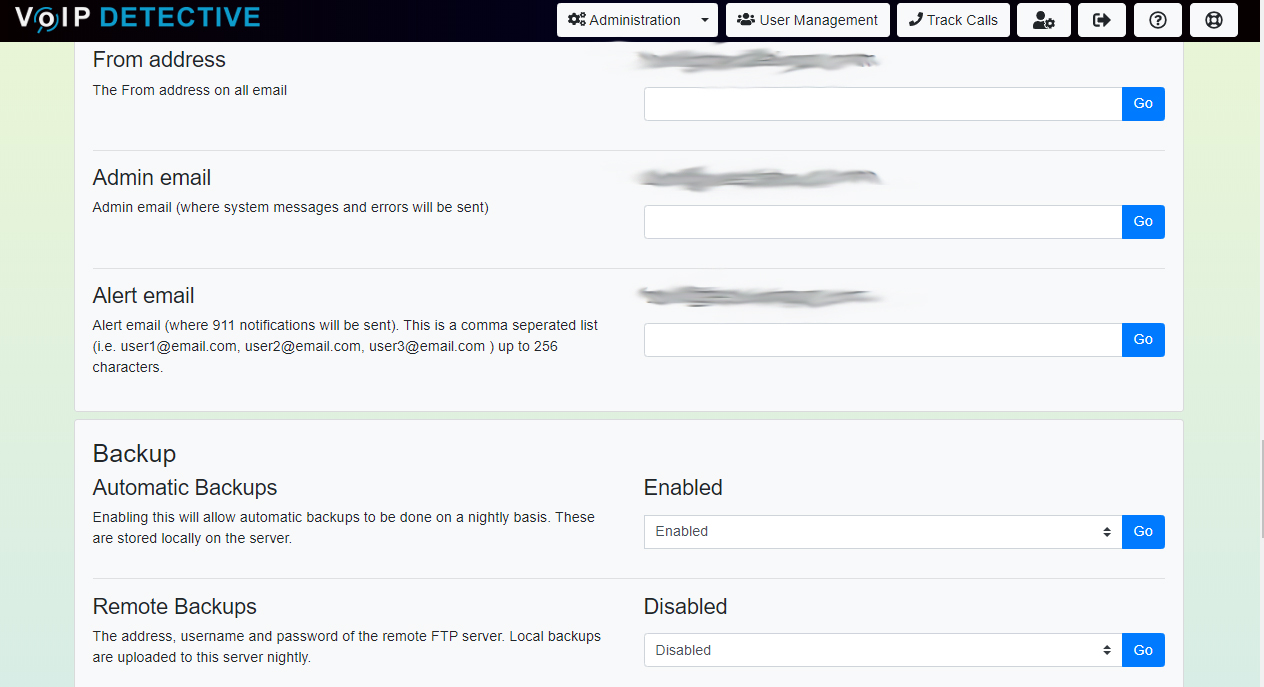
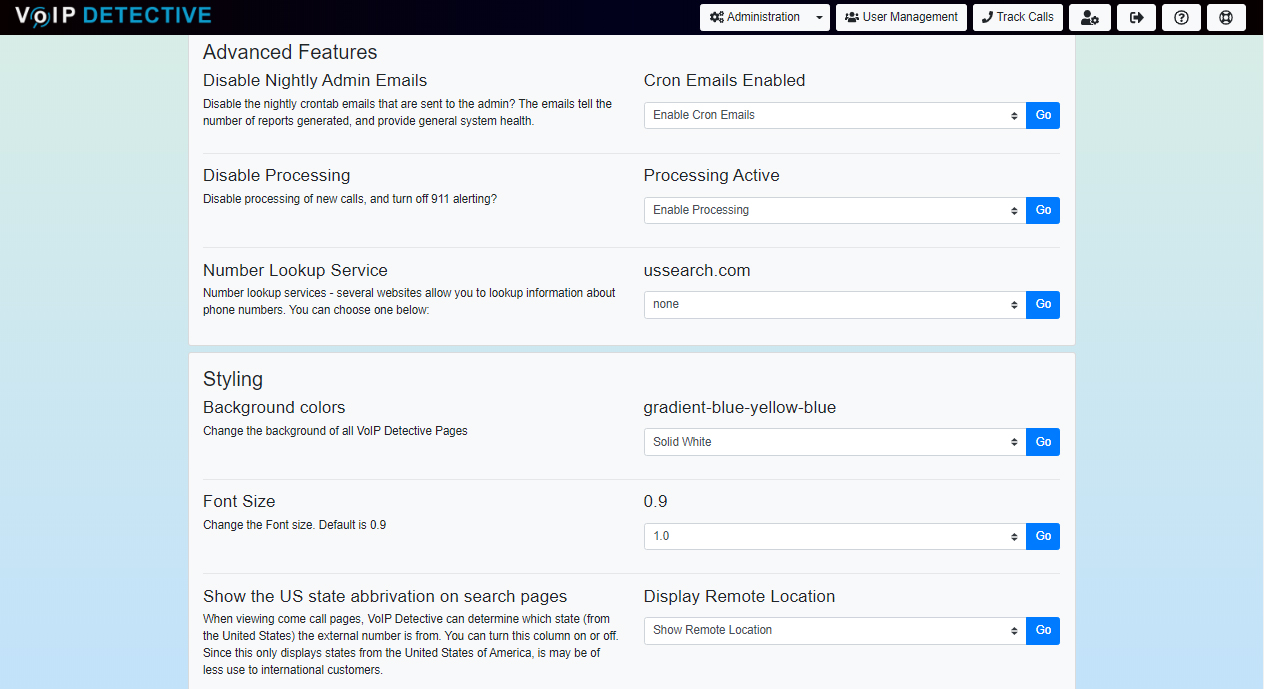
- Navigate to Administration > Configuration > Complete the configuration as asked.
Basic Configuration
Here is the configuration I did for my lab:
- Navigate to Administration > Configuration
Backup and Restore
You can easily backup and restore the database with one click.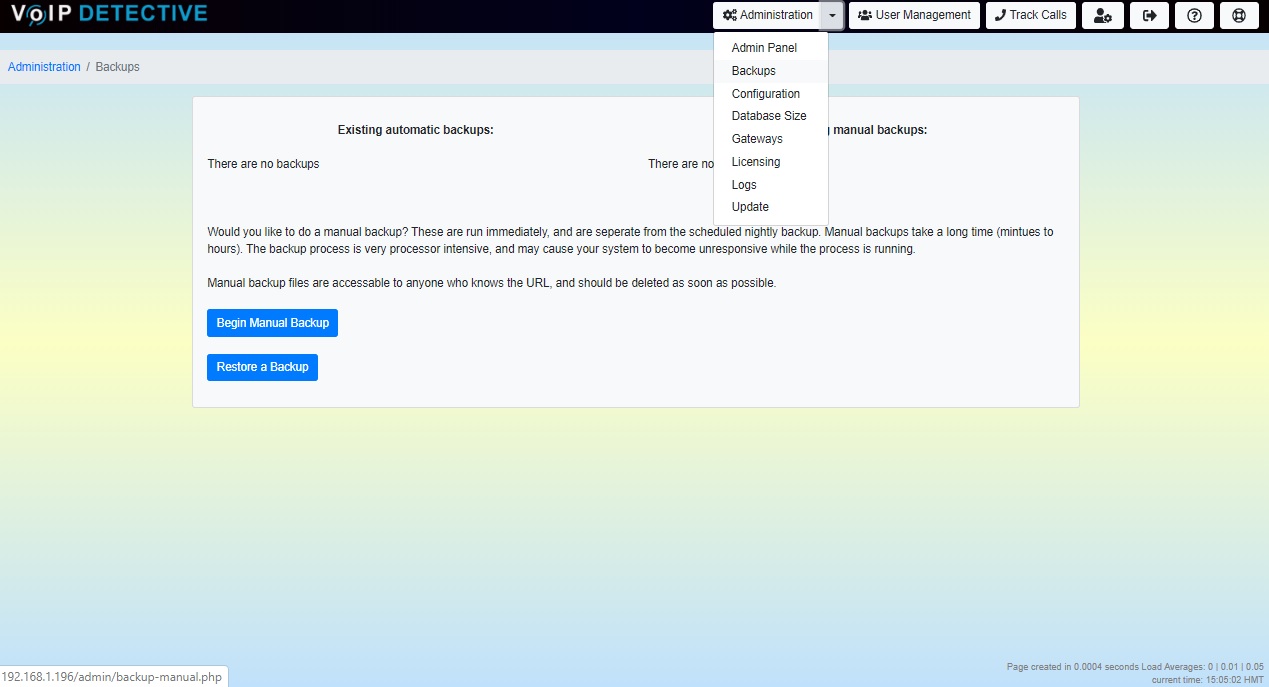
For Backup:
Navigate to Administration > Backups > Click on Begin Manual Backup

For Restore:

Navigate to Administration > Backups > Click on Restore a Backup to restore.
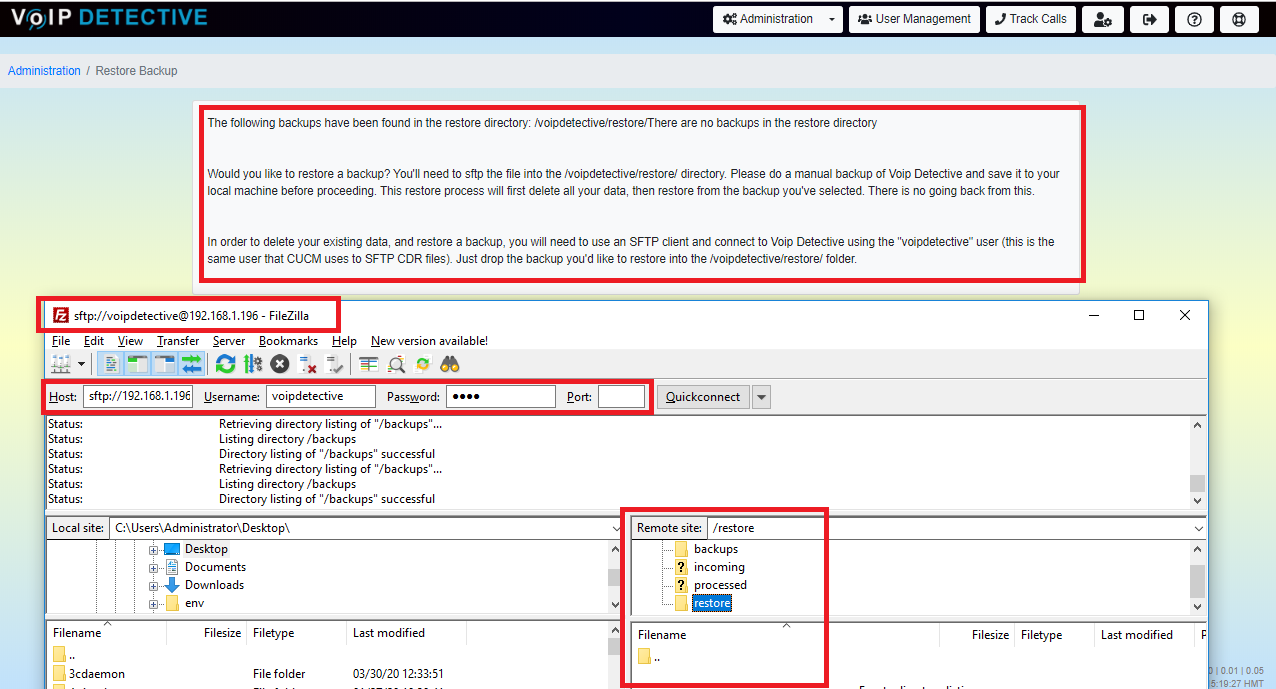
Follow the steps as mentioned in the portal while you perform a restore and you need to use SFTP application such as FileZilla. Credentials as follow:
Username : ‘voipdetective‘
Password: Password that has been set, my was kept on default which is ‘voip‘
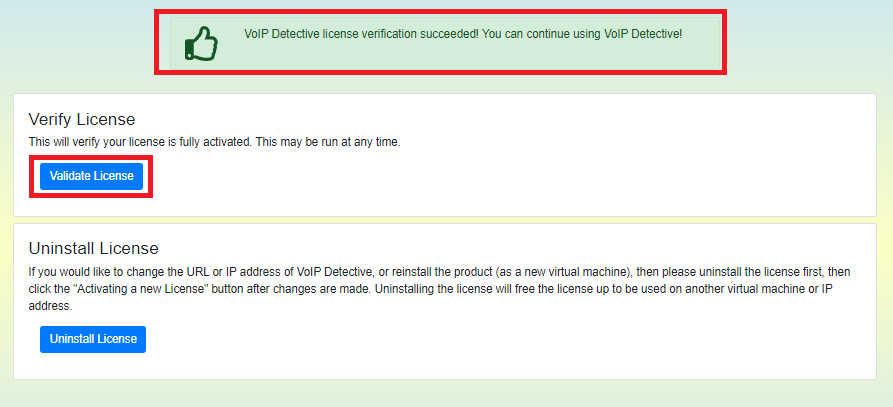
Licensing
Please ensure that your server is connected to Internet and License is activated.To verify, follow the below steps:
Navigate to Administration > Licensing > Click on Validate License
Configuration on Cisco Unified Communications Manager
You need to also ensure that the basic configuration is completed on the CUCM like enabling CDR, setting up Billing server. Here is the detailed process mentioned on the same.
In the next article, i would demonstrate the results of the calls made through the system.

I am working in an IT company and having 10+ years of experience into Cisco IP Telephony and Contact Center. I have worked on products like CUCM, CUC, UCCX, CME/CUE, IM&P, Voice Gateways, VG224, Gatekeepers, Attendant Console, Expressway, Mediasense, Asterisk, Microsoft Teams, Zoom etc. I am not an expert but i keep exploring whenever and wherever i can and share whatever i know. You can visit my LinkedIn profile by clicking on the icon below.
“Everyone you will ever meet knows something you don’t.” ― Bill Nye

Pingback: Voip Detective - An Excellent CDR analysis Tool
Pingback: VoIP Detective - Demonstration of the tool