How to get LDAP attributes easily and use them in CUCM LDAP Filter?
LDAP custom filters can be used when you don’t want your CUCM to sync your entire LDAP directory.
For example: You are using a Global LDAP Server where all the users across the globe are configured i.e., APAC, US, EMEA. Now let’s say you have three CUCM cluster i.e., APAC, US and EMEA. You probably won’t want the users from APAC to be synced in US and EMEA Cluster, users from EMEA to be synced in US and APAC and users from US to be synced with EMEA and APAC. Also you won’t want users without a telephone number to be seen in your CUCM.
So, in such case a LDAP filter can be applied in respective CUCM and users can be stopped from getting synced in wrong CUCM Cluster.
There are various LDAP attributes available that can be applied in filter, you may refer this link.
An example of LDAP attributes :
Let’s take an example:
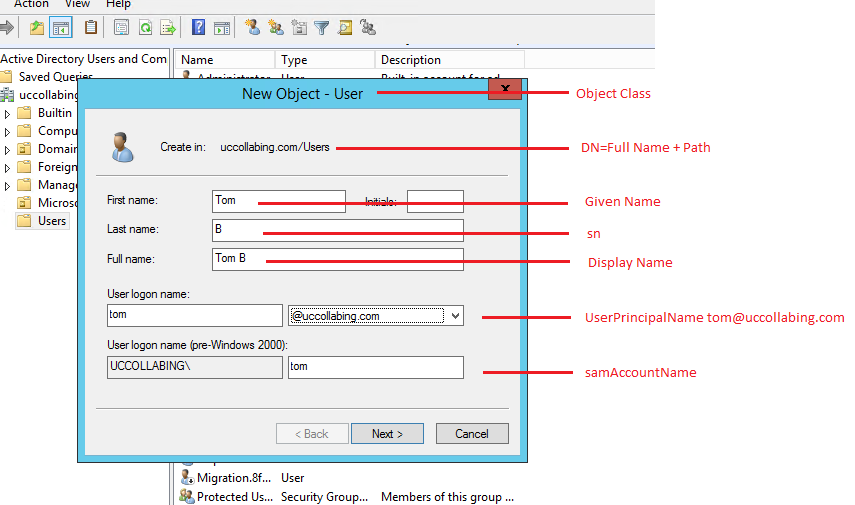
I created three users in Active Directory i.e., Tom from APAC, Harry from EMEA and John from US. I added their IP Phone numbers and tag them to APAC, EMEA and US respectively under Address (Street) in AD. See below.
Let’s configure the LDAP Filter: Assuming that you have already configured the basic LDAP setup, if not, follow this article:
Configuring LDAP Filter
- Navigate to System > LDAP > LDAP Custom Filter
- Click on Add New
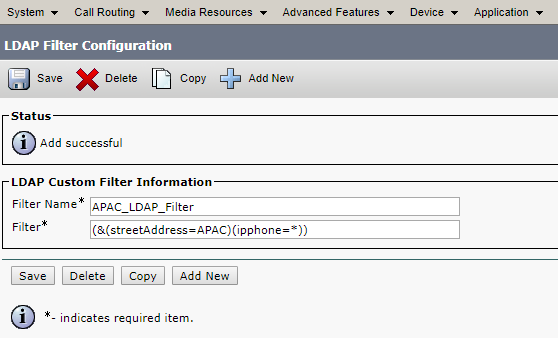
- Filter Name > Give it the name you want. I would give it as “APAC_LDAP_Filter“
- Filter > (&(streetAddress=APAC)(ipphone=*))
- Click on Save
Applying LDAP Filter
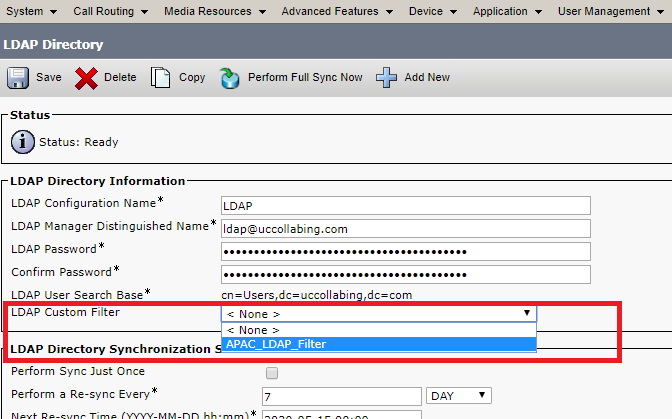
- Navigate to System > LDAP > LDAP Directory
- Select the LDAP Directory that is being used in your Call Manager.
- LDAP Custom Filter > Select the LDAP Filter you created in the above step. As per our example, i would select APAC_LDAP_Filter
- Click on Save
- Click on Perform Full Sync Now (It is highly recommended to do it outside business hours.)
Verifying the End User
- As per our example, only Tom should be part of our CUCM as he is from APAC, John and Harry should not be as they are from US and EMEA respectively.
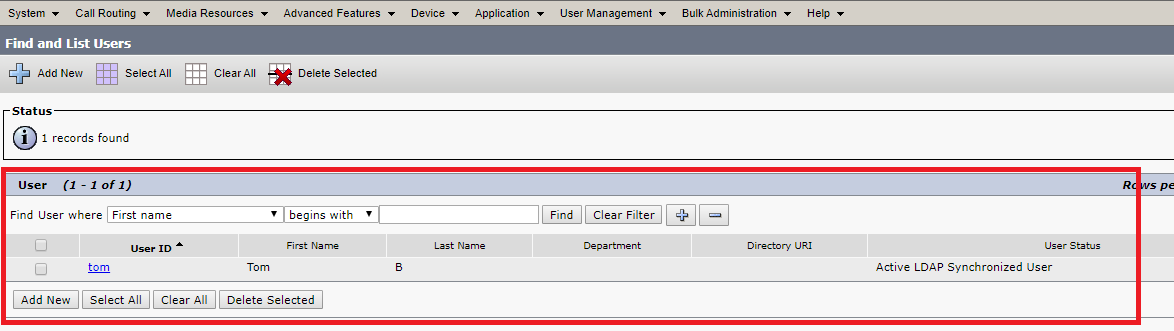
So, any users without a telephone number will not be synced in CUCM even though the user is part of APAC or EMEA or US because we have applied a filter as (ipphone=*))
For EMEA, the filter would look like (&(streetAddress=APAC)(ipphone=*))
For US, the filter would look like (&(streetAddress=US)(ipphone=*))
Some random examples of LDAP filters are:
(&(objectClass=user)(email=*)) – By applying this filter, we are importing users who are from ObjectClass “User” and has an email address.
(&(objectclass=user)(telephonenumber=*)) – By applying this filter, we are importing users who are from ObjectClass “User” and has a telephone number.
(&(objectClass=user)(|(ou:dn:=APAC)(ou:dn:=EMEA))) – By applying this filter, we are importing users who are from ObjectClass “User” and who are from APAC or EMEA
(&(objectClass=user)(&(ou:dn:=APAC)(!(ou:dn:=EMEA))))- By applying this filter, we are importing users who are from ObjectClass “User” and who are from APAC but not from EMEA
LDAP Search Filter Operators
| Operator | Description |
| = | Equal to |
| ~= | Approximately equal to |
| <= | Less than or equal to |
| >= | Greater than or equal to |
| & | AND |
| | | OR |
| ! | NOT |
How to get LDAP attributes easily?
- Login to Windows 2008/2012 AD server.
- Go to Run > Enter “adsiedit.msc” and hit enter. ADSI Edit Window will appear.
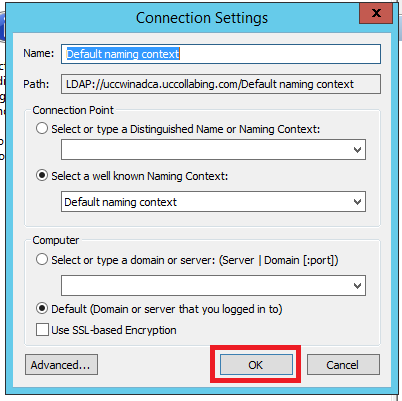
- Right Click ADSI Edit > Connect to
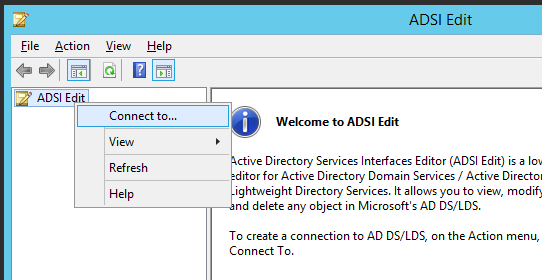
- Click on OK
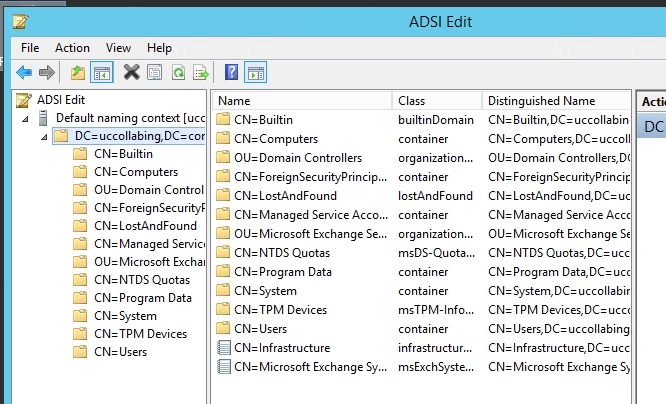
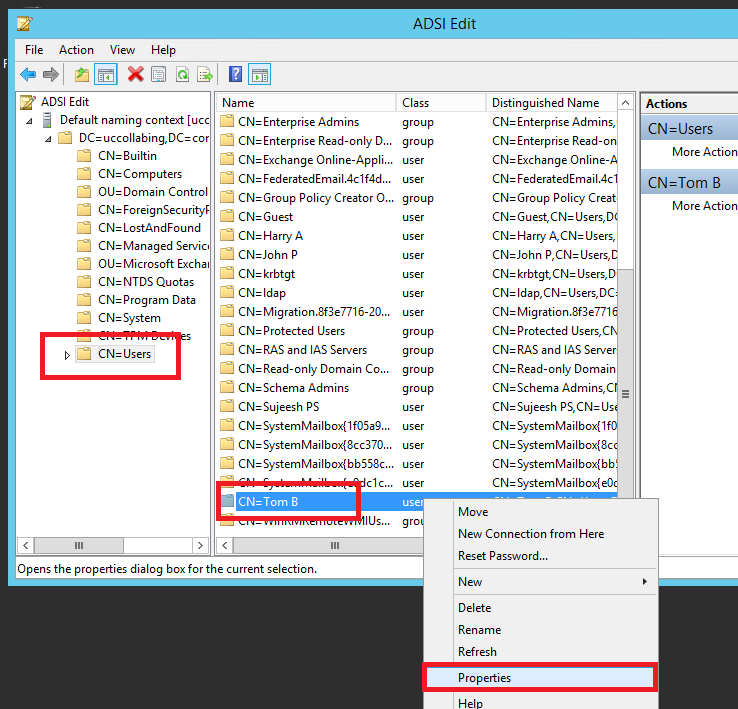
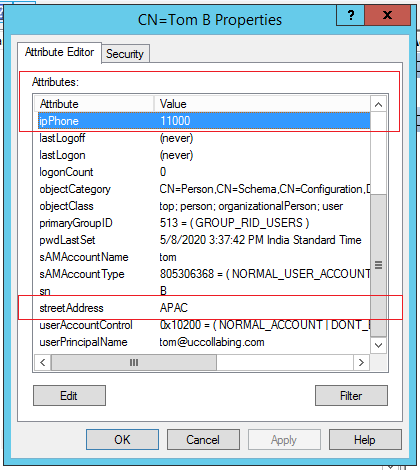
- In our example, we wanted to know the attributes for IP Phone and Address, so, i would Click on CN=Users
- Then i would click on CN=Tom B (the user who is part of APAC Cluster)
- Right Click Tom B and Click on Properties
- See the below screenshot, which tells about the Attributes name and value. I have used the same in LDAP Filter.
Likewise, you can get LDAP attributes based on your requirement.
A demo video on LDAP Filter

I am working in an IT company and having 10+ years of experience into Cisco IP Telephony and Contact Center. I have worked on products like CUCM, CUC, UCCX, CME/CUE, IM&P, Voice Gateways, VG224, Gatekeepers, Attendant Console, Expressway, Mediasense, Asterisk, Microsoft Teams, Zoom etc. I am not an expert but i keep exploring whenever and wherever i can and share whatever i know. You can visit my LinkedIn profile by clicking on the icon below.
“Everyone you will ever meet knows something you don’t.” ― Bill Nye

Pingback: Powershell Query to get all the users from AD with attributes