CUCM LDAP Active Directory Integration-Sync
Are you trying to Install Active Directory Lightweight Directory Services on Windows Server? Want to configure LDAP (Lightweight Directory Access Protocol) to sync users from LDAP directory to Cisco Unified Communications Manager?
Demo Video on Integrating CUCM with Active Directory using LDAP:
Follow the below steps –
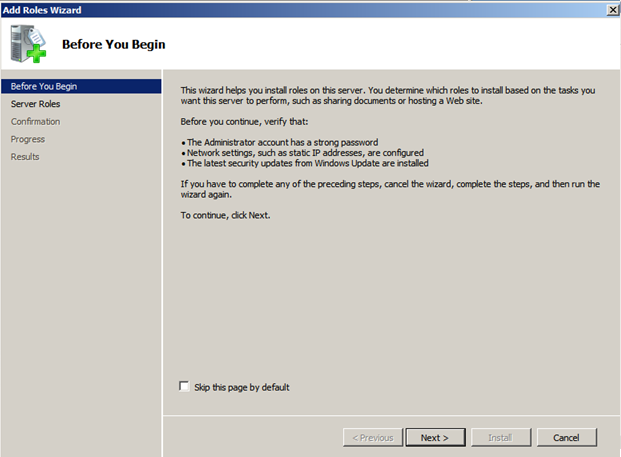
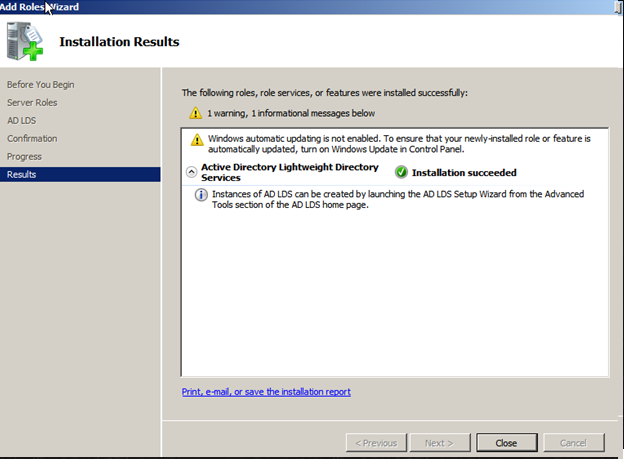
Installing Active Directory Lightweight Directory Services
- Launch Server Manager on Windows Server 20XX
- Right Click Roles > Add Roles > Click on Next
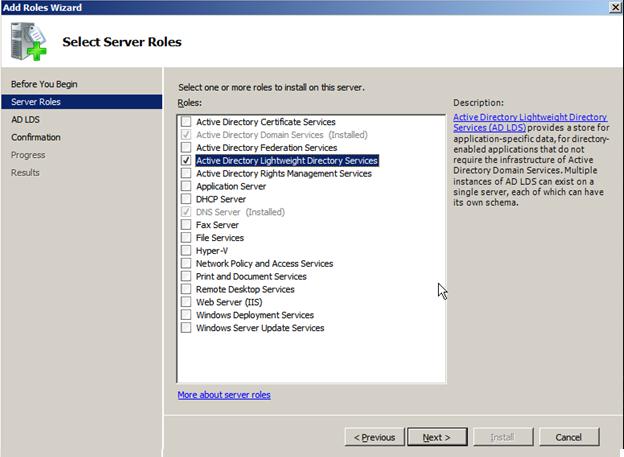
- Check Mark > Active Directory Lightweight Directory Services and click on Next
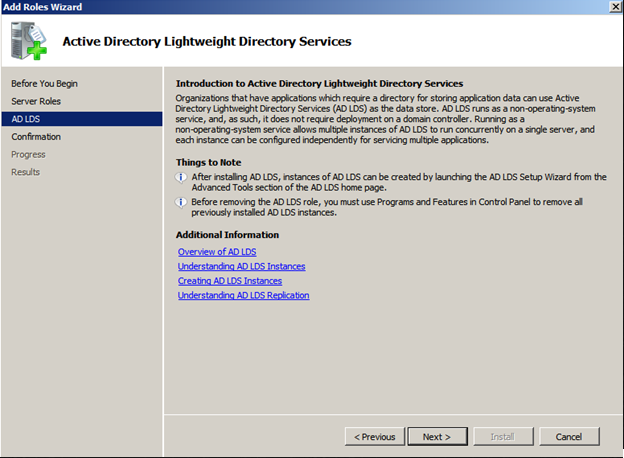
- Click on Next
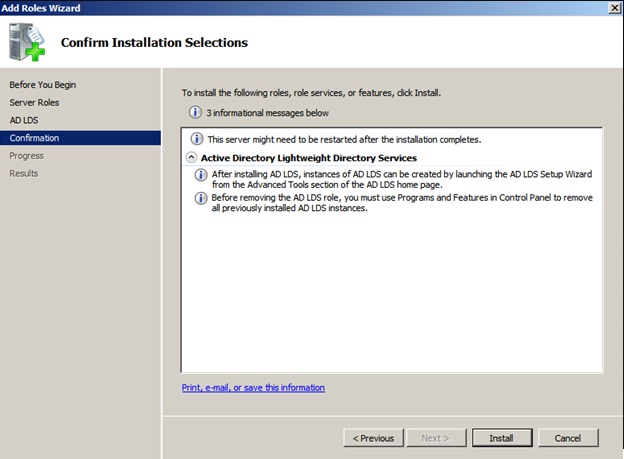
- Click on Install
- Click on Close
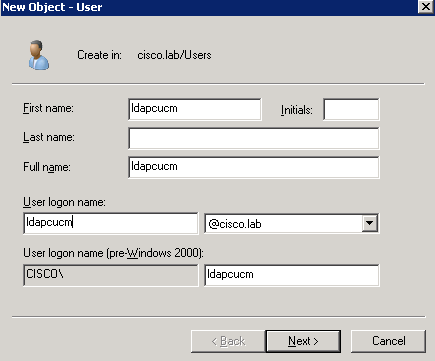
Create LDAP User Account
- Expand Expand Director Tree > Users > Create a New User which will be used by Cisco Unified Communication Manager to communicate with LDAP Server
- Enter First Name
- Enter Last Name
- Enter User Logon Name
- Click on Next
- Enter Password and Confirm Password
- Check Mark – User cannot change password
- Check Mark – Password never expires
- Click on Next
- Click on Finish
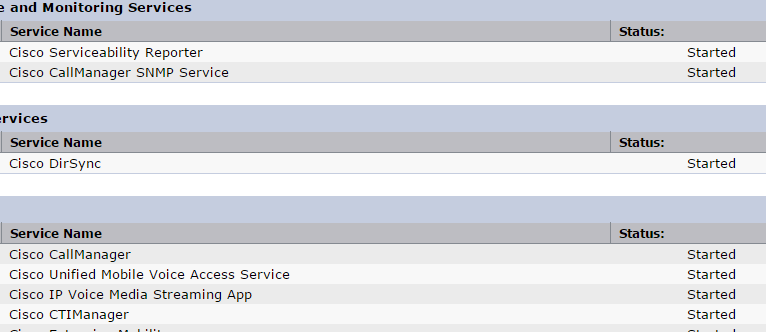
Confirm if Cisco DirSync Service is up on Cisco Unified Communication Manager
- Login to Cisco Unified Communications Manager Serviceability – https://X.X.X.X/ccmservice/
- Go to Tools > Control Center – Feature Services > Ensure that Cisco DirSync Service is up and running
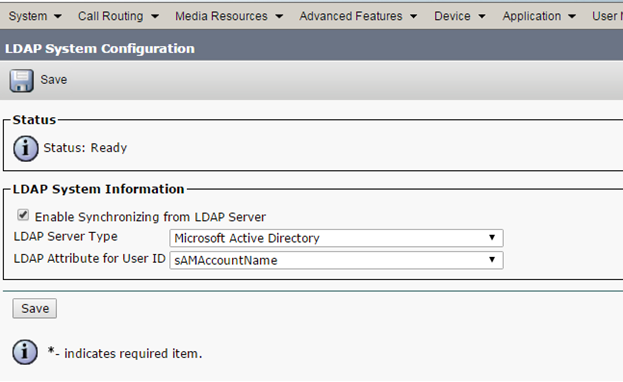
Configure LDAP in Cisco Unified Communication Manager
- Login to Cisco Unified Communication Manager Administration – https://X.X.X.X/ccmadmin/
- Go to System > LDAP > LDAP System
- Check Mark > Enable Synchronizing from LDAP Server
- LDAP Server Type > Microsoft Active Directory
- LDAP Attribute for User ID > sAMAccountName
- Click on Save
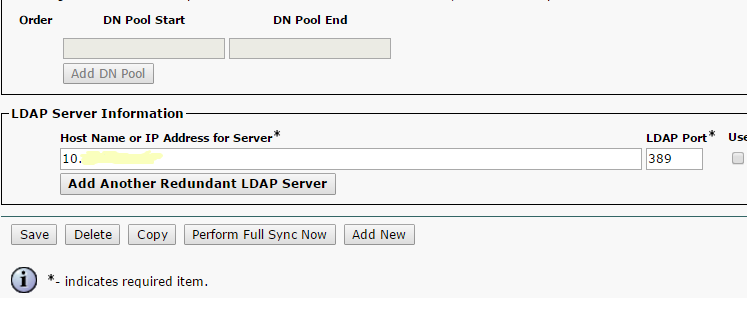
- Go to System > LDAP > LDAP Directory
- Click on Add New
- LDAP Configuration Name > Enter a Name for LDAP
- LDAP Manager Distinguished Name > [email protected] (Replace USERID with the User ID that was created in Active Directory to be used by CUCM to communicate with LDAP Server, Replace Domain.Name with your domain name)
- LDAP Password > Enter LDAP Password that was created in LDAP Server
- Confirm Password > Confirm Password again
- The LDAP User Search Base comprises of two attributes to make up a dn (Distinguished Name) which includes the cn (Common Name) and the dc (Domain Component). In our case we will use cn=Users, dc=uccollabing, dc=com. If you are not sure what is the LDAP search base you need to use, follow the article “LDAP User Search Base CUCM/CUC” shared below afte the configuration.
- Perform a Re-sync Every – Choose your value accordingly
- Under LDAP Server Information > Host Name or IP Address for Server > Enter the IP Address of the Windows 20XX Server
- Click on Save
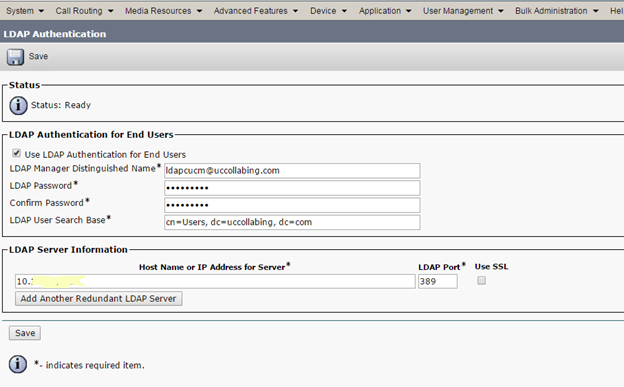
- Go to System > LDAP > LDAP Authentication
- Check Mark > Use LDAP Authentication for End Users
- LDAP Manager Distinguished Name > The same name that was used in the previous steps for Distinguished Name
- LDAP Password > Enter the same password
- Confirm Password > Enter the confirm password
- LDAP User Search Base > Enter the Search Base that was used in the above LDAP User Search Base step
- Host Name or IP Address for Server > Enter the IP address of WIndows 20XX Server
- Click on Save
To know what is the LDAP user search base that you need to use on CUCM or Unity Connection – Follow the below article.
https://www.uccollabing.com/2016/07/13/ldap-user-search-base-cucmcuc/
Testing LDAP Configuration
- For testing purpose, i created a New User in LDAP Directory
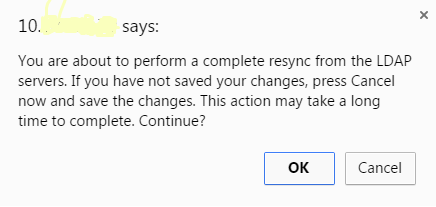
- On Cisco Unified Communication Manager > Go to System > LDAP > LDAP Directory
- Click on Perform Full Sync Now
- Once the Sync is completed, Go to User Management > End User
- Verify if the User is synced via LDAP in End Users and you see the User Status as “Active LDAP Synchronized User”


Hope this helps!!

I am working in an IT company and having 10+ years of experience into Cisco IP Telephony and Contact Center. I have worked on products like CUCM, CUC, UCCX, CME/CUE, IM&P, Voice Gateways, VG224, Gatekeepers, Attendant Console, Expressway, Mediasense, Asterisk, Microsoft Teams, Zoom etc. I am not an expert but i keep exploring whenever and wherever i can and share whatever i know. You can visit my LinkedIn profile by clicking on the icon below.
“Everyone you will ever meet knows something you don’t.” ― Bill Nye

Thanks, it was very informative.
Pingback: CUCM LDAP Filters - Easy
Pingback: CUCM LDAP Filters - Find LDAP Attributes easily.
Pingback: CUCM - Secure LDAP
Thanks for an excellent presentation
Thanks for an excellent presentation