Migrating ITL files between CUCM Clusters
When migrating IP Phones from CUCM version 8 on wards to a newer version, you may encounter IP Phones registration issues because of security feature which uses ITL (Initial Trust List) files. This will not allow you to register the IP Phones until and unless the ITL (Security files) are deleted from the IP Phones.
If you are migrating the entire cluster at one go, you can use the feature called “Prepare Cluster for Rollback to Pre-8.0” (Link shared below) which will help you to migrate all the IP Phones without any issues. But the challenge comes in when you have been asked to migrate IP Phones partially.
For example – If you are asked to migrate Site A on Week 1, Site B on Week 2, Site C on Week and so, Prepare Cluster for Rollback to Pre-8.0 is not a recommended option. If you enable this feature, it will delete the ITL files from Cisco IP Phones and make the devices unregistered and registered back with blank ITL files issued to the IP Phones. Hence this option is not a recommended option if you are migrating IP Phones partially.
Now, to overcome the IP Phone registration issues if you migrate phones partially, the other solutions to Delete the IP Phone’s ITL files using some Remote Tool (Software) or manually by going to everyone’s desk which is not feasible. The best option would be is importing the consolidated signed certificates to the Legacy Cluster that will help in migrating the IP Phones seamlessly from one cluster to another cluster.
What are the Pre-Requisites?
- Download sFTP application and install the same on a Windows Server.
- Ensure that Windows Server and CUCM (Legacy and New) are reachable.
- Ensure that you correctly take backup of CUCM (Legacy and New) before you proceed.
How do we start now?
Login to New CUCM:
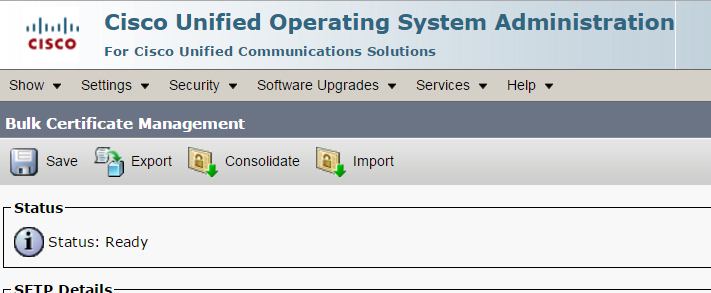
- Login to New Cisco Unified Communication Manager > OS Administration (GUI)
- Go to Security > Bulk Certificate Management
- Enter the SFTP Details >
- IP Address > X.X.X.X
- Port > 22
- User ID > SFTPUser
- Password > SFTPPassword
- Directory > \
- Click on Save
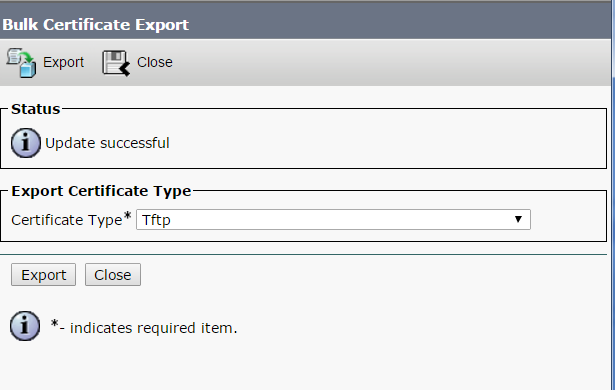
- Click on Export > A popup window will appear
- Certificate Type > Select TFTP from drop down menu
- Click on Export
- Ensure you see “Update Successful” message
- Close the Popup window
Login to Old CUCM:
- Login to Legacy Cisco Unified Communication Manager > OS Administration (GUI)
- Go to Security > Bulk Certificate Management
- Enter the SFTP Details >
- IP Address > X.X.X.X
- Port > 22
- User ID > SFTPUser
- Password > SFTPPassword
- Directory > \
- Click on Save
- Click on Export > A popup window will appear
- Certificate Type > Select TFTP from drop down menu
- Click on Export
- Ensure you see “Update Successful” message
- Close the Popup window
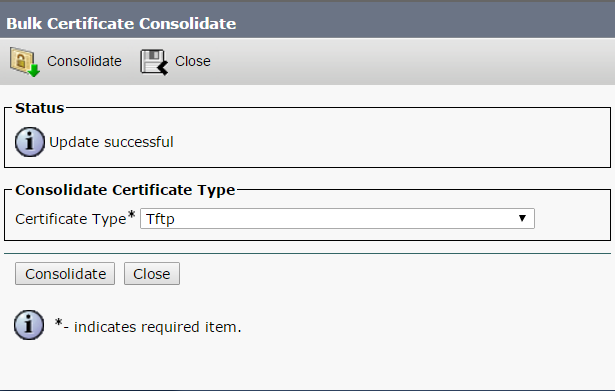
- You will see a “Consolidate” link on the Menu > Click on Consolidate button ( A popup window will appear)
- Select Certificate Type as TFTP from the drop down menu
- Click on Consolidate
- Ensure you see “Update Successful” message
- Close the Popup Window
- Go to Bulk Certificate Management
- Click on Import
- Select TFTP as Certificate Type and Click on Import
- Once imported, click on close to close the popup window
- Login to Legacy Cluster Cisco Unified Communication Manager > Serviceability
- Go to Tools > Control Center – Network Services >
- Radio Check > Cisco Trust Verification Service
- Click on Restart
- Now change the DHCP option 150 to point the phones to the new destination cluster
- Reset the IP Phones from Legacy Cisco Unified Communication Manager and the IP Phones should start registering to the New Cluster if the certificate export/consolidate/import process has worked correctly
That’s all
For Prepare Cluster for Rollback to Pre-8.0 – Please refer to the below link
https://www.uccollabing.com/2016/08/11/prepare-cluster-for-rollback-to-pre-8-0/
Hope this helps!

I am working in an IT company and having 10+ years of experience into Cisco IP Telephony and Contact Center. I have worked on products like CUCM, CUC, UCCX, CME/CUE, IM&P, Voice Gateways, VG224, Gatekeepers, Attendant Console, Expressway, Mediasense, Asterisk, Microsoft Teams, Zoom etc. I am not an expert but i keep exploring whenever and wherever i can and share whatever i know. You can visit my LinkedIn profile by clicking on the icon below.
“Everyone you will ever meet knows something you don’t.” ― Bill Nye
