Installing Cisco Unified Attendant Console
Installation of Attendant Console is quite easy and can be done within 30-45 minutes but configuring Attendant Console may take an hour if you don’t encounter any issues.
Before installation, please ensure the following:
- IIS is Installed on your Windows Server
- Your CUAC Server should not be installed on a Domain Controller
- Ensure your DNS is working (If you don’t have a DNS Server, you need to modify the Hosts file on the CUAC Server. Add an entry in the hosts file so that you can resolve your Server Hostname to an IP Address)
Creating Application User in Cisco Unified Communication Manager:
- Login to Cisco Unified Communication Manager
- Create a New Group as “CUAC” and assign all “CTI” roles to this group.
- Create an Application User (This will be used to communication with CUAC Server)
- Assign the application user to CUAC and Standard CCM Super Users Groups
Installation on Windows Server
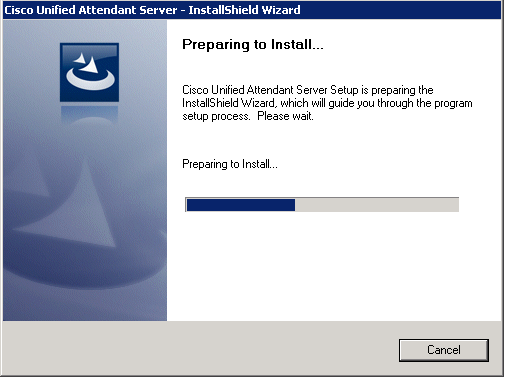
- Launch CUAC Server Setup File
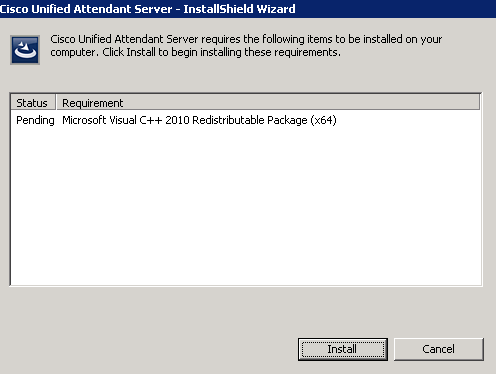
- Click on Install when prompted for installing Microsoft Visual C++ 20XX Redistributable Package (x64)
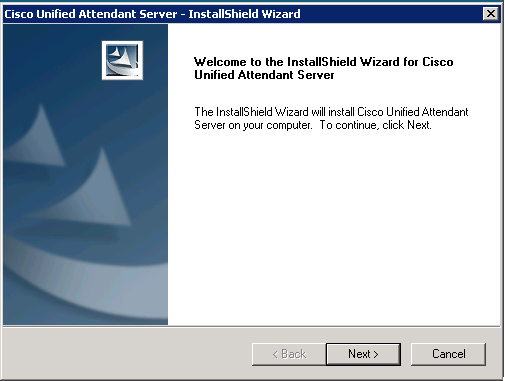
- Click on Next when you are prompted “Welcome to the InstallShield Wizard for Cisco Unified Attendant Server
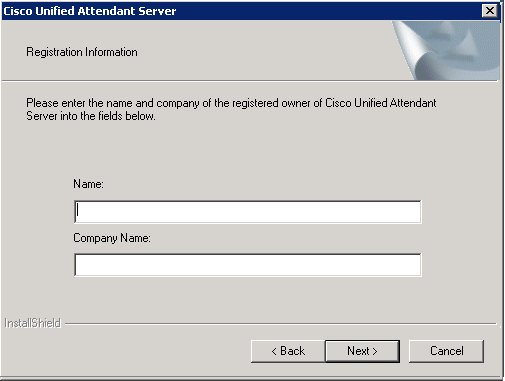
- Enter Registration Information and Click on Next
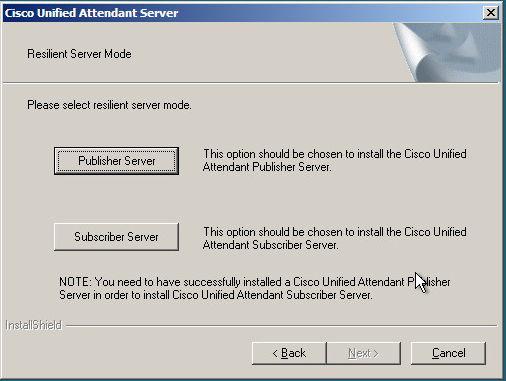
- Resilient Server Mode > Select Publisher Server and click on Next
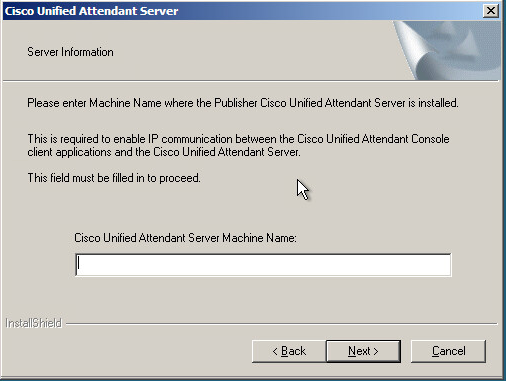
- Server Information > Enter the Hostname of the CUAC Server and click on Next
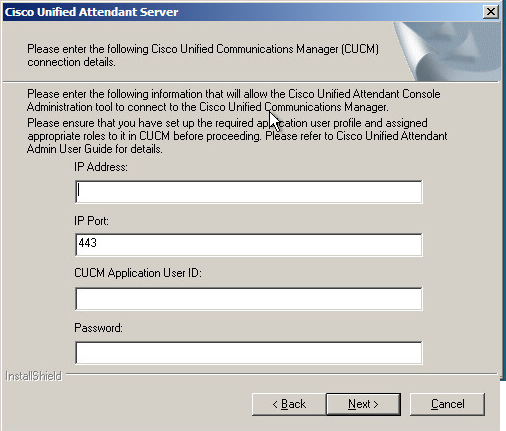
- Enter IP Address of Cisco Unified Communication Manager, IP Port (let it be default), CUCM Application User ID and Password and click on Next
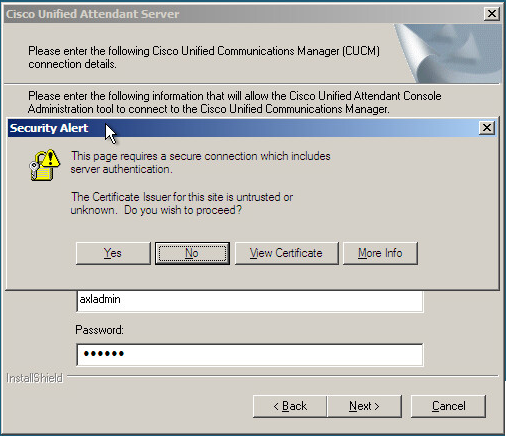
- Security Alert > When prompted, click on Yes
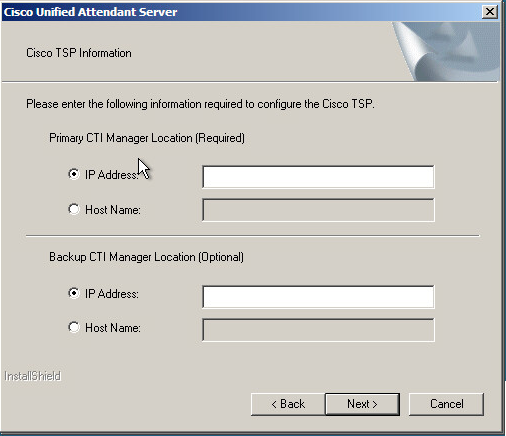
- Cisco TSP Information >Enter Primary CTI Manager and Backup CTI Manager and click on Next (Cisco Unified Communication Manager IP Address on which CTI Service is Enabled)
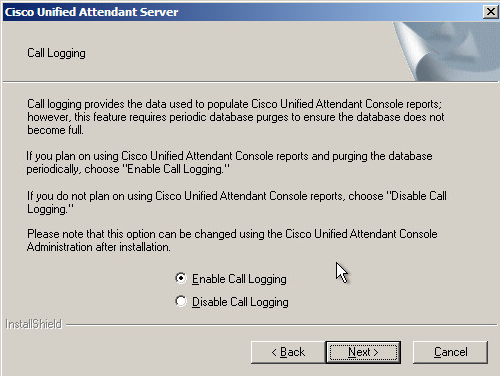
- Call Logging > Radio Check Enable Call Logging and click on Next
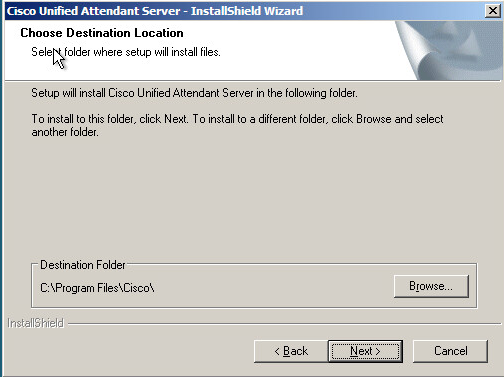
- Choose Destination Folder > Click on Next if you want to use the Default Location
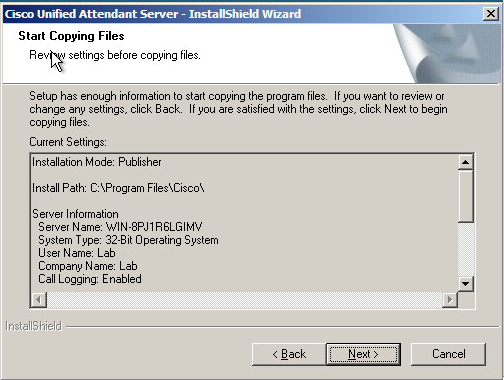
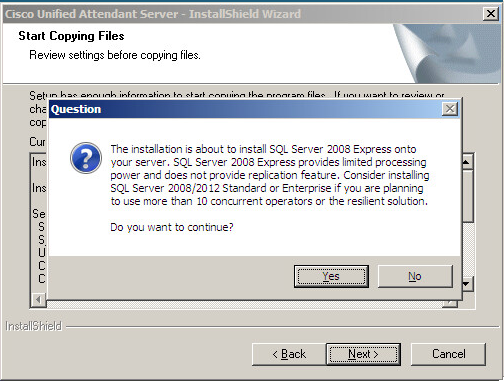
- Click on Next to Start Copying Files
- Click on Yes, when Question windows popups to install SQL Server
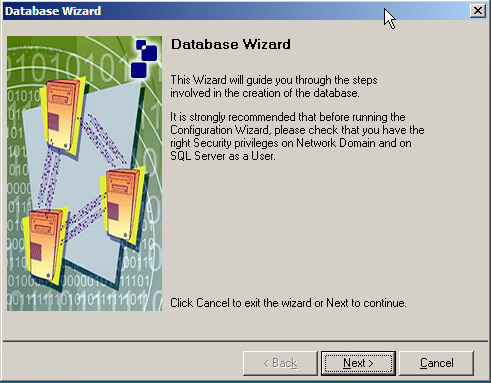
- Click on Next when Database Wizard is prompted
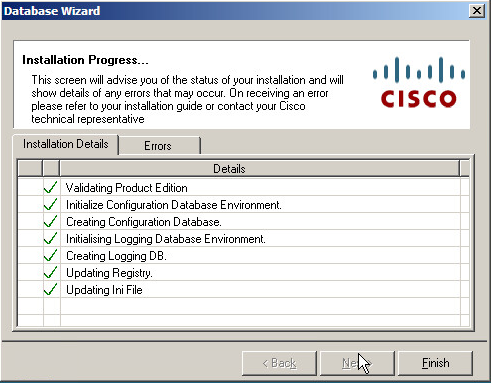
- Verify the Installation Details and click on Finish
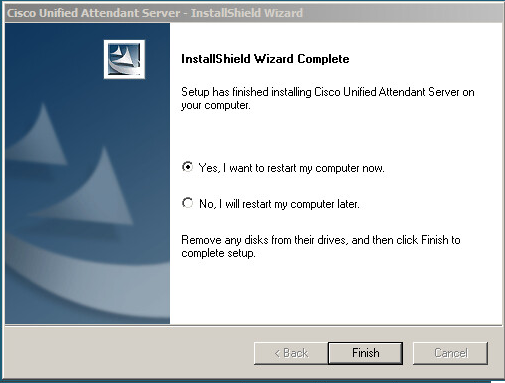
- Radio Check “Yes, i want to restart my Computer now.” and click on Finish
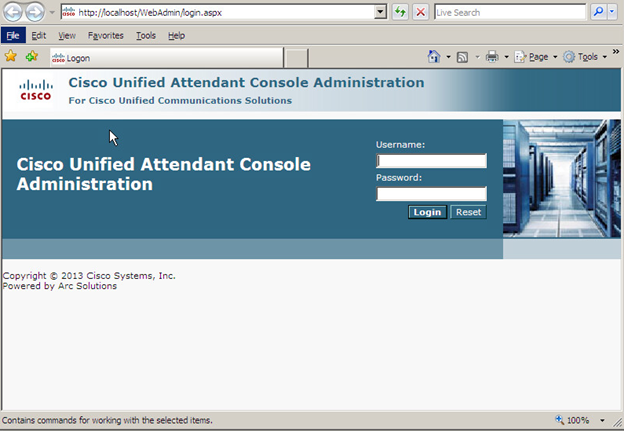
- Once your windows Server is started, Launch your browser and enter the url “https://X.X.X.X/WebAdmin/login.aspx” (Replace X.X.X.X with your CUAC IP Address)
- CUAC Default Username is “ADMIN” and Default Password is “CISCO”
Hope this helps!

I am working in an IT company and having 10+ years of experience into Cisco IP Telephony and Contact Center. I have worked on products like CUCM, CUC, UCCX, CME/CUE, IM&P, Voice Gateways, VG224, Gatekeepers, Attendant Console, Expressway, Mediasense, Asterisk, Microsoft Teams, Zoom etc. I am not an expert but i keep exploring whenever and wherever i can and share whatever i know. You can visit my LinkedIn profile by clicking on the icon below.
“Everyone you will ever meet knows something you don’t.” ― Bill Nye

after all that it say ” unable to connect to the server attendant console API_NOT_INITIALIZED ”
any help