Get Root Access to your Cisco Unified Communications Manager (CUCM), Cisco Unity Connection (CUC) or UCCX.
There are many advantages of having root access to the system but there are some dis-advantages also unless you know what you are doing with your root access. Root access can help you to gain access to the system files where you can fix issue if you know what files you need to modify.
For example : If you are facing an issue with dbreplication and you have tried resetting up the replication by issuing the commands but the replication did not come up. You realized that you may have to take a look and into the hosts/sqlhosts/rhosts files but to do that, you will need root access for which you need to involve Cisco TAC which could be very time consuming.
In similar situations, root access is beneficial but however Cisco does not give root access to users/administrators as they can manipulate the system files and it would be difficult for Cisco TAC team to troubleshoot issues when they are involved.
Note: UC Collabing does not recommend to try and apply it on your production server and will not be held for any damages that could occur to your system. In case you perform this on your production servers, you may void Cisco contract. Rooting the Appliance may be illegal and we are not directly/indirectly responsible for this. This is only for lab and learning purpose!
Pre-requisites for Rooting UC Application:
To start with the rooting process, you need to have the following file downloaded into your system.
- Cent OS – Download CentOS from the link (https://www.centos.org/download/). Minimal ISO will also work.
- CUCM or CUC or UCCX installed already.
- Access to your ESXi / VMware workstation.
Loading CentOS ISO Image on Vmware:
Let’s get started – In our example, we are using VMWare Workstation.
- Make sure that your Virtual Machine is powered off
- Right Click on your Virtual Machine and Click on Settings
- Click on CD/DVD(IDE)
- Radio Check Use ISO image file and click on Browse
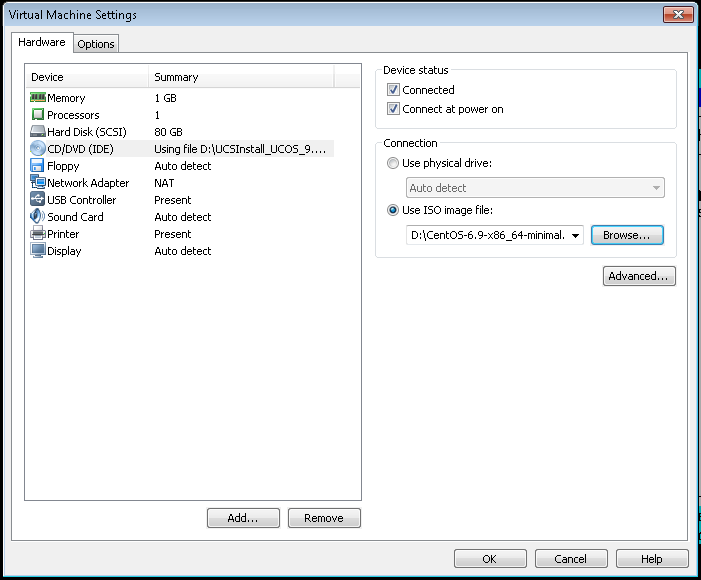
- Select the CentOS ISO file which you have downloaded
- Click on Open and Click on OK
Changing the BIOS Boot Order:
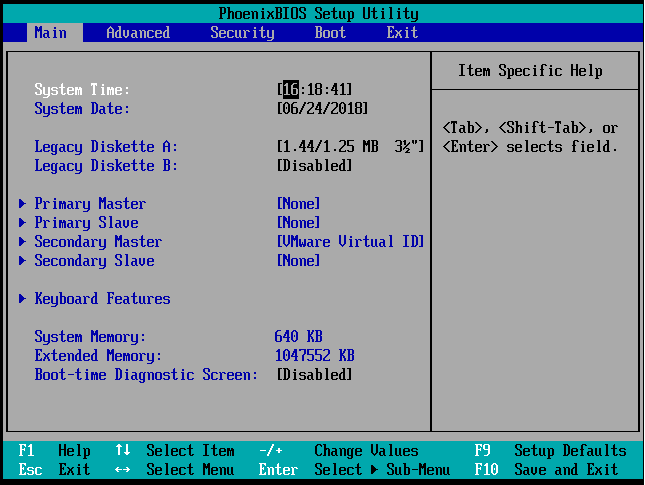
- Right Click the Virtual Machine and Navigate to Power > Click on Power on to BIOS

- You will be redirected to BIOS Setup Utility Screen
- Navigate to Boot Menu and Change the order as follows: To change the order you need to use + or – keys on your keyboardRemovable Devices
CD-ROM Drive
Hard Drive
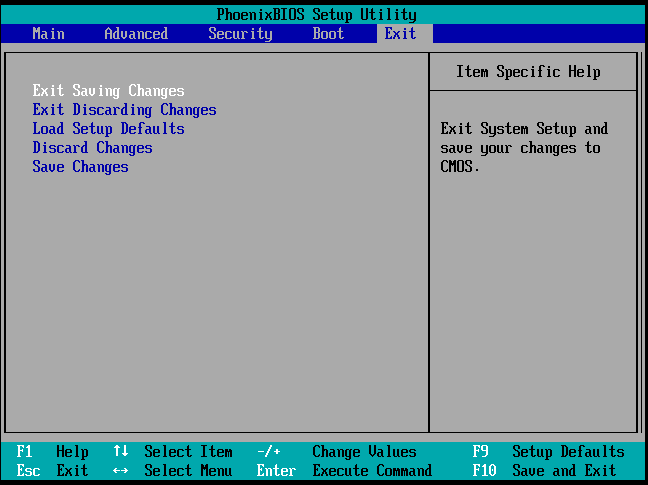
Network Boot from Intel E1000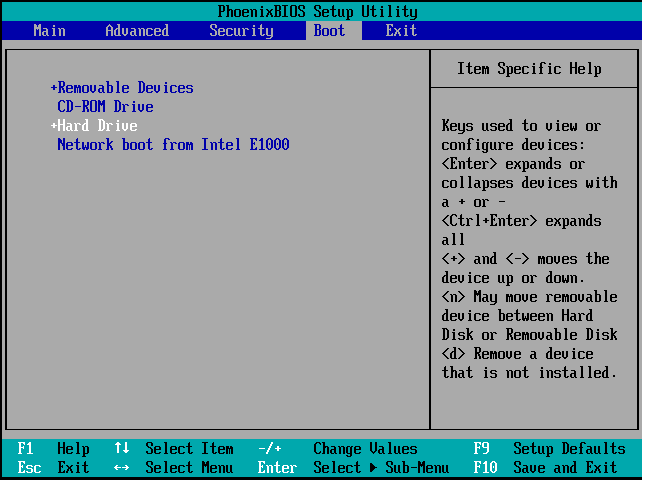 Once the order is change, press ESC button and hit Exit Saving Changes
Booting your Vmware using CentOS:
Your system will not boot using the CentOS ISO
- You will be prompted with CentOS Boot Screen Menu.
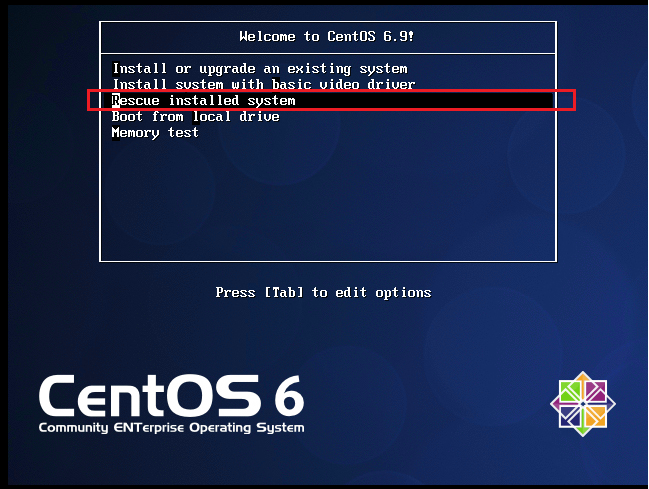
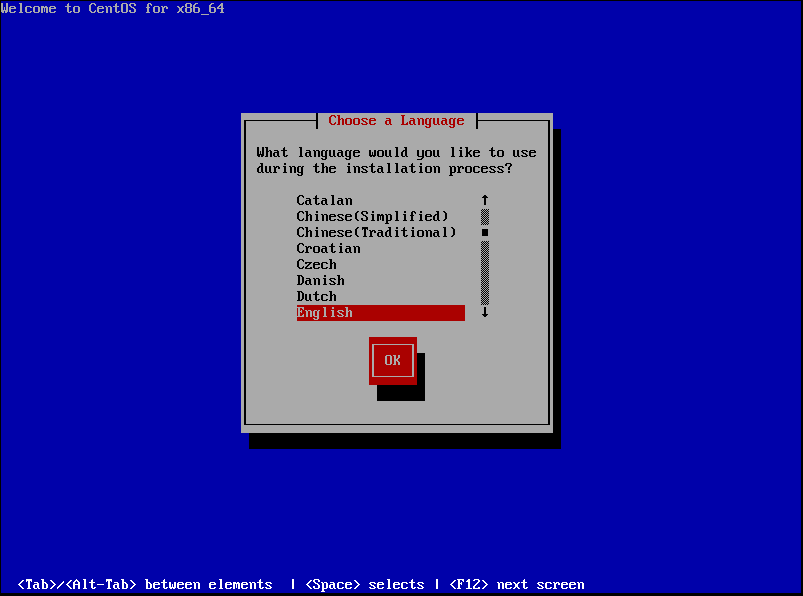
Select Rescue Installed System and hit Enter - Choose a language
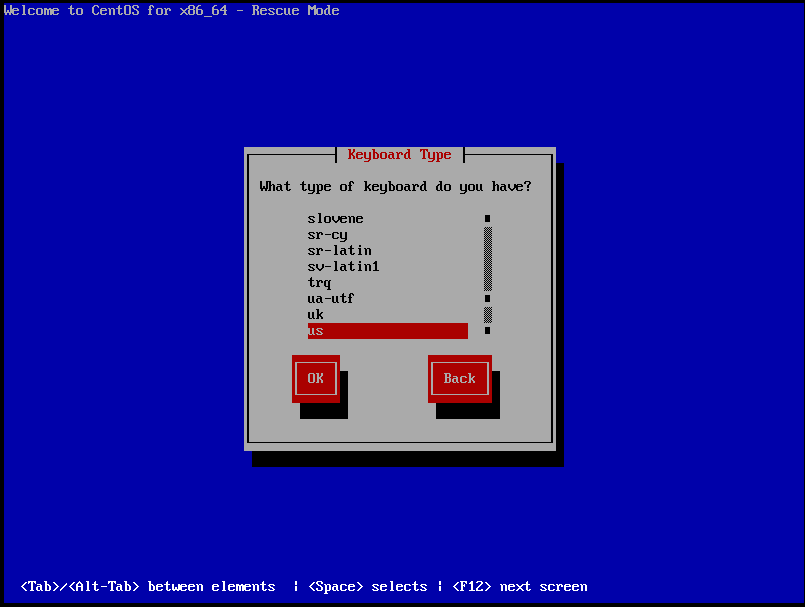
- Choose keyboard type
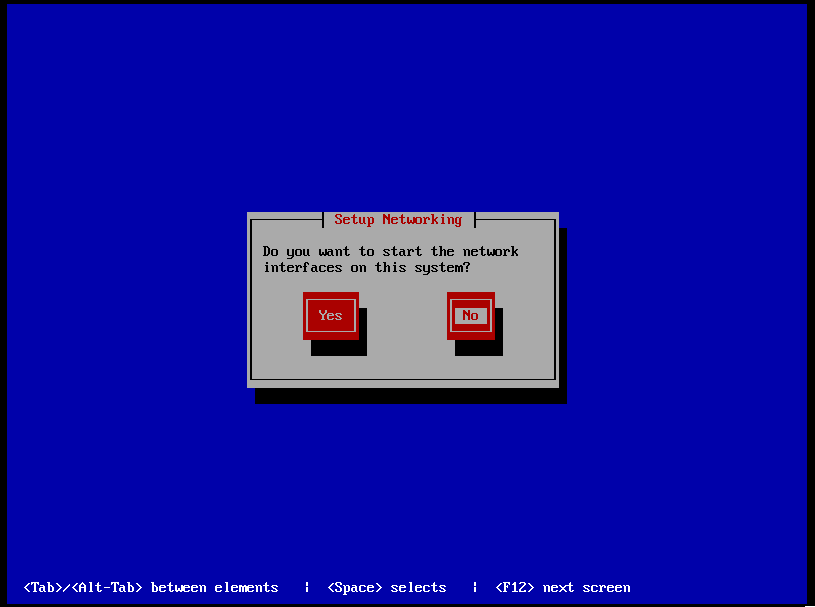
- Setup Networking – Choose No
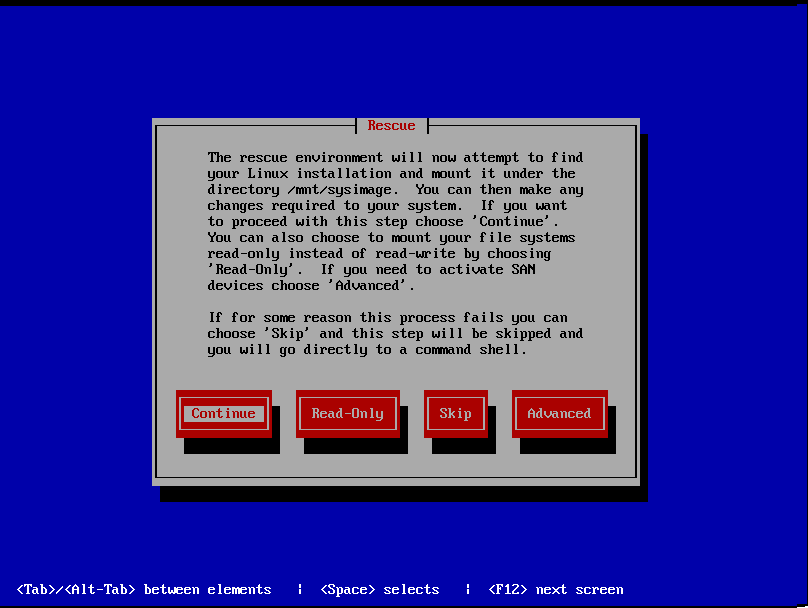
- Rescue Mode – Continue – Click on Continue and hit Enter
- Click on OK
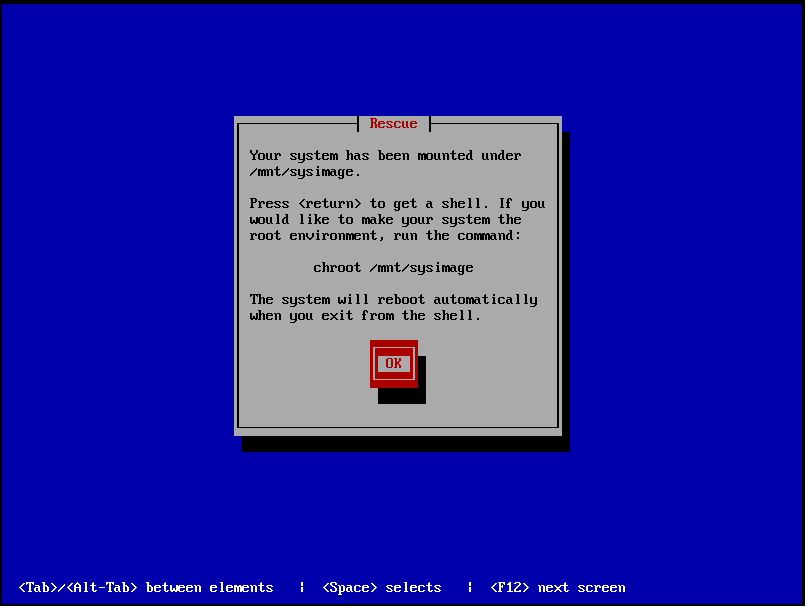
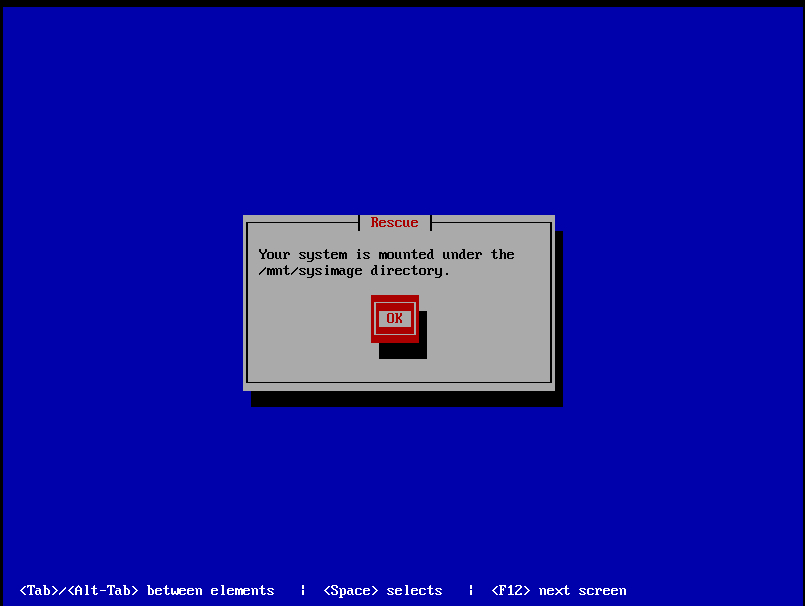
- Your system is mounted under /mnt/sysimage directory. Click on OK
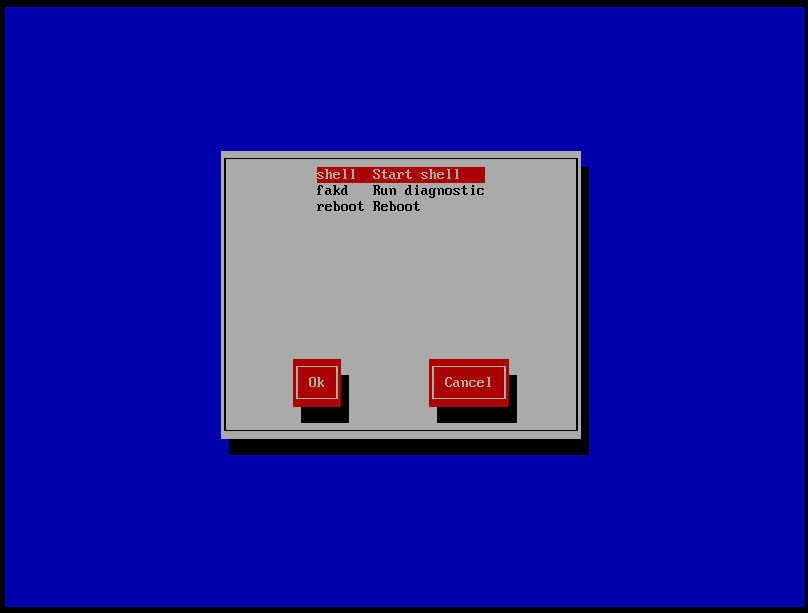
- Select Shell Start Shell and hit enter
- Enter commands as follows:chroot /mnt/sysimage/
(The chroot command changes its current and root directories to the provided directory and then run command)
rm /etc/securetty
(The rm (i.e., remove) command is used to delete files and directories.)
passwd root
New Password: (Enter your New UNIX Password)
Retype new password: (Re-Enter your UNIX Password)(The passwd command is used to change the password of a user account)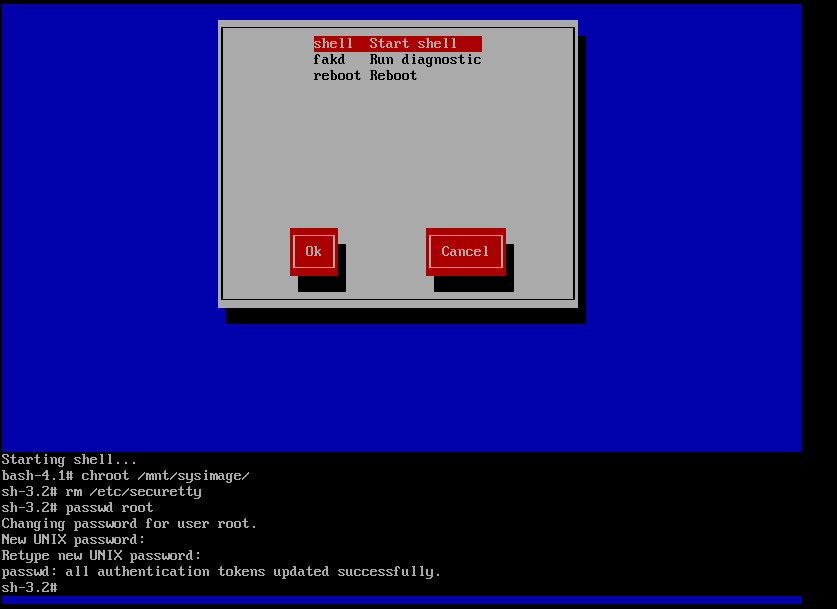
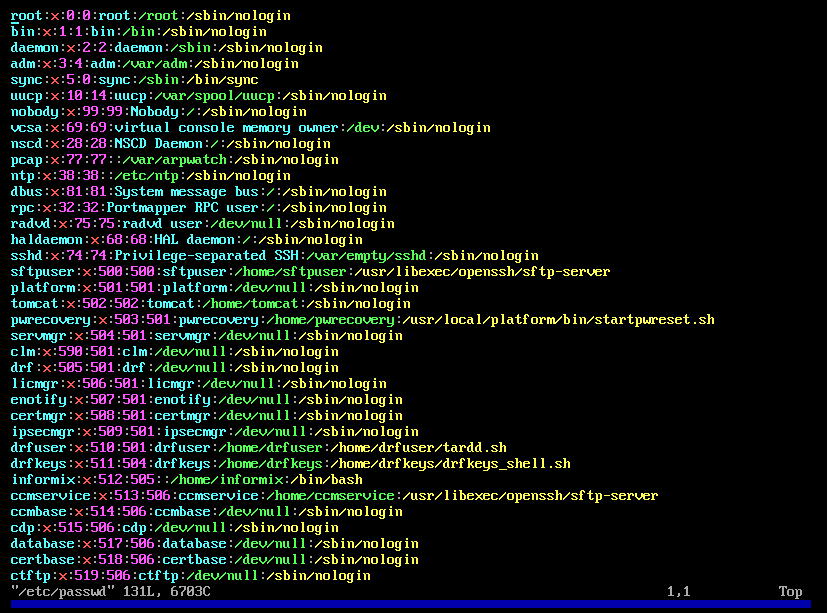
- Enter the following command in order to assign a shell to the root user::
vim /etc/passwd
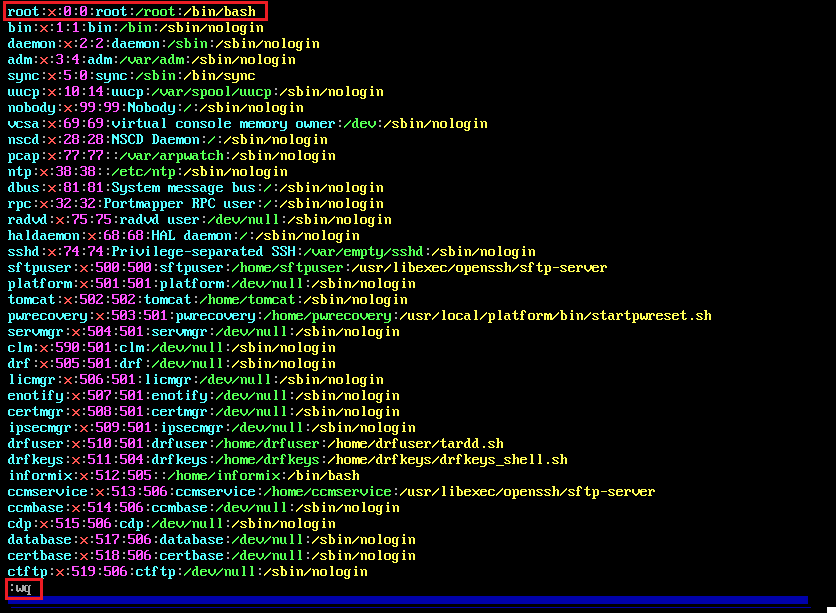
(Vim is an editor to create or edit a text file)a
(Press “a” key in your keyboard to append text)
“root:x:0:0:root:/root:/sbin/nologin”
REPLACE WITH
“root:x:0:0:root:/root:/bin/bash” ESC
(Press ESC button once replace is done):wq
(Press :wq keys to quit vim, writing out modified file to file named in original invocation)Original File:
Modified File
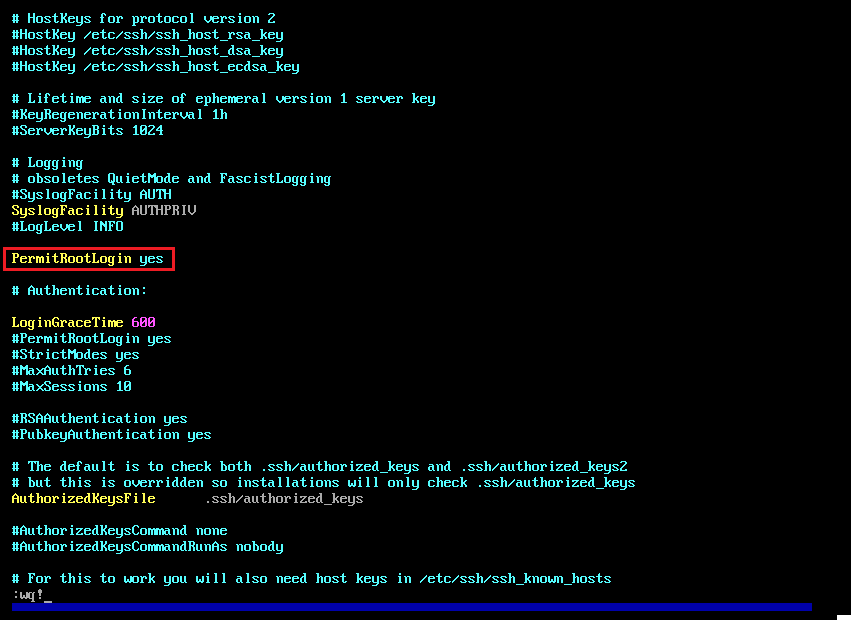
- Enter the following command in order to allow root login via SSH:vim /etc/ssh/sshd_config
(Use VIM editor to edit the sshd_config file)PermitRootLogin yes
(Press “a” key to append and enter the line anywhere in the file)ESC
:wq!(Press ESC and type :wq! in order to write the protected file and quit)
Original File
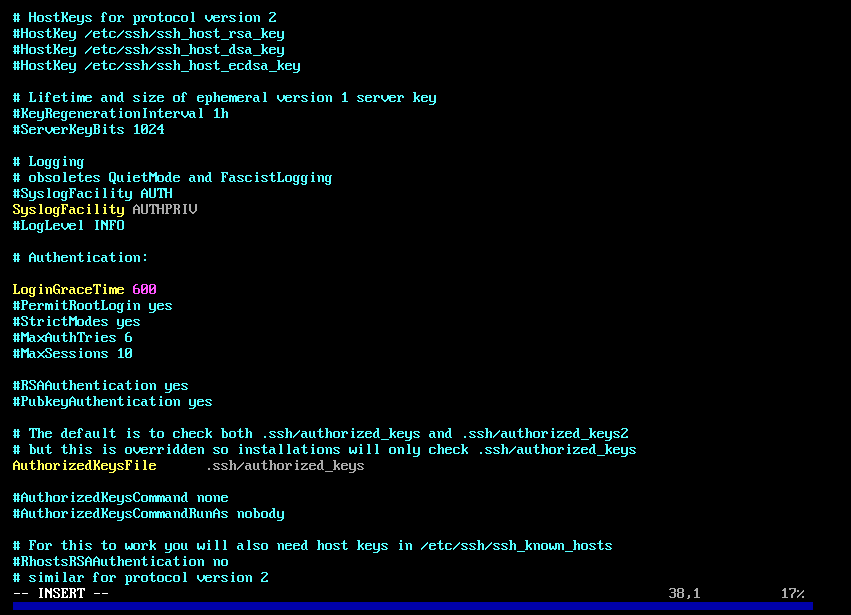
Modified File
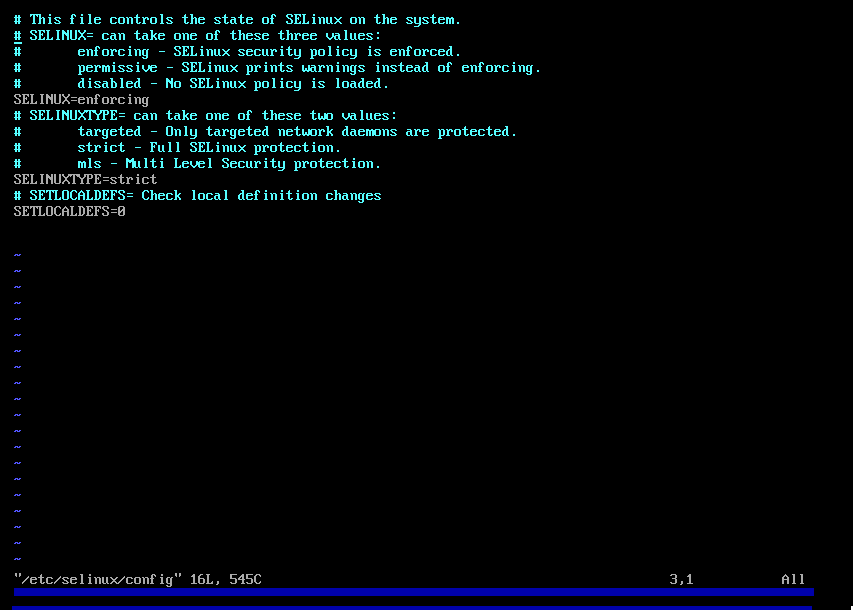
- Enter the following command in order to set the Selinux from enforcing to permissive:
vim /etc/selinux/config
(Use VIM editor to edit the config file)
“SELINUX=enforcing”
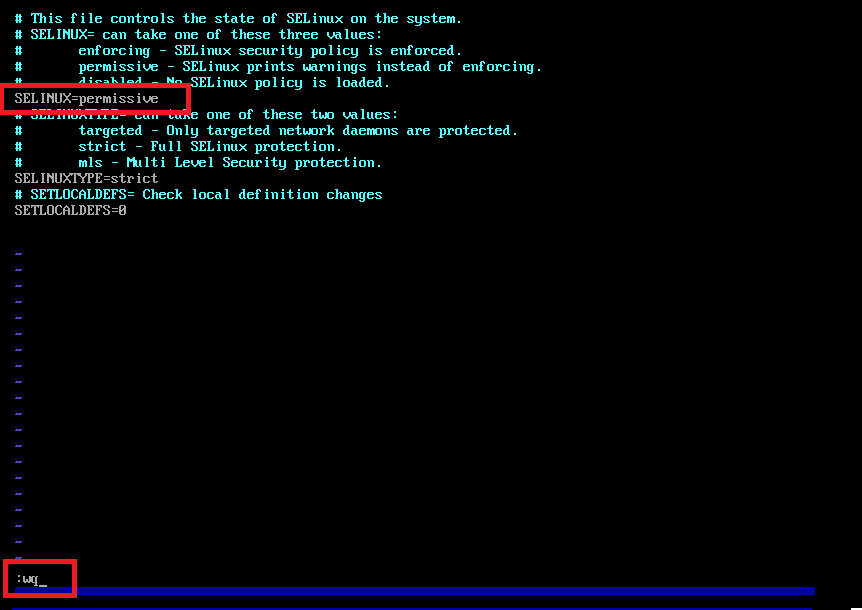
REPLACE WITH
“SELINUX=permissive”
(Replace “enforcing” with “permissive”)
ESC
:wq
(Press ESC and :wq to write and quit)
Original File
Modified File
That’s all, reboot the Virtual Machine.
Once the UC application is up, you should be able to login using the root account and the password you have set.
Hope this helps!

Pingback: Get Root Access to CUCM, CUC, UCCX just like TAC in less than a minute