Step by Step Cygwin Installation – Use Cygwin as a SSH/SFTP server to create backups for CUCM/CUC/UCCX/IM&P
The first and the foremost step is to download the Cygwin setup file from official website: Please choose the installation file according to your system i.e., 32 bit or 64bit.
- Once the file is downloaded, launch the setup file.
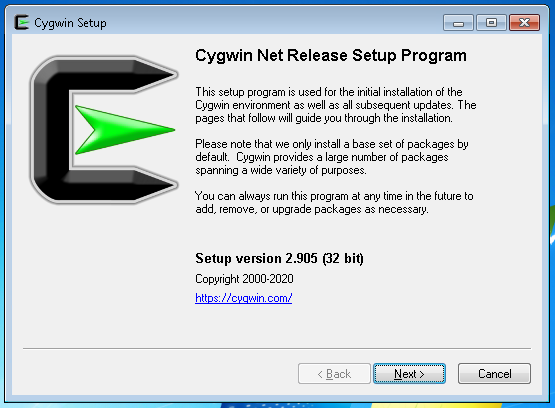
- Click on Next
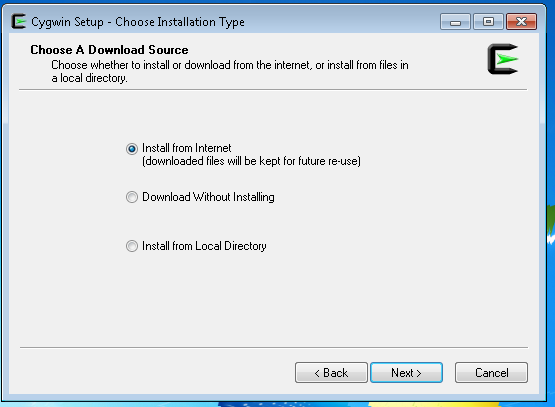
- Choose Install from Internet

- Click on Next
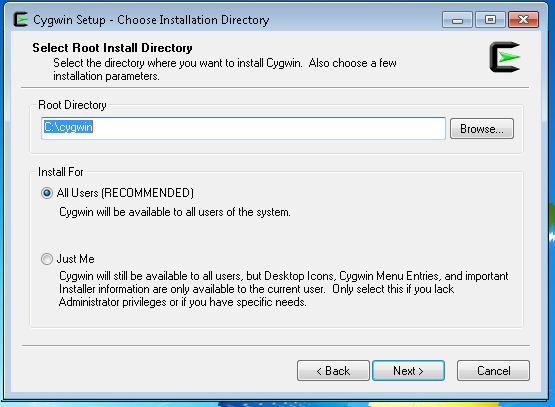
- Select the location where you would like the installation to happen.
- Click on Next
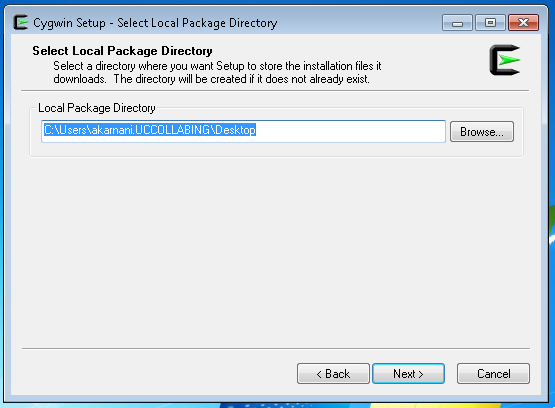
- Click on Next
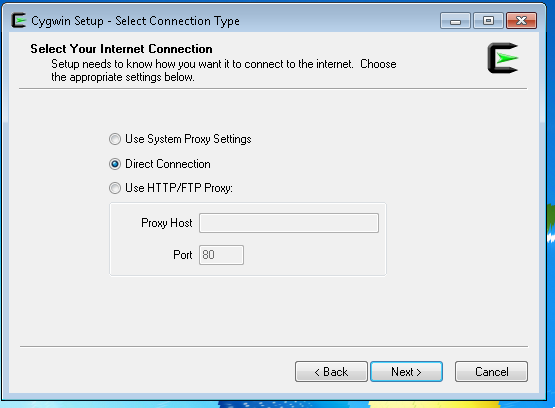
- Select the way you would want setup file to access Internet to download some files. In my case I do have direct Internet Connection on PC. If you are using any Proxy, you can select proxy.
- Click on Next
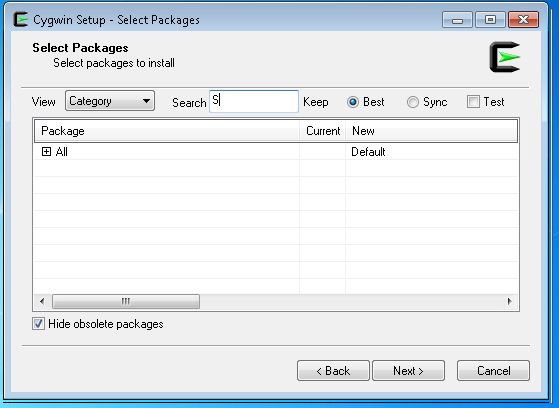
- The below screen will appear where you can select the package you wish to install
- in The search, type openssh and hit enter
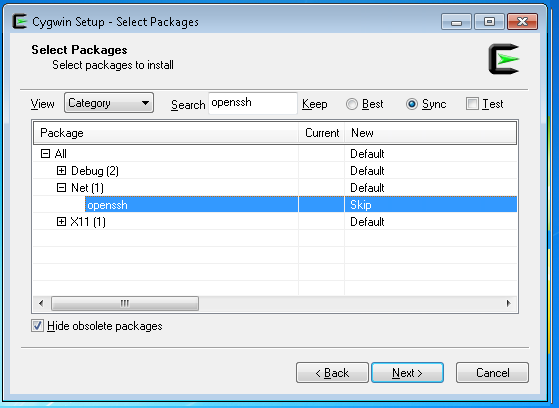
- Expand Net and select openssh and double click on Skip to select.
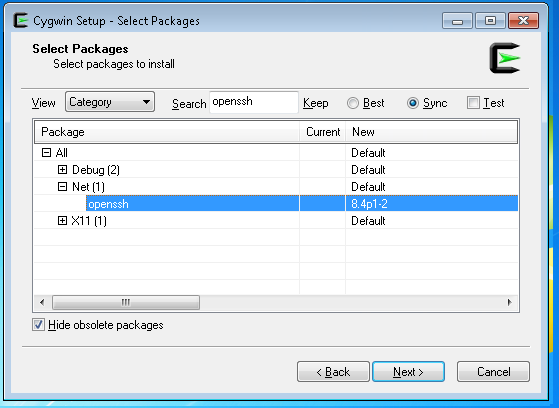
- Once done, click on Next
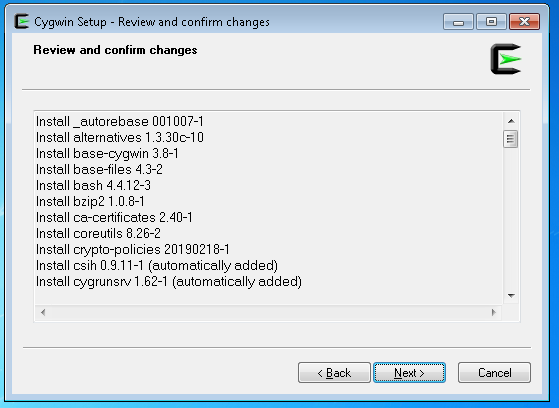
- Click on Next
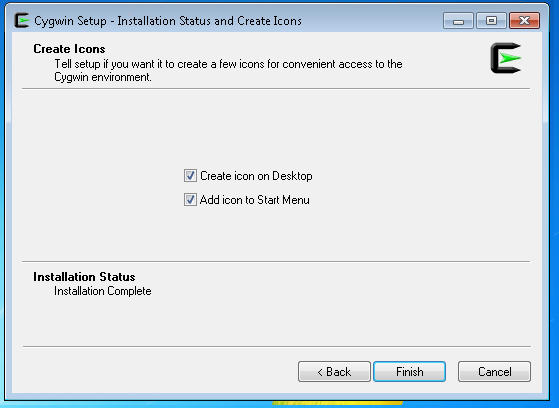
- The installation is completed. Click on Finish
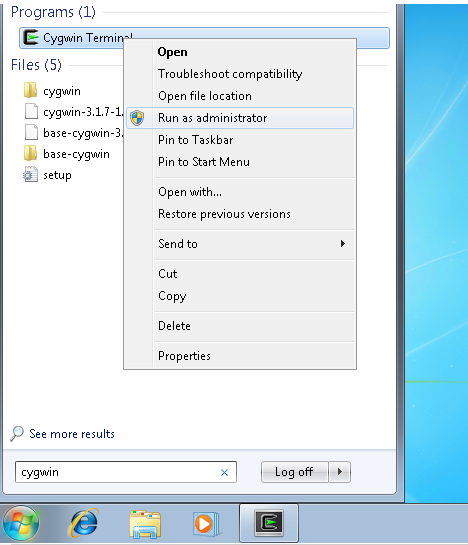
- Once the installation is finished, then you need to run Cygwin application as Administrator.
- Refer to the below screenshot and enter the information as requested.
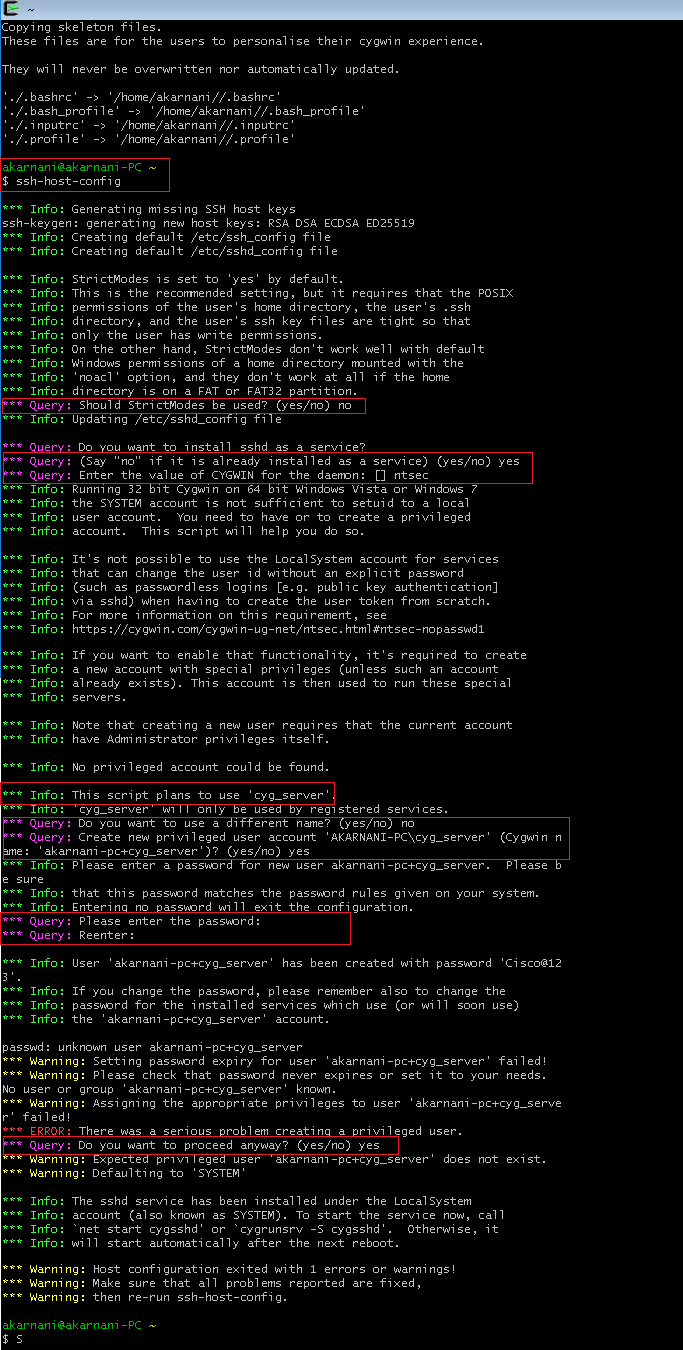
Copying skeleton files.
These files are for the users to personalise their cygwin experience.

They will never be overwritten nor automatically updated.

'./.bashrc' -> '/home/akarnani//.bashrc'
'./.bash_profile' -> '/home/akarnani//.bash_profile'
'./.inputrc' -> '/home/akarnani//.inputrc'
'./.profile' -> '/home/akarnani//.profile'

akarnani@akarnani-PC ~
$ ssh-host-config

*** Info: Generating missing SSH host keys
ssh-keygen: generating new host keys: RSA DSA ECDSA ED25519
*** Info: Creating default /etc/ssh_config file
*** Info: Creating default /etc/sshd_config file

*** Info: StrictModes is set to 'yes' by default.
*** Info: This is the recommended setting, but it requires that the POSIX
*** Info: permissions of the user's home directory, the user's .ssh
*** Info: directory, and the user's ssh key files are tight so that
*** Info: only the user has write permissions.
*** Info: On the other hand, StrictModes don't work well with default
*** Info: Windows permissions of a home directory mounted with the
*** Info: 'noacl' option, and they don't work at all if the home
*** Info: directory is on a FAT or FAT32 partition.
*** Query: Should StrictModes be used? (yes/no) no
*** Info: Updating /etc/sshd_config file

*** Query: Do you want to install sshd as a service?
*** Query: (Say "no" if it is already installed as a service) (yes/no) yes
*** Query: Enter the value of CYGWIN for the daemon: [] ntsec
*** Info: Running 32 bit Cygwin on 64 bit Windows Vista or Windows 7
*** Info: the SYSTEM account is not sufficient to setuid to a local
*** Info: user account.  You need to have or to create a privileged
*** Info: account.  This script will help you do so.

*** Info: It's not possible to use the LocalSystem account for services
*** Info: that can change the user id without an explicit password
*** Info: (such as passwordless logins [e.g. public key authentication]
*** Info: via sshd) when having to create the user token from scratch.
*** Info: For more information on this requirement, see
*** Info: https://cygwin.com/cygwin-ug-net/ntsec.html#ntsec-nopasswd1

*** Info: If you want to enable that functionality, it's required to create
*** Info: a new account with special privileges (unless such an account
*** Info: already exists). This account is then used to run these special
*** Info: servers.

*** Info: Note that creating a new user requires that the current account
*** Info: have Administrator privileges itself.

*** Info: No privileged account could be found.

*** Info: This script plans to use 'cyg_server'.
*** Info: 'cyg_server' will only be used by registered services.
*** Query: Do you want to use a different name? (yes/no) no
*** Query: Create new privileged user account 'AKARNANI-PC\cyg_server' (Cygwin name: 'akarnani-pc+cyg_server')? (yes/no) yes
*** Info: Please enter a password for new user akarnani-pc+cyg_server.  Please be sure
*** Info: that this password matches the password rules given on your system.
*** Info: Entering no password will exit the configuration.
*** Query: Please enter the password:
*** Query: Reenter:

*** Info: User 'akarnani-pc+cyg_server' has been created with password 'Cisco@123'.
*** Info: If you change the password, please remember also to change the
*** Info: password for the installed services which use (or will soon use)
*** Info: the 'akarnani-pc+cyg_server' account.

passwd: unknown user akarnani-pc+cyg_server
*** Warning: Setting password expiry for user 'akarnani-pc+cyg_server' failed!
*** Warning: Please check that password never expires or set it to your needs.
No user or group 'akarnani-pc+cyg_server' known.
*** Warning: Assigning the appropriate privileges to user 'akarnani-pc+cyg_server' failed!
*** ERROR: There was a serious problem creating a privileged user.
*** Query: Do you want to proceed anyway? (yes/no) yes
*** Warning: Expected privileged user 'akarnani-pc+cyg_server' does not exist.
*** Warning: Defaulting to 'SYSTEM'

*** Info: The sshd service has been installed under the LocalSystem
*** Info: account (also known as SYSTEM). To start the service now, call
*** Info: `net start cygsshd' or `cygrunsrv -S cygsshd'.  Otherwise, it
*** Info: will start automatically after the next reboot.

*** Warning: Host configuration exited with 1 errors or warnings!
*** Warning: Make sure that all problems reported are fixed,
*** Warning: then re-run ssh-host-config.

akarnani@akarnani-PC ~
$
- Next step is to run the SSH service by entering the following command.

akarnani@akarnani-PC ~
$ net start cygsshd
The CYGWIN cygsshd service is starting.
The CYGWIN cygsshd service was started successfully.


akarnani@akarnani-PC ~
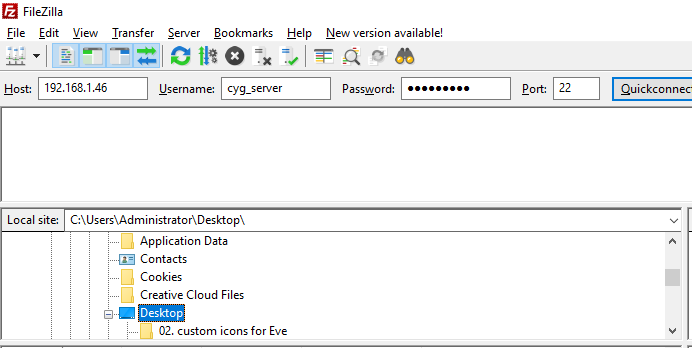
- Use any SFTP/FTP application to test. In my case, I will use Filezilla to test the credentials.
- Enter the IP Address of the server/machine where you installed the Cygwin application. Enter the username as “cyg_server” and password that was created. Also mention the port number as 22.
- Click on QuickConnect.
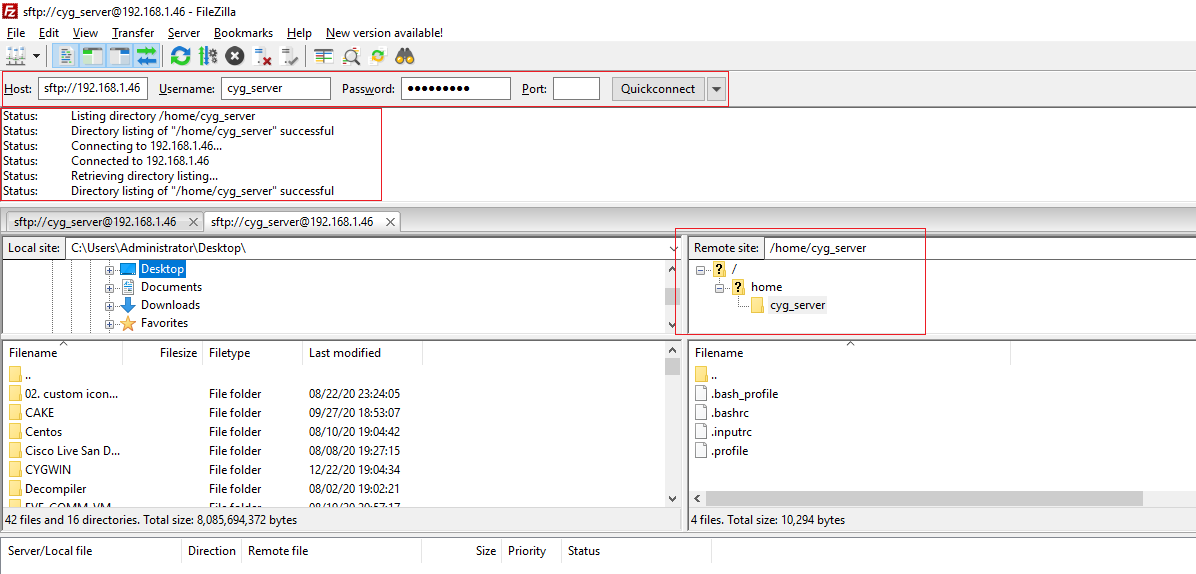
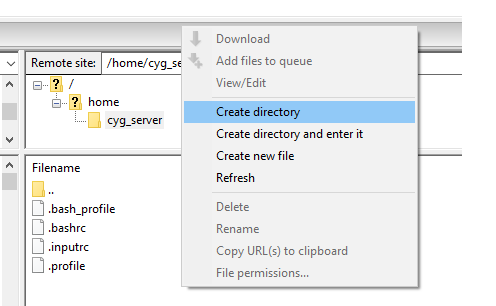
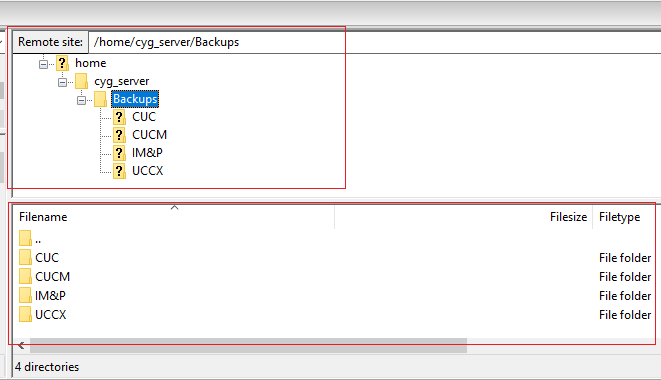
- If you are using it to store CUCM/CUC/UCCX/IM&P backup server, on the right hand side, I would create a folder called Backup and under that Backup Folder, subfolders as CUCM, CUC, UCCX, IM&P.
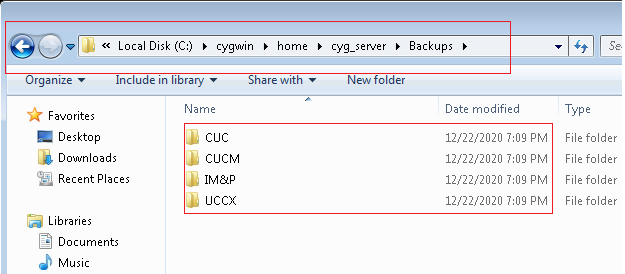
- The location on the windows server/system would be the installation path where your Cygwin has been installed.
C:\PATH_TO_CYGWIN_INSTALLATION_FOLDER\home\USERNAME_YOU_CREATED\
In our case, the application was installed in C:\ drive so our path is “C:\cygwin\home\cyg_server\”
You are all set to take backups now!

I am working in an IT company and having 10+ years of experience into Cisco IP Telephony and Contact Center. I have worked on products like CUCM, CUC, UCCX, CME/CUE, IM&P, Voice Gateways, VG224, Gatekeepers, Attendant Console, Expressway, Mediasense, Asterisk, Microsoft Teams, Zoom etc. I am not an expert but i keep exploring whenever and wherever i can and share whatever i know. You can visit my LinkedIn profile by clicking on the icon below.
“Everyone you will ever meet knows something you don’t.” ― Bill Nye
