Cisco Unity Connection Audiotext Manager Installation
Have you worked on Cisco Unity Connection Audiotext Manager by ciscounitytools? If no, then this is one among the best tool for managing Unity Connection Audio Files.
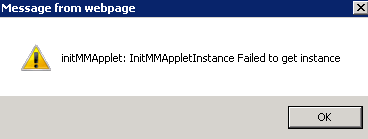
Generally, we do upload greetings in Unity Connection by accessing the Unity Connection GUI and upload the audio file in Call Handlers/Users Mailbox in Standard/Closed/Holiday Greetings using Media Master tool. At times, Media Master tool fail to load and it may give you error like “Missing Required Permission manifest attribute in main jar” or “initMMApplet:InitMMAppletInstance failed to get instance” which may be due to Java/Flash/Permission issue into the PC.
In such situation, i found a very small and a handy tool which works great for uploading the greeting into Unity Connection but that tool sometimes fail to work in some cases. The link for that small and handy tool is shared at the end of the post.
In such situation, we are left with no other choices except hit and trial by upgrading or downgrading the Java or Flash versions or granting administrator privileges to the user to resolve the issue. To overcome the issue, there is a tool by ciscounitytools which works great in all the situation. The only drawback is that the size of the tool is more i.e., 400 MB+.
Installation Procedure:
To use the tool, you need to download two files using the below link:
One would be the actual tool i.e., AudioText Manager Setup file which would be around 120 MB and Informix ODBC Drivers file (IBM Informix Client SDK Install for all 32 and 64 bit Windows Systems) which would be around 330 MB. Once the files are downloaded, install the following :
- Informix ODBC Driver and follow the installation steps on the screen
- AudioText Manager and follow the installation steps on the screen
Once the installation is completed, follow the below steps:
- Login to Cisco Unity Connection Serviceability > Tools > Service Management
- Connection Database Proxy > Activate Database Proxy Service if not activated
- Login to Cisco Unity Connection Administrator
- Add a New User without Mailbox and add “Remote Administrator” and “System Administrator” role
- Change the Web Password for the user created
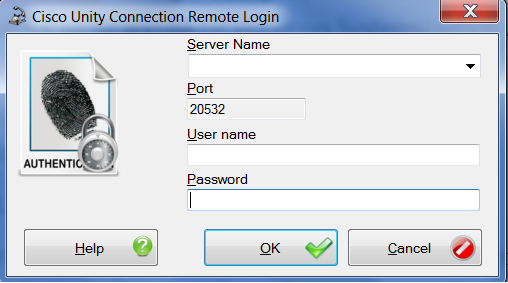
- Launch Audiotext Manager
- Server Name > Enter the IP Address of Cisco Unity Connection
- Port > Keep the Port Number as default (20532)
- Username > Enter the Username which you have created in the above step
- Password > Enter the User Password
- Click on OK
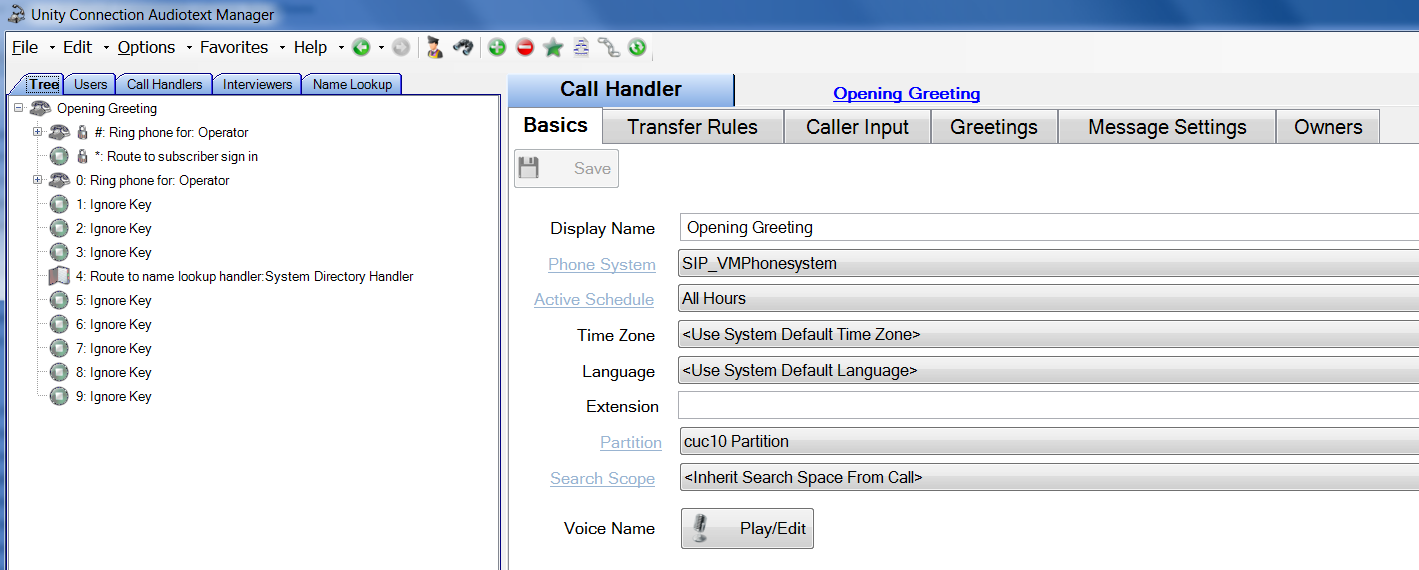
That’s all ! You are now ready to play with Unity Connection configuration using the tool.
Another Small and Handy tool to upload greetings into Cisco Unity Connection:
Hope this helps!

I am working in an IT company and having 10+ years of experience into Cisco IP Telephony and Contact Center. I have worked on products like CUCM, CUC, UCCX, CME/CUE, IM&P, Voice Gateways, VG224, Gatekeepers, Attendant Console, Expressway, Mediasense, Asterisk, Microsoft Teams, Zoom etc. I am not an expert but i keep exploring whenever and wherever i can and share whatever i know. You can visit my LinkedIn profile by clicking on the icon below.
“Everyone you will ever meet knows something you don’t.” ― Bill Nye

The procedure seems to be half complete for the scenario example you give.
Where do you go within the tool to actually upload a wav file?
It finally worked….thanks a lot for this post
Gracias, funcionó correctamente