UCCX Integration with CUCM
In this document I will be sharing the steps for UCCX integration with CUCM. I used UCCX version 10.6 for this document which was available to me. It may not be possible for me to show you the snippets from all CCX versions, however, I will highlight the options that are not available from UCCX version 11.x. Also, please visit cisco site in order to see what UCCX version are EOL/EOS.
Before you proceed with integrating UCCX with CUCM, make sure you have, CTIManager and AXL Service activated on CUCM.
Also create an Application user on CUCM with which has AXL API role or you can use the application user that you created during CUCM installation. I will be using application user created during CUCM installation.
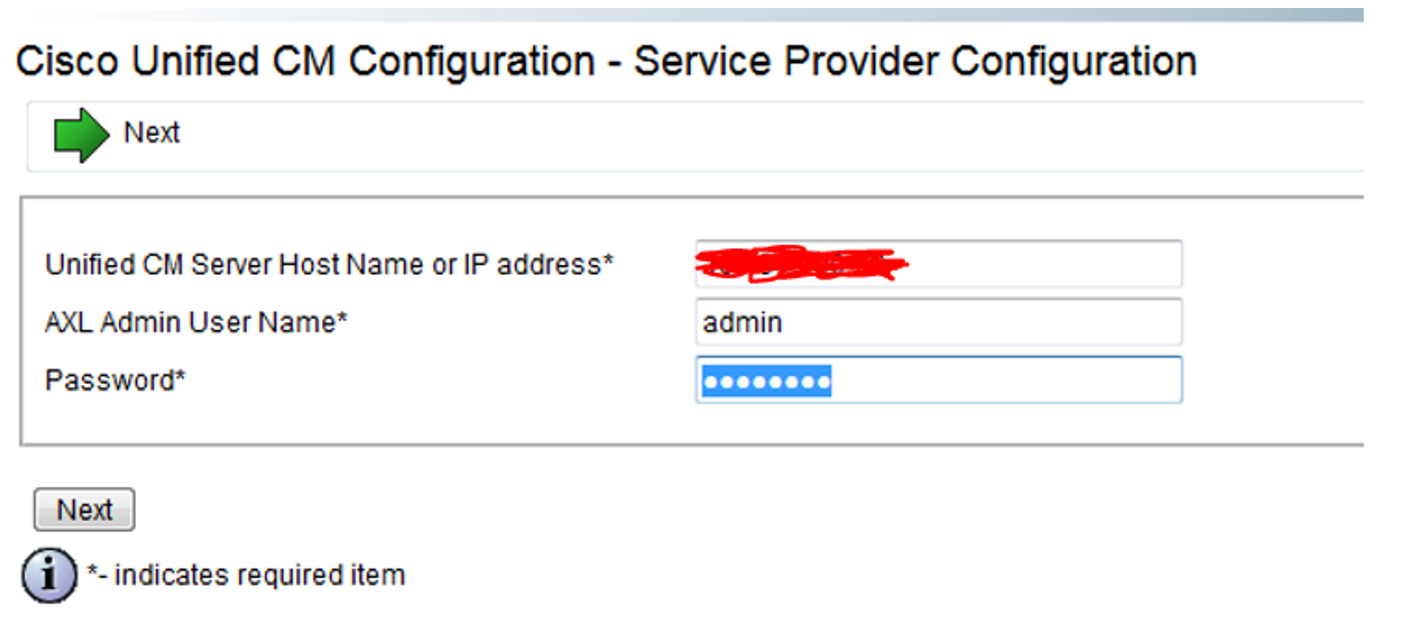
Step 1
When you first install UCCX and login to GUI with application username and password, you will get following prompt where you need put CUCM server’s IP on which you have AXL service running. With the help of this user UCCX authenticates with CUCM to make changes on CUCM (to push the jtapi, rmcm users, CTI port, CTI route point to CUCM).
Click Next
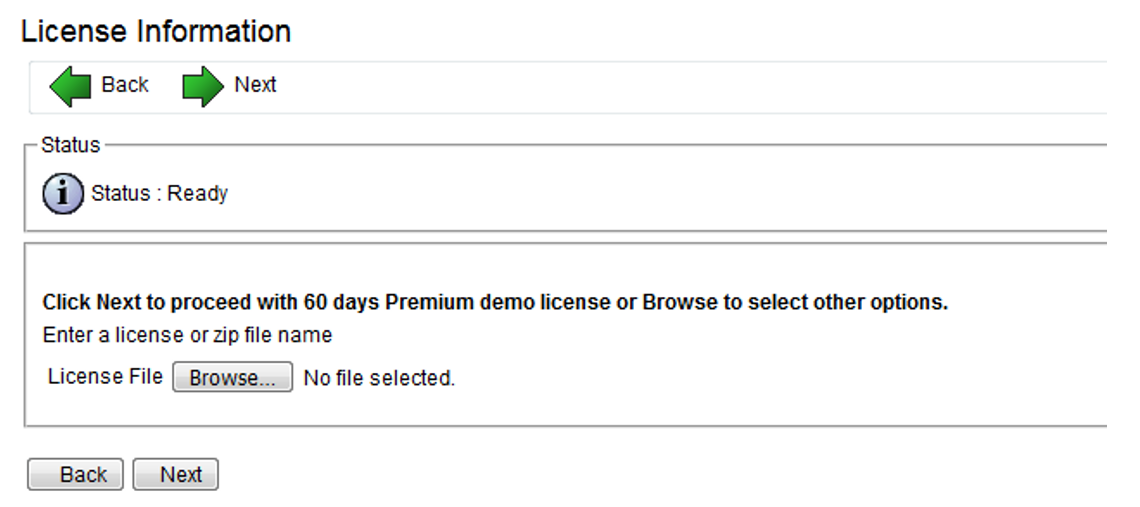
Step 2
Next you will be prompted to upload licenses if you have license file available. If not, you will get demo license for 60 days.
Note: Not sure how this interface look like in version 12.5 because we have Smart licensing also available along with classic licensing.
Click Next
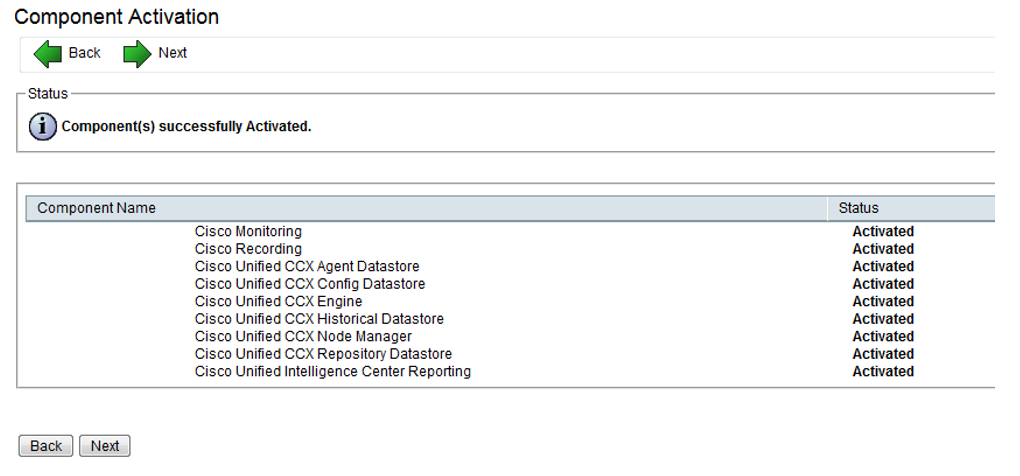
Step 3
UCCX will activate its components.
Note: Cisco Monitoring, Cisco Recording, Cisco Unified CCX Agent Datastore are only application till 10.x
Click Next
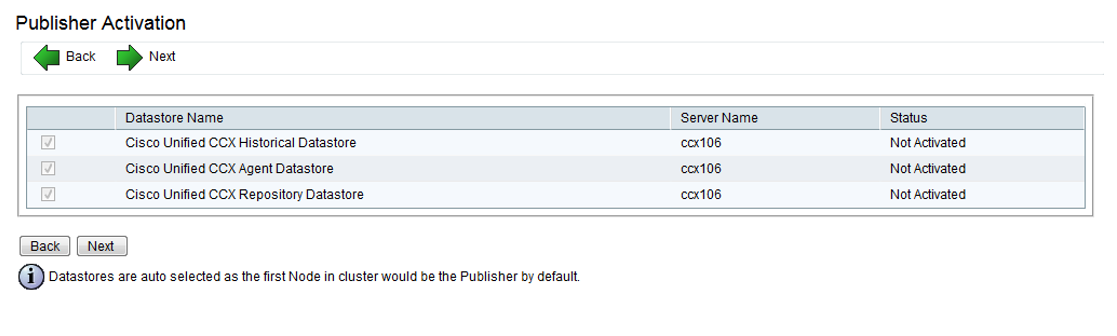
Step 4
If you install 11.x or later you will not see Cisco Unified CCX Agent Datastore. It’s only available in UCCX versions supporting CAD
Note: CAD is EOL/EOS.
These datastores will be shown as activated at final stage.
Click Next
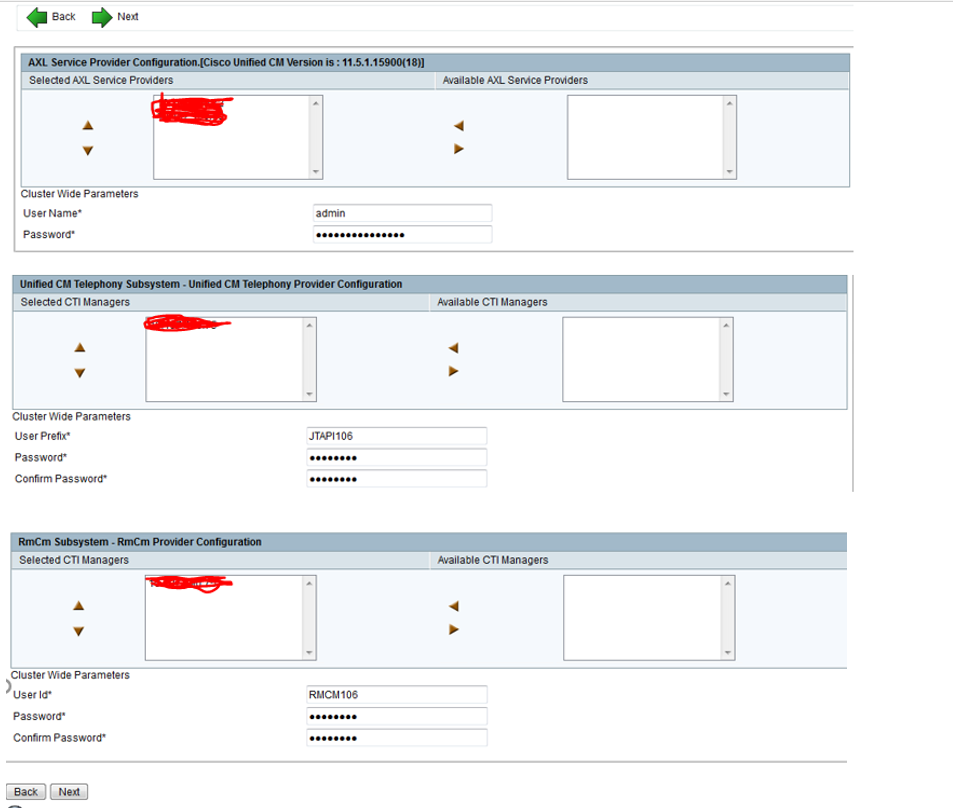
Step 5
You box on left hand side for AXL Service Provider, you will see IP address and credential of CUCM server which is running AXL service. If you have more than 1 server running AXL service in the cluster will appear in the box on right hand side and you may drag them to left as per your requirement.
Under Unified CM telephony Provider and Rmcm Provider, you will see IP address of CUCM nodes running the CTIManager service.
Drag them to left
Put the user and passwords’ whatever is suitable for you. This will create the same users as Application Users on CallManager when you proceed.
Click Next
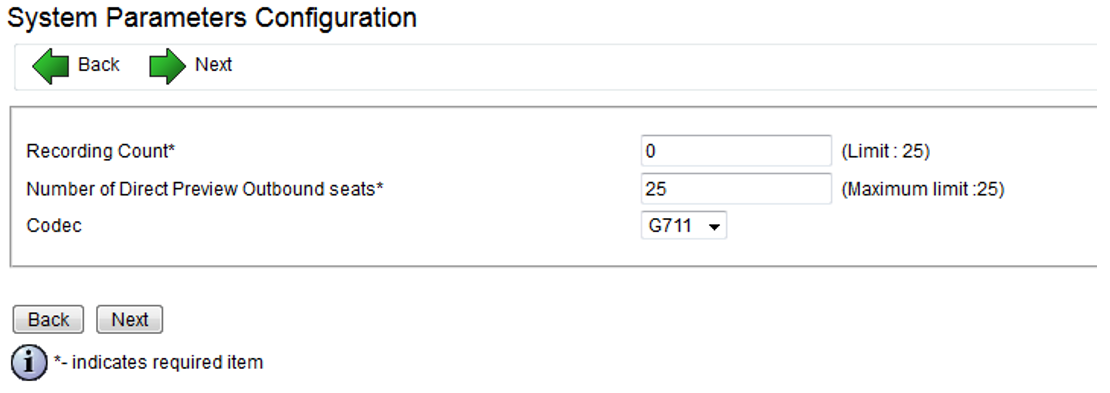
Step 6
Select the codec that you want to use for UCCX (G711 or G729) and outbound seats
Note: You won’t see Recording Count option from UCCX version 11.X
Click Next
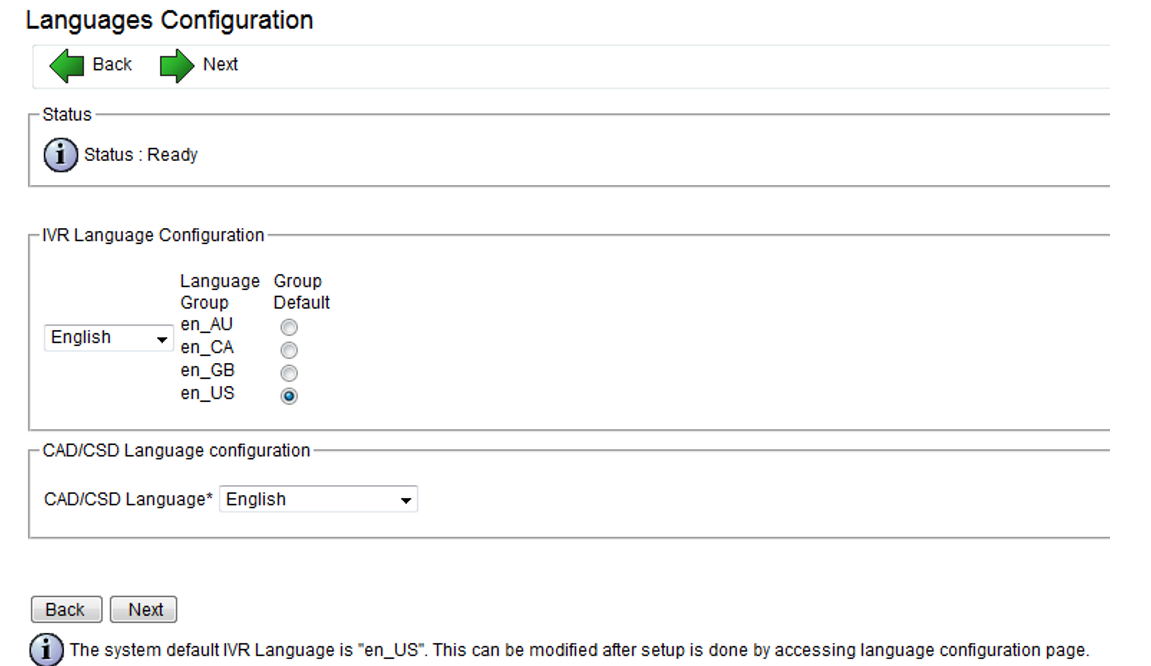
Step 7
Select the Language for IVR
Note: You won’t see CAD/CSD Language configuration option from 11.x. CAD/CSD Language is used to select the language that you will see on CAD/CSD
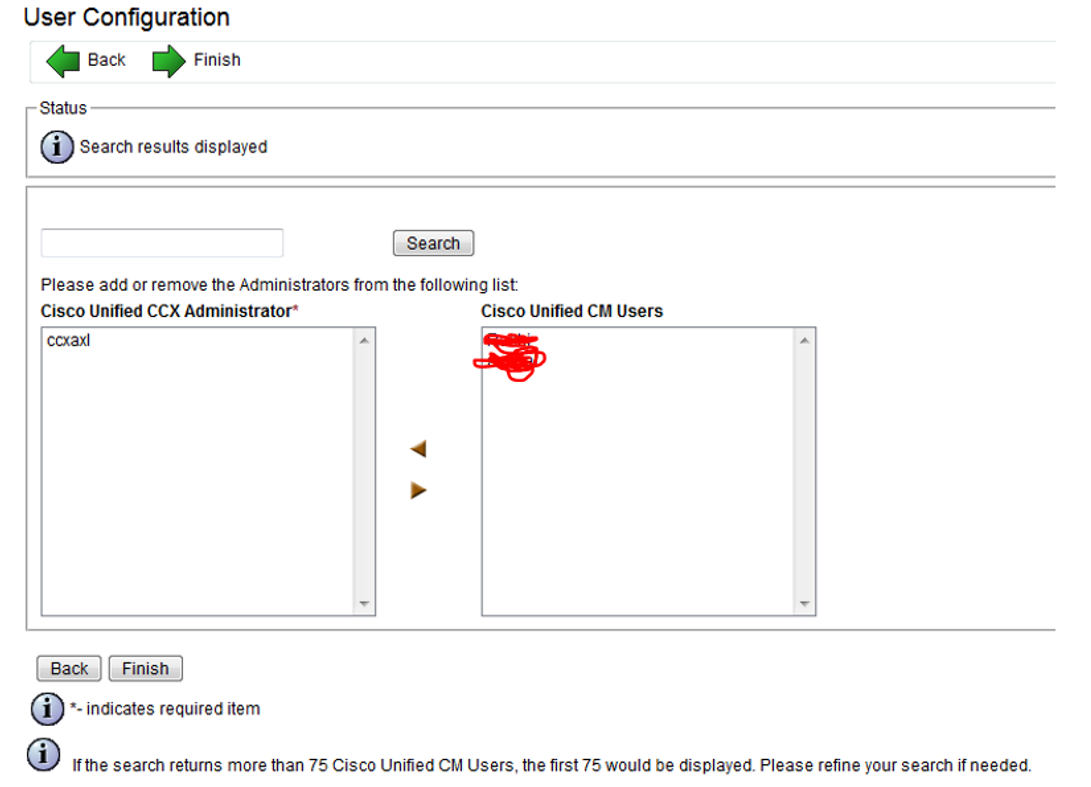
Step 8
Select the UCCX administrators
The users are populated from CUCM End User
Click Next
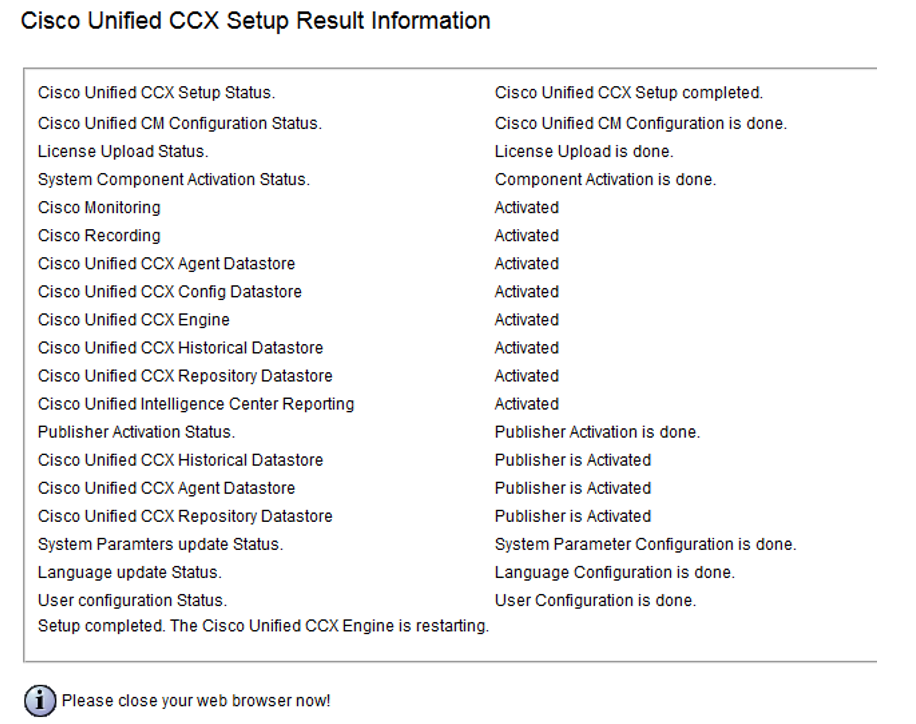
Step 9
Here you see the setup result
Note: Cisco Unified CCX Agent Datastore is only applicable till UCCX 10.x
Please find the link below for my previous post if you would like to refer anything:
Basic Definitions Relevant for UCCX for Beginners (uccollabing.com)
Thank you!!
Here is the YouTube video for CUCM integration with UCCX
I have total experience of 5+ years and working in Cisco VoIP since last 4+ years. I have worked on various Cisco applications like CUCM, UCCX, CUC, VGWs, 3rd party SBCs (Sonus and Oracle) with expertise on UCCX. Currently hold active certification is Cisco Certified Specialist – Collaboration Core (CLCOR 350-801).

Nice content . Explained very well .Thanks