Configure Single Number Reach (SNR)
Cisco Unified Mobility application known as Mobile Connect, commonly called Single Number Reach (SNR), provides Cisco Unified Communications users with the ability to be reached via a single enterprise phone number that rings on both their IP desk phone and their cellular phone (Remote Destination), simultaneously. Mobile Connect users can pick up an incoming call on either of their desk or cellular phones and at any point and can move the in-progress call from one of these phones to the other without interruption.
SNR Pre requisites:
- User Configuration
- Remote Destination Profile Configuration
- Remote Destination Configuration
Creating an End User:
- Create an end user (LDAP syn or local user).
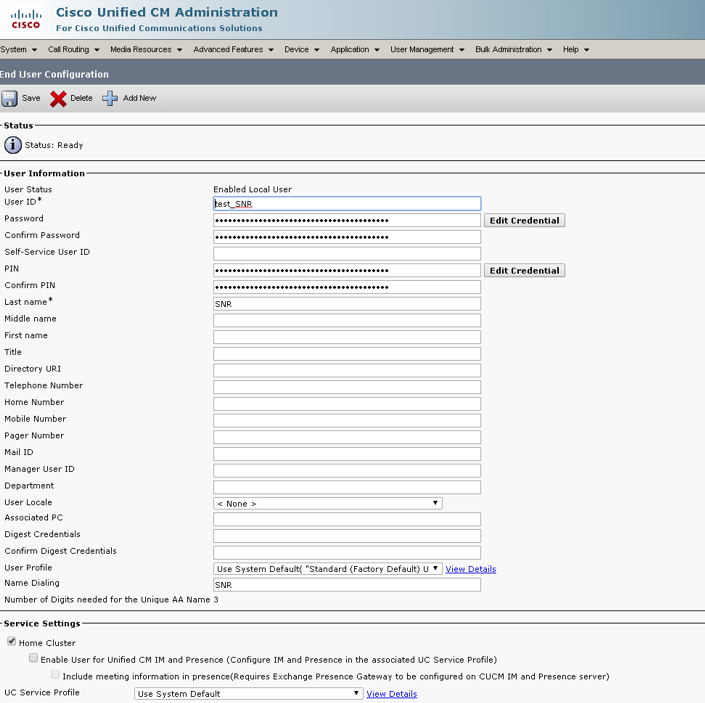
Enable Mobility for the End User:
2. Make sure you enable mobility under mobility information.
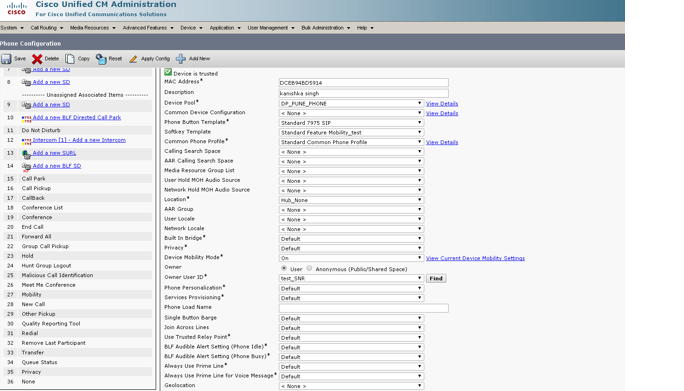
Associating User:
3. Now, associate the user which you have created to the phone under Device –> Phone.
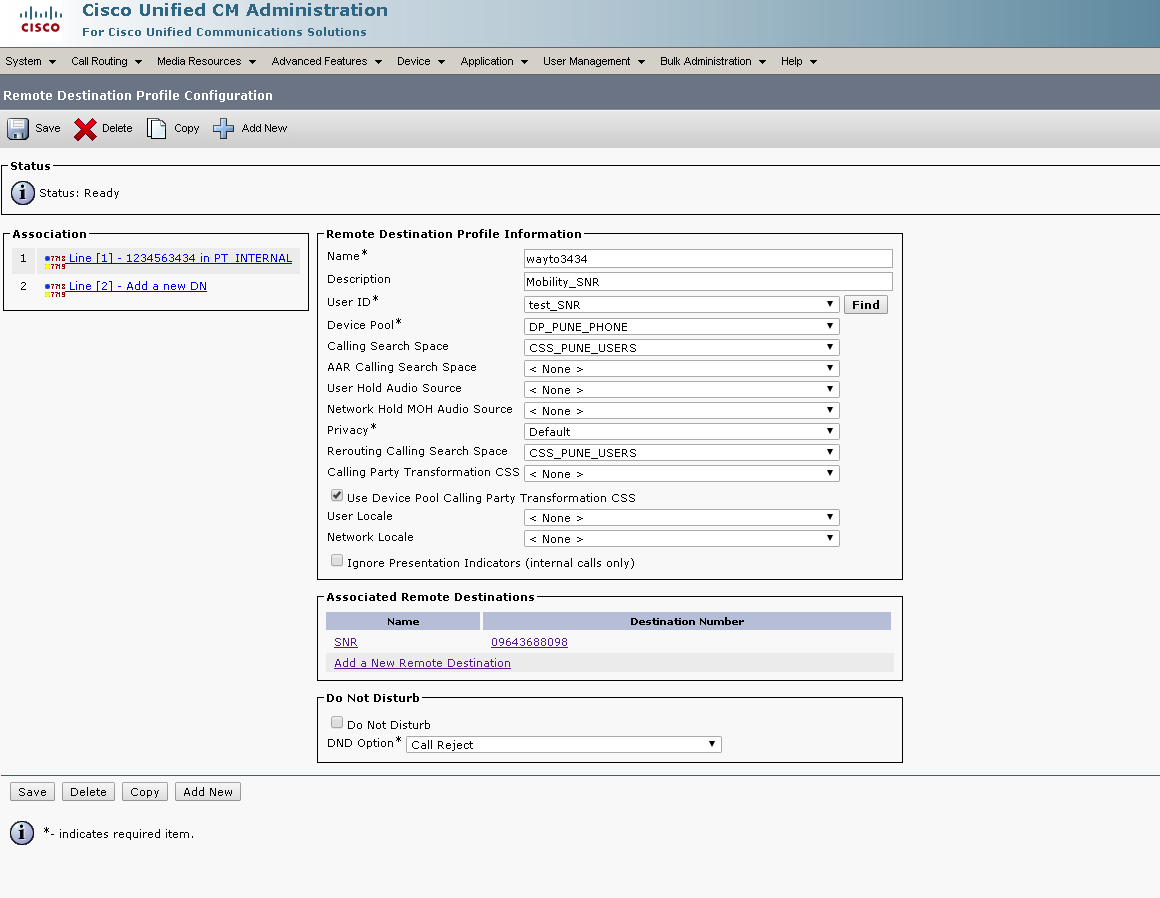
Creating a Remote Destination Profile (RDP):
4. Create a Remote Destination Profile (RDP) for the end user .
In order to create a new RDP profile, navigate to Device > Device Settings > Remote Destination Profile > Add new
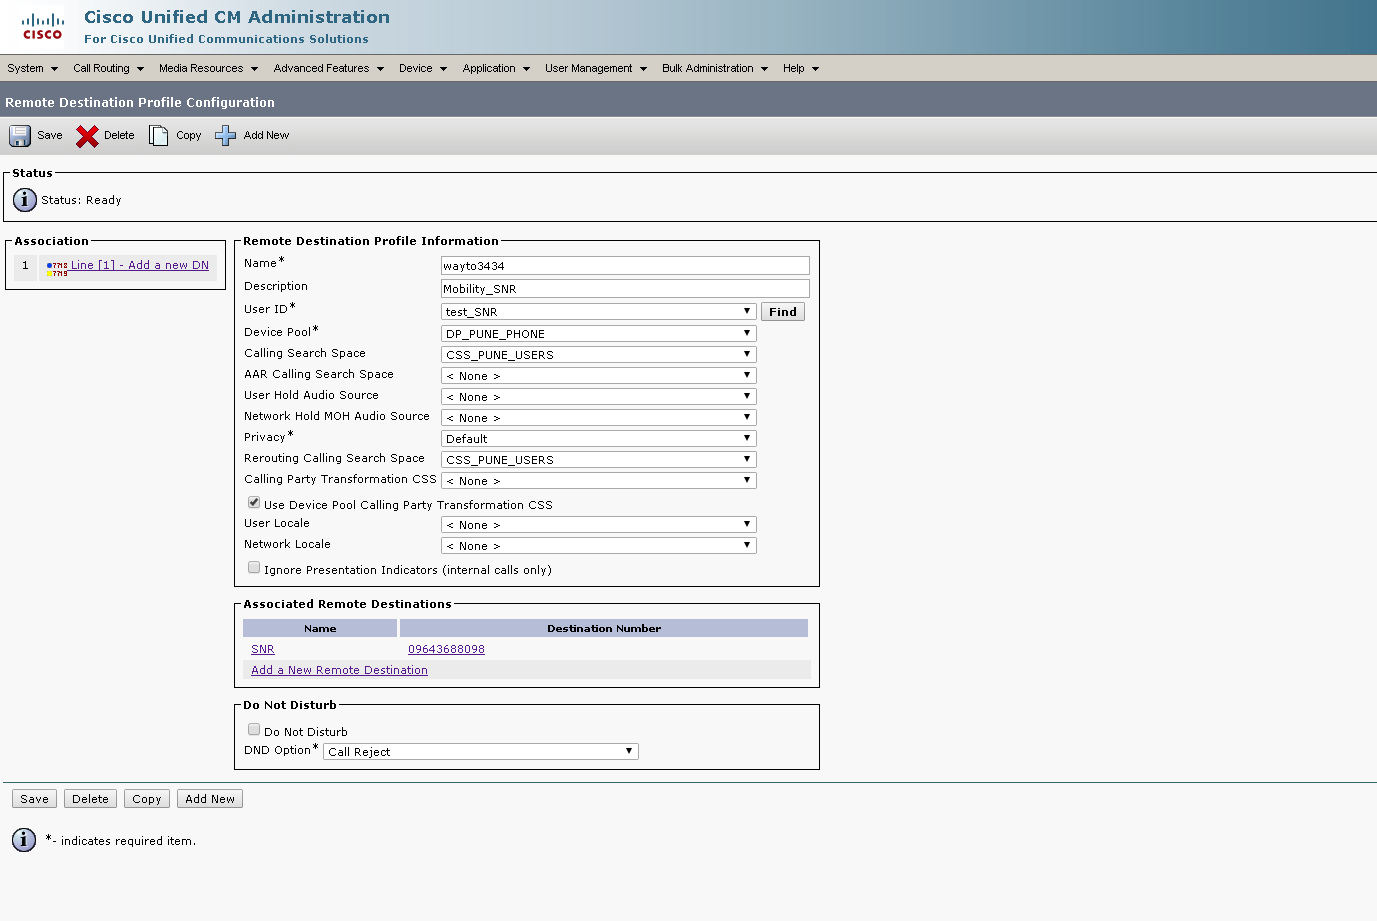
Give any name, associate the user Id which you’ve created, give calling search space, rerouting CSS().It is also important to note that the CUCM attempts to reach the remote destination through the Rerouting calling search Space.
5. Click Add a new DN to navigate to directory number configuration, where you need to specify the directory number of the desk phone with which you need to associate the RDP and then click Save
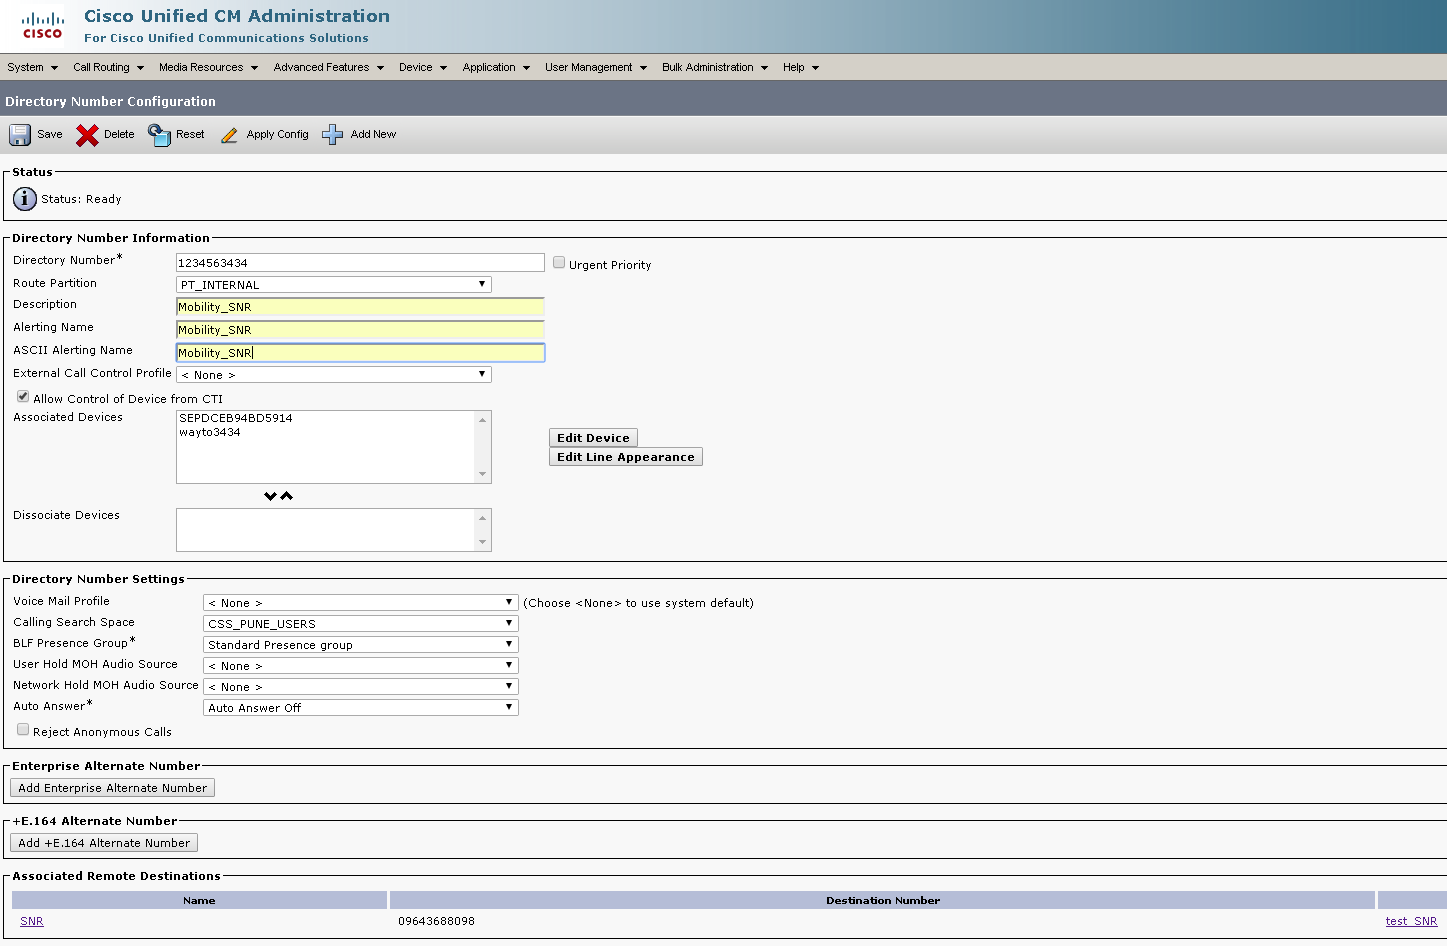
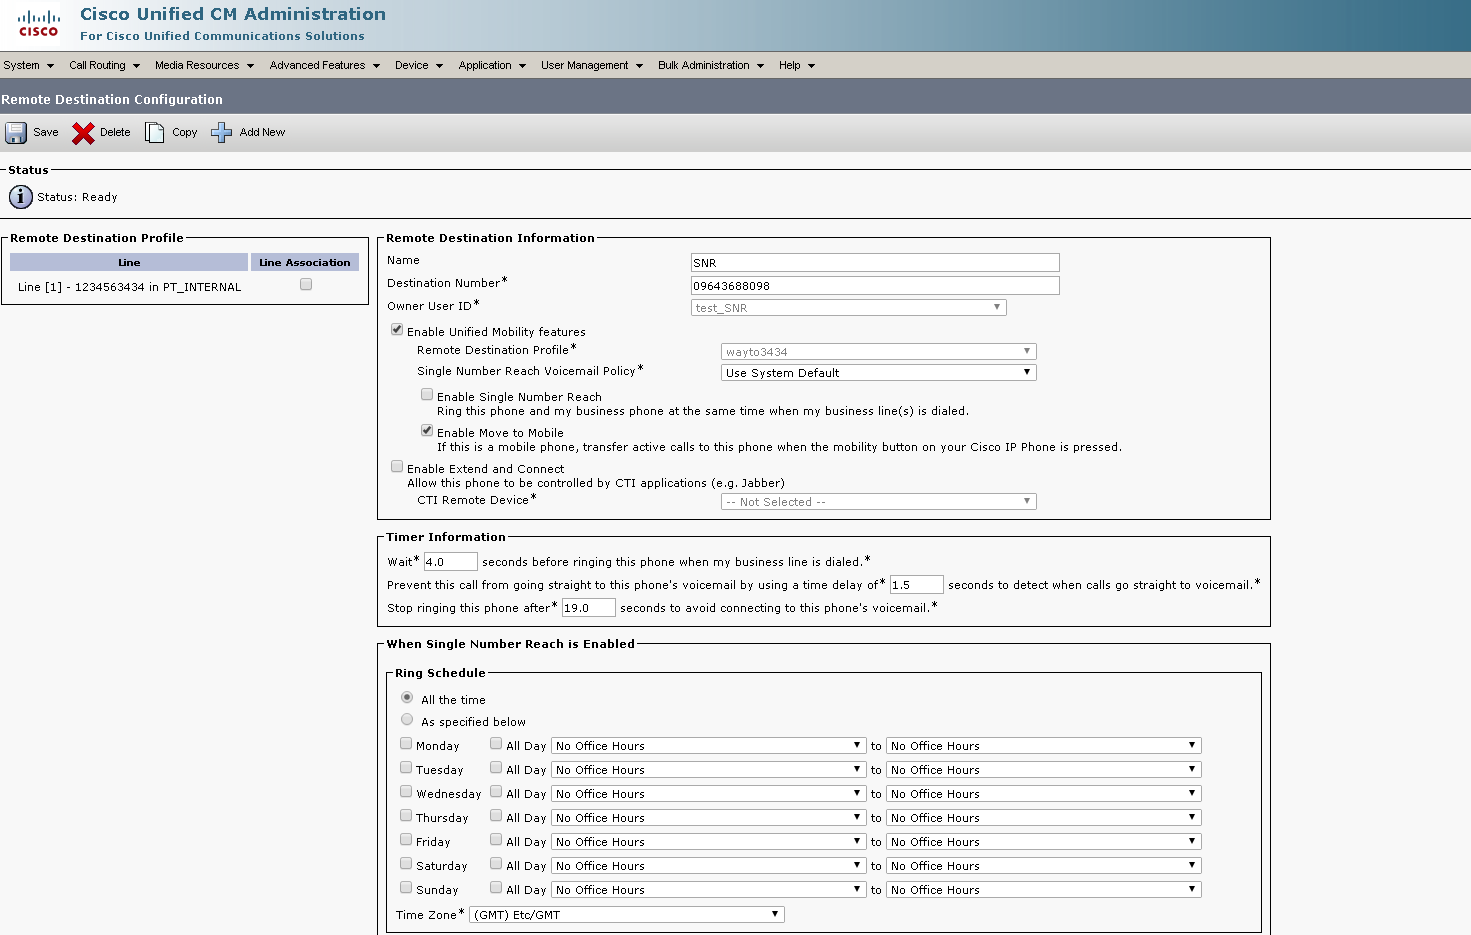
Creating a Remote Destination:
6. Now for Remote destination number
Specify the Destination number, as this is the number for your Remote destination.
Ensure that the check box, Enable Unified Mobility features, Enable Single Number Reach, Enable Move to Mobile is checked.Single Number Reach Voicemail Policy provides two options Timer control and User Control, of which the former one is default. Under the section Timer information, you can specify the amount of delay before which the Remote Destination should ring.
In case if the Remote Destination is required to ring immediately, you should set the Wait* as zero.
It is also important to calibrate the time in which the service provider of the remote destination sends the call to the voice-mail of the remote destination. The Stop ringing this phone after value should be set lesser then that to ensure that
call does not go to the voicemail of the cell phone. This time value is specified against Stop ringing this phone after.
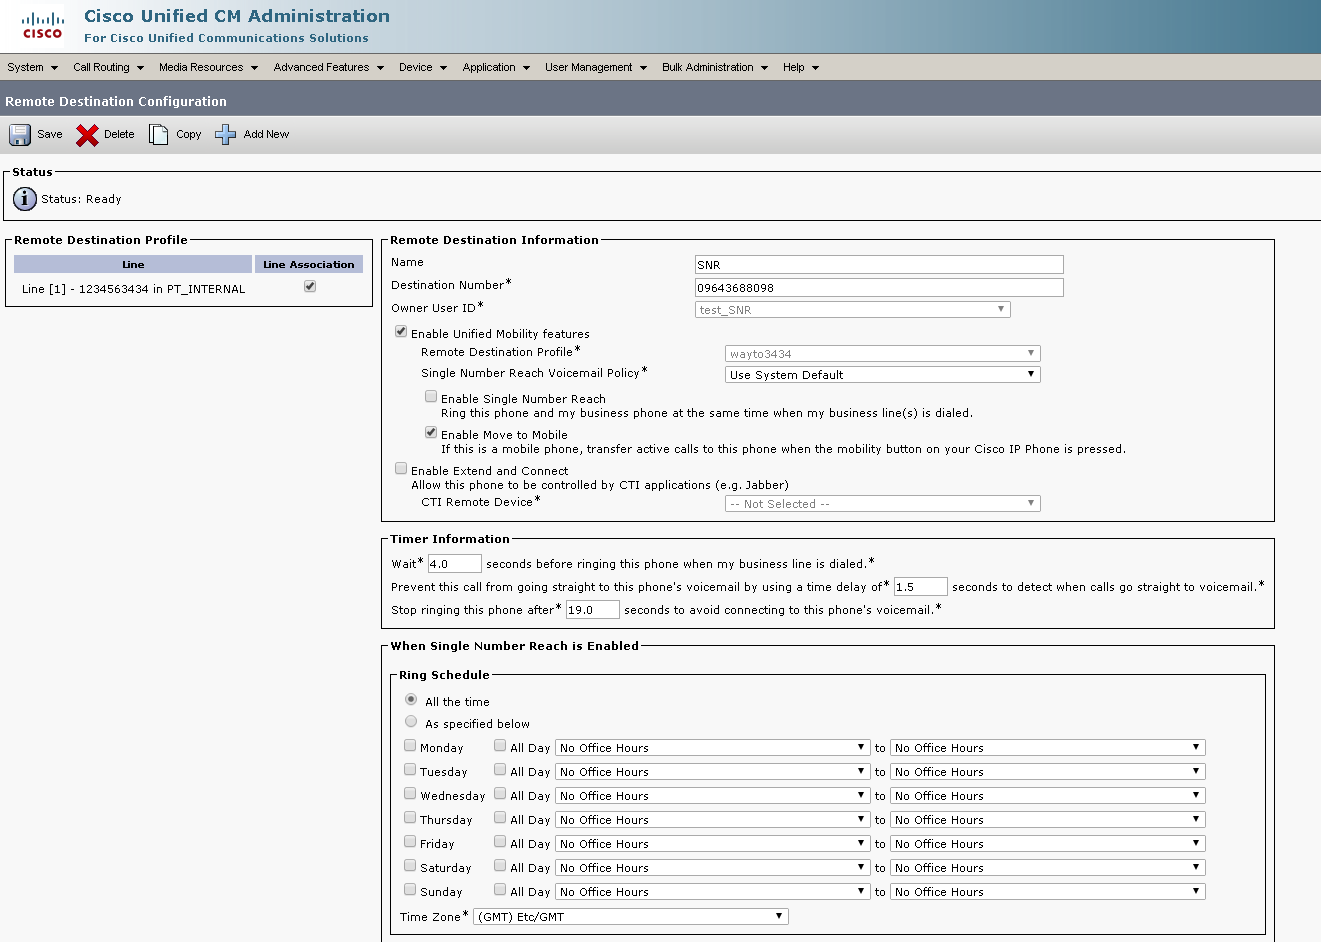
7. Check the checkbox, which is next to the line and click Save.
Hope this would have been informative for you and I’d like to thank you for viewing.

CCNA Routing and Switching
I am a technology enthusiast. I work in network support providing support with implementation, maintaining and precisely troubleshooting the infra. Am having 3.9+ years of experience working with Cisco Collaboration platforms: CUCM, Cisco Unity Connection, IM and Presence, VCS C and E, Expressway C and E, Cisco Meeting Server,Solarwinds, Gateways. Realm of collaboration makes me want to learn and face new challenges more and more. Feel free to reach out to me.
Learn-Create-Share

Use with caution and careful consideration. By doing this, you will occupy two voice channels to your PSTN. The first is when the call is inbound, and then your CUCM will reroute the call, on a different call leg with a different call ID, back out to the PSTN to the cell phone. Thereby utilizing two channels. This will essentially double your phone bill.
Thank you Jaron for the information, indeed SNR will end up, burgeoning the phone bills.
Great post, by the way. Single Number Reach is one of those features a lot of people don’t know about and don’t use. You did a great job laying it out and making it simple.
Thank you Jaron
Thank you for this article, hope to find more of your works in this website! thank you again 🙂