Cisco Jabber Auto Discovery Service – SRV Records
Domain Name System (DNS) is now playing an important role in Unified Communications whether you are using Cisco Unified Communications Manager, Cisco Unity Connection. Cisco Contact Center Express, Cisco IM & Presence, Expressway C or Expressway E etc.
SRV (Service Record) – SRV Records are used to help with service discovery and most commonly used with SIP configuration. The naming pattern basically starts with an underscore followed by the name of the service, followed by a period, and underscore, and then the protocol, another dot, and then the name of the domain.
Example: _sip._tcp.example.com
So, in today’s article, we will see how DNS SRV would help us?
When we deploy Jabber, we manually feed the IP Address of Cisco Unified Communications Manager / Cisco IM & Presence in Jabber Advance Settings.
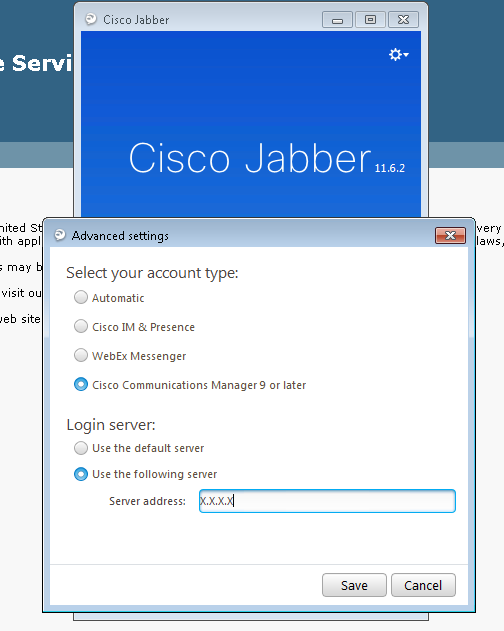
We can configure DNS SRV which will help in getting the services discovered automatically. Once the configuration is completed, we don’t need to fill the IP Address of CUCM/IMP. We will leave the account type as “Automatic” (default) and it will itself discover the IP Address of CUCM/IM&P.
Assumptions : I hope you have configured DNS Server, Forward Lookup Zone and Reverse Lookup Zone and added entries for Unified Communications servers like CUCM, IM&P, Unity Connection, Contact Center Express etc.
Login to your DNS Server
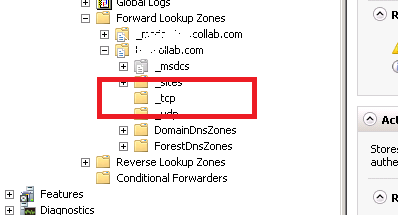
Now, it’s time to create DNS SRV records for your Jabber. In your DNS Server, expand Forward Lookup Zone, expand your domain. You would see something like _tcp .
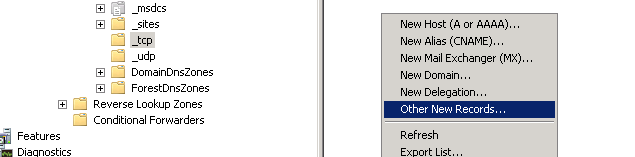
- Click on _tcp
- On the Right Panel > Right Click > Click on Other New Records

Screenshot - On Resource Record Type Window > Click on Service Location (SRV)
Screenshot - Click on Create Record
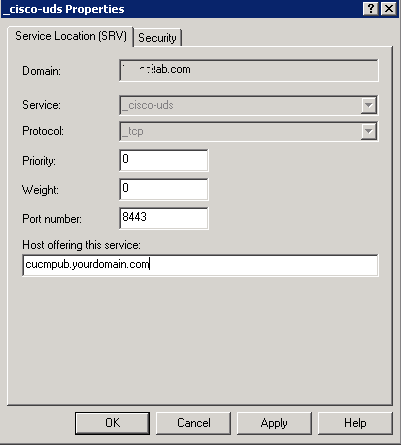
- Enter the following details :
Service > _cisco-uds
Protocol > _tcp
Priority > 0
Weight > 0
Port Number > 8443
Host Offering this service > CUCMHOSTNAME.yourdomain.com
Click Apply
Click OKScreenshot - Similarly you can add your CUCM Subscriber Hostname by creating a new SRV Record.
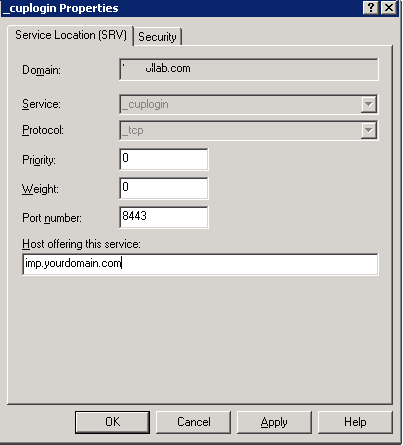
- Also add IM & Presence Hostname by creating a new SRC Record. Enter the following details.Service > _cuplogin
Protocol > _tcp
Priority > 0
Weight > 0
Port Number > 8443
Host Offering this service > IM&PHOSTNAME.yourdomain.com
Click Apply
Click OKScreenshot Note: The highest priority returned record will be used for Jabber Service. If you have more than one CUCM Server, you can change the priority attribute to use that server for the service.
Verify _cisco-uds or _cuplogin DNS service records
- Go to Start > Run > Type CMD and hit enter
- Type nslookup and hit Enter
- Type set type=srv and hit enter
- Type _cisco-uds._tcp.yourdomain.com and hit enter
- The output displayed the information for the _cisco-uds SRV record that was built.

Start Jabber Testing :
- Launch Jabber.
- Click on Settings Icon on your login screen > File > Reset Cisco Jabber
- Click on Reset
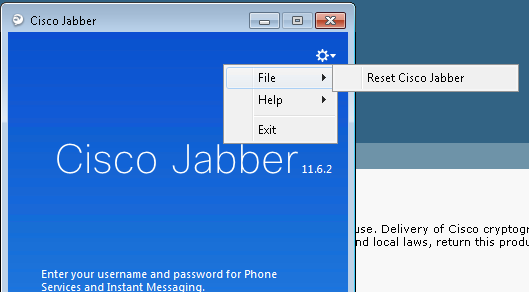
- Enter your [email protected] and click on Continue. It will try to find services.
- Enter your Username and Password and you should be able to login.
I hope in this process you realized that have not defined any IP Address in Jabber Advance Settings and you are able to login successfully.
Hope this helps!

I am working in an IT company and having 10+ years of experience into Cisco IP Telephony and Contact Center. I have worked on products like CUCM, CUC, UCCX, CME/CUE, IM&P, Voice Gateways, VG224, Gatekeepers, Attendant Console, Expressway, Mediasense, Asterisk, Microsoft Teams, Zoom etc. I am not an expert but i keep exploring whenever and wherever i can and share whatever i know. You can visit my LinkedIn profile by clicking on the icon below.
“Everyone you will ever meet knows something you don’t.” ― Bill Nye
