Install Vmware ESXI on bare metal
VMware ESXi is a bare metal hyper-visor from VMware . ESXi is a software which has to be installed onto physical servers and on top of ESXi, Virtual Machines are installed/configured. Before installing ESXi, you need to follow the compatibility matrix in VMware website. To start with the installation, follow the below procedures.
Installation Steps
- Download ESXi from VMware download page and burn the iso file in a CD/DVD.
- Boot the Server from CD/DVD
- Select “ESXi-5.X.X-XXXXXXX-Standard-Installer” on the Screen and hit Enter
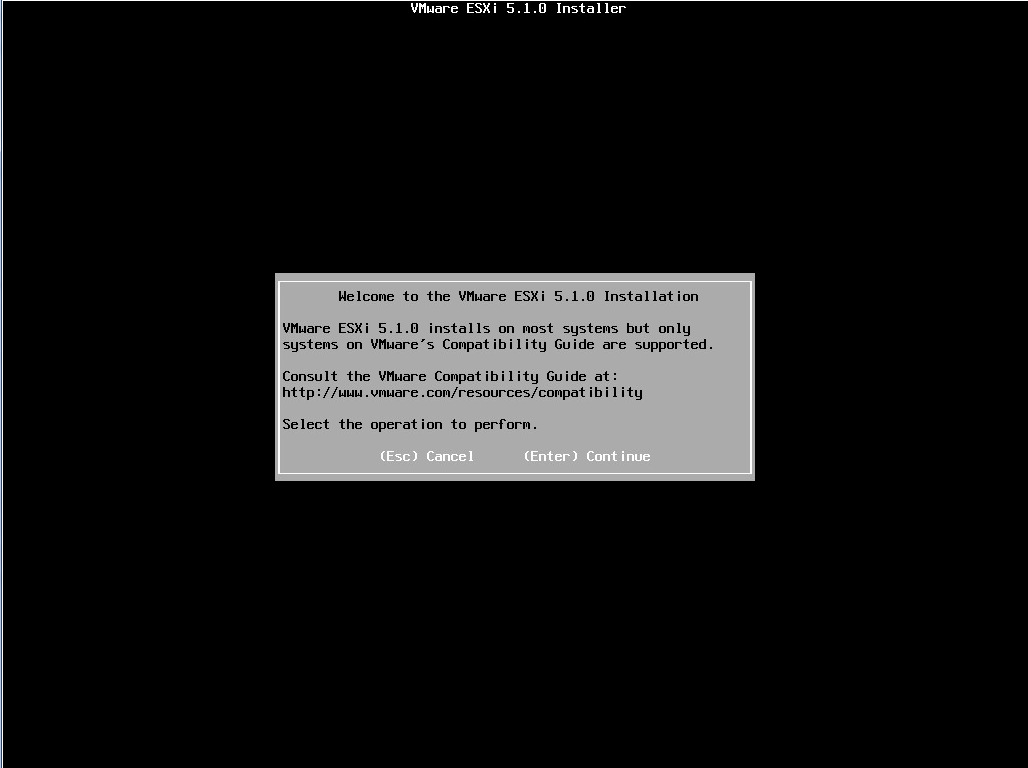
- Wait for a while until it prompts you for “Welcome to the VMware ESXi 5.X.X Installation” screen
- Hit Enter to Continue
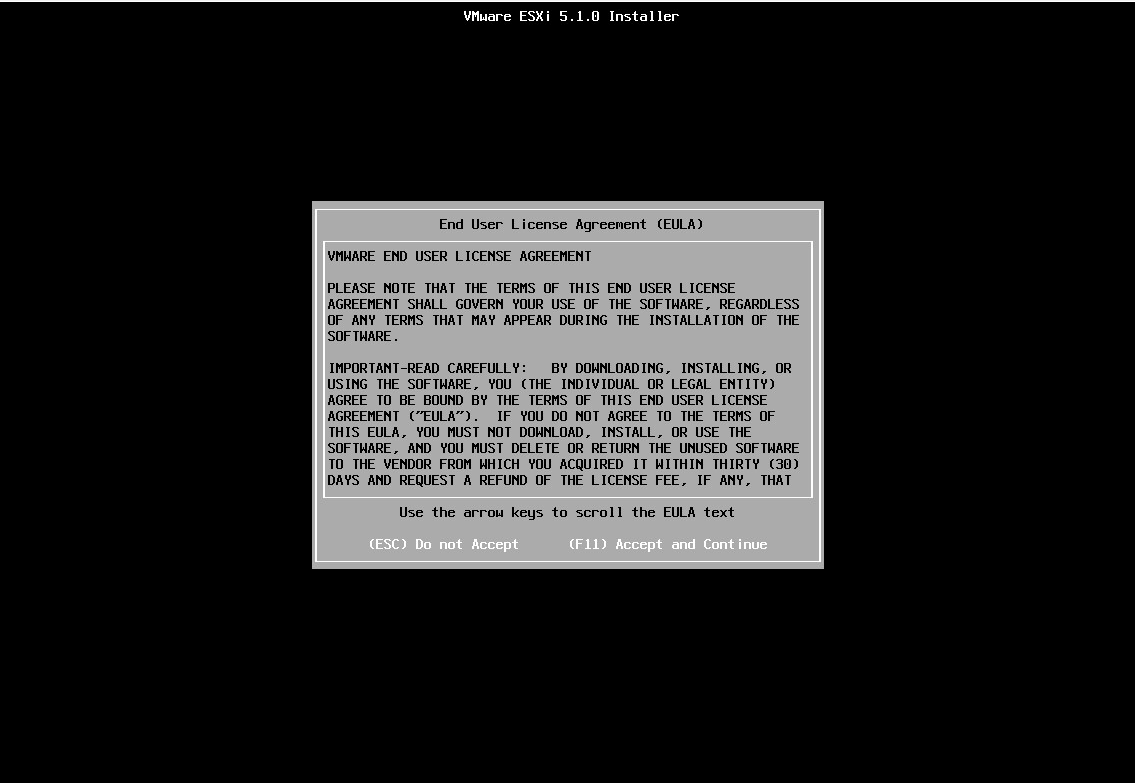
- Press “F11” to Accept and Continue
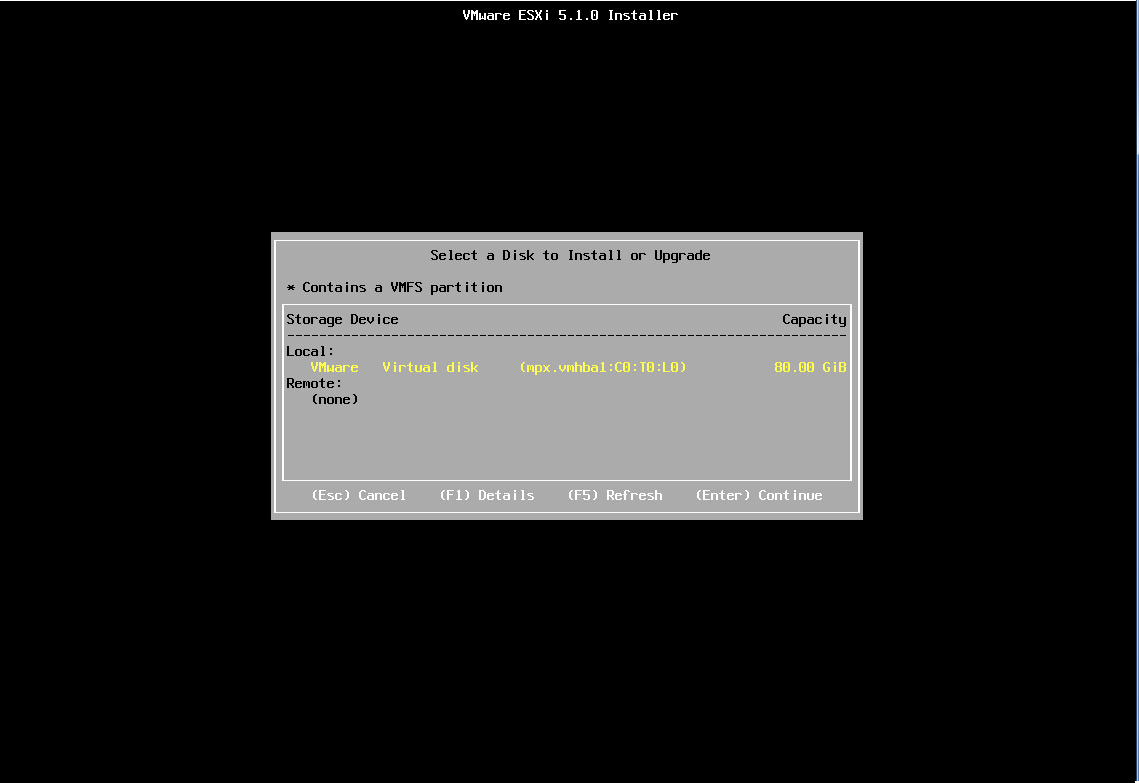
- Select Local Virtual Disk and Hit Enter
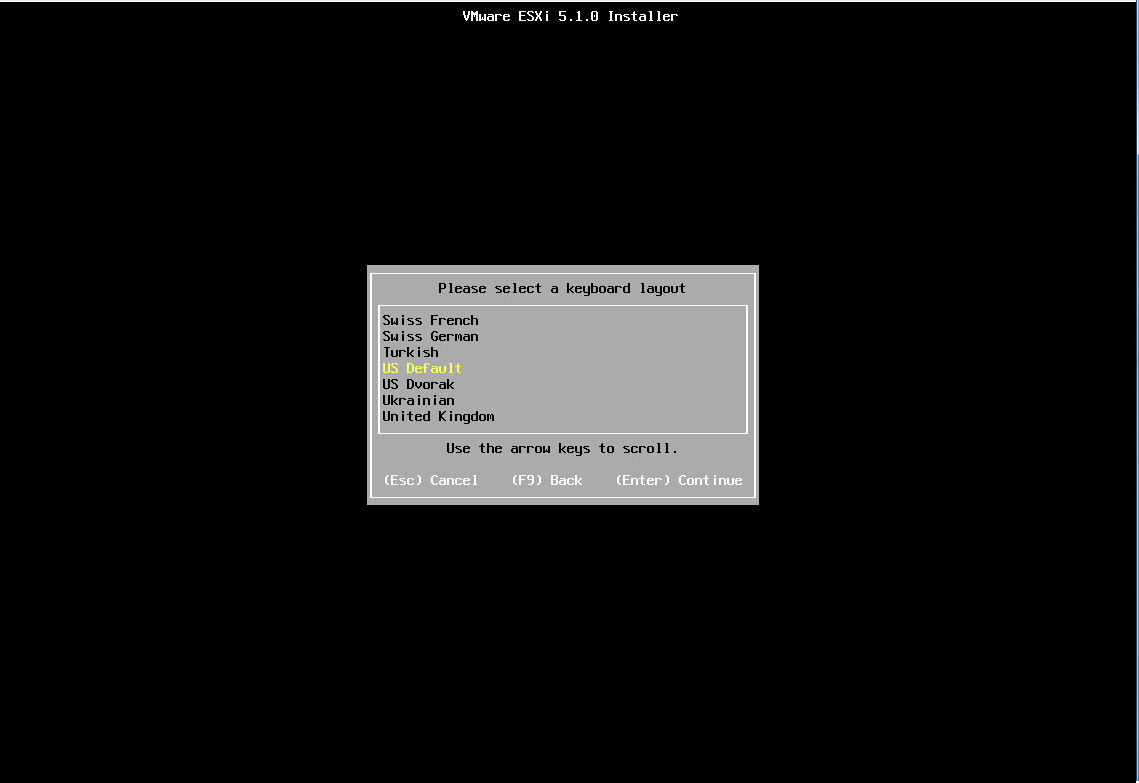
- Select appropriate Keyboard layout and hit Enter
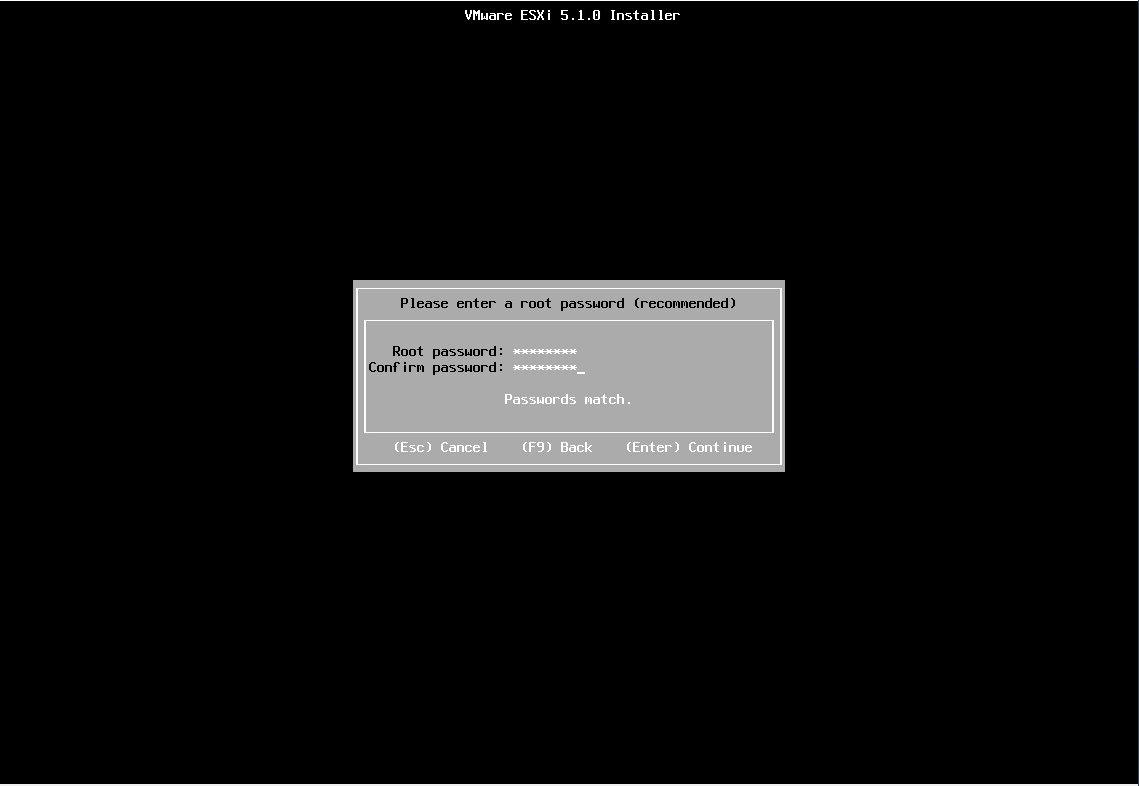
- Enter root password, confirm password and hit enter
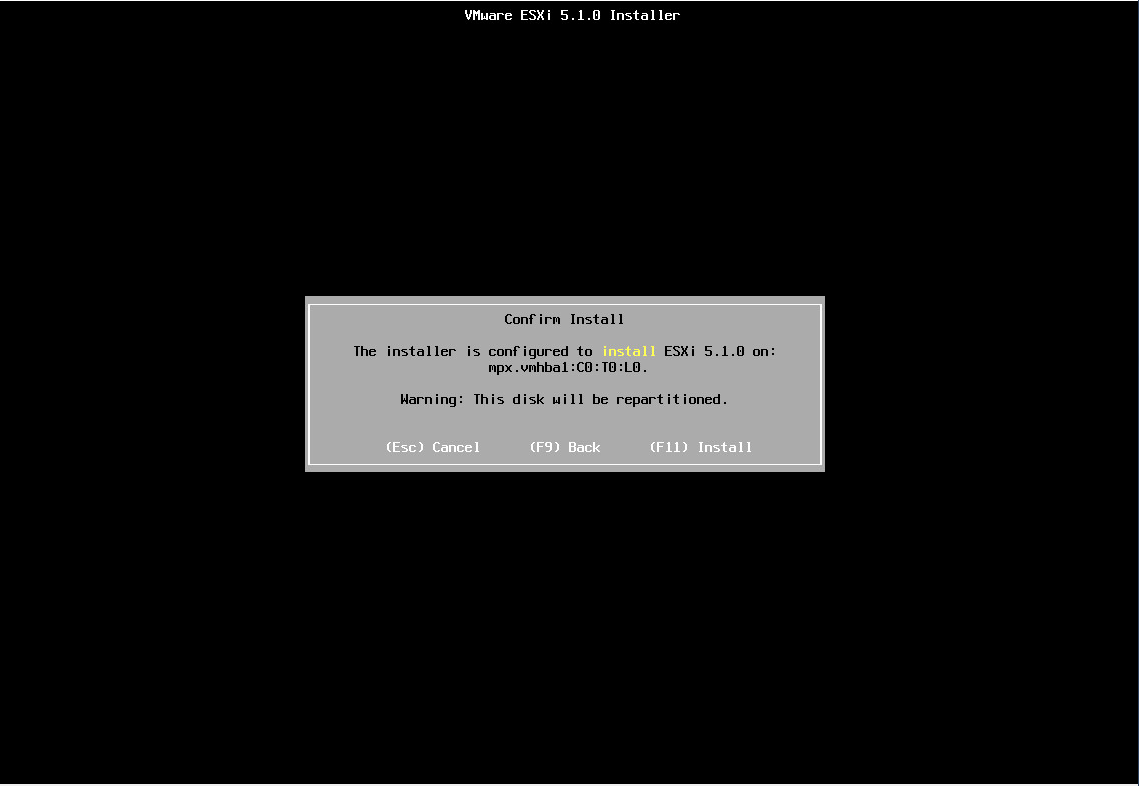
- Press “F11” to begin with the Installation.
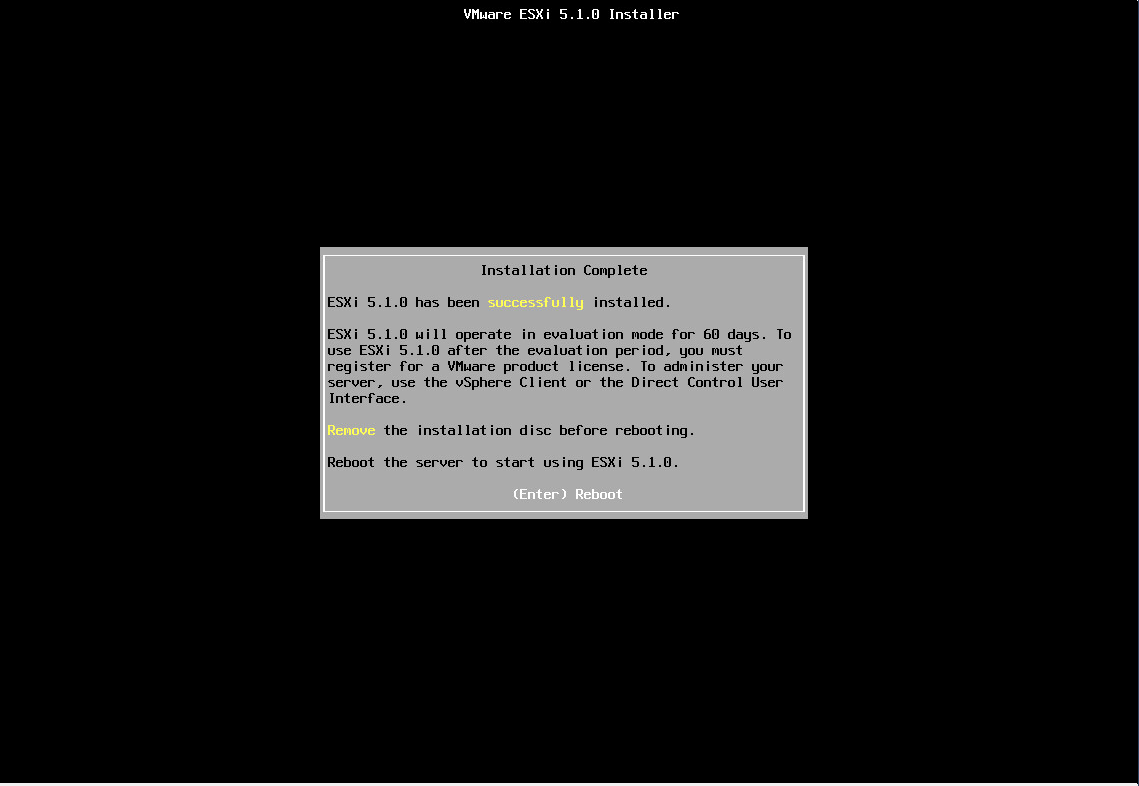
- Wait for sometime until it prompts you for “Installation Complete” screen. Once you see the screen, it will read as “ESXi 5.X.X has been successfully installed”.
- Press Enter to reboot
- Once the ESXi reboot is completed, if your network has DHCP enabled, you will receive IP Address, or else you have to set a Static IP Address. It is recommended to set a Static IP Address.
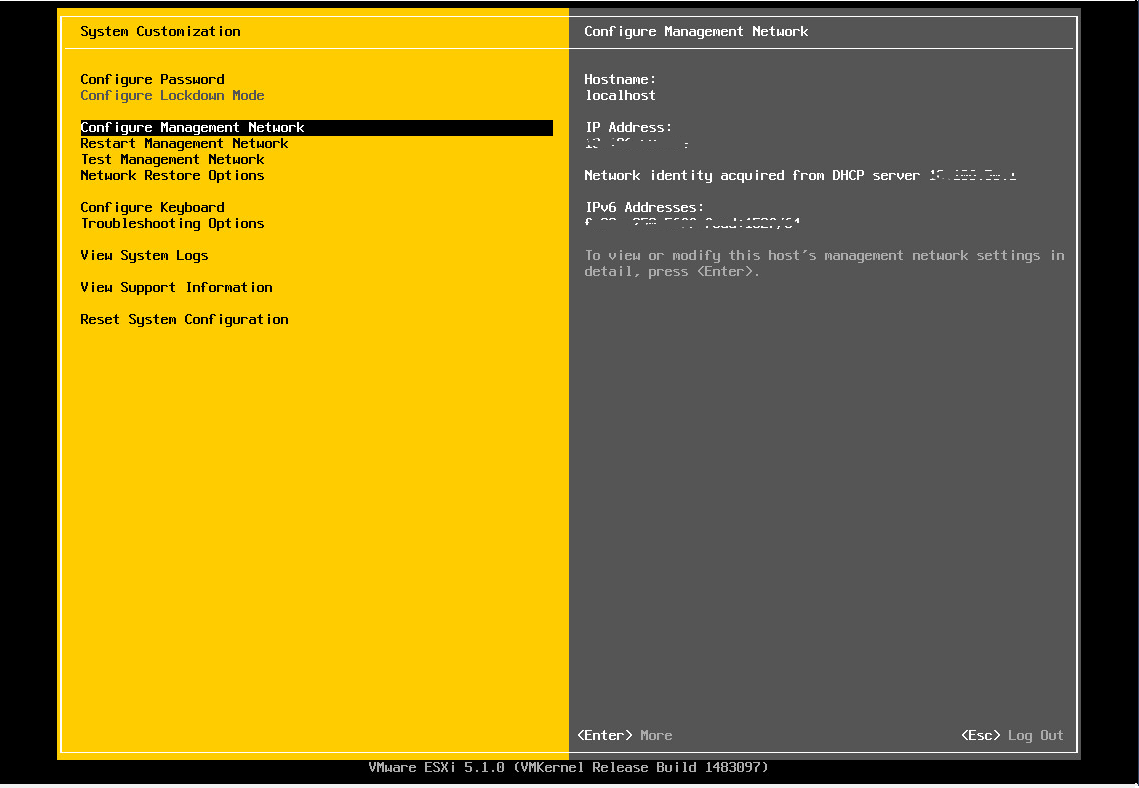
- Press “F2” to Customize System/View Logs
- Enter username as “root” and password you defined
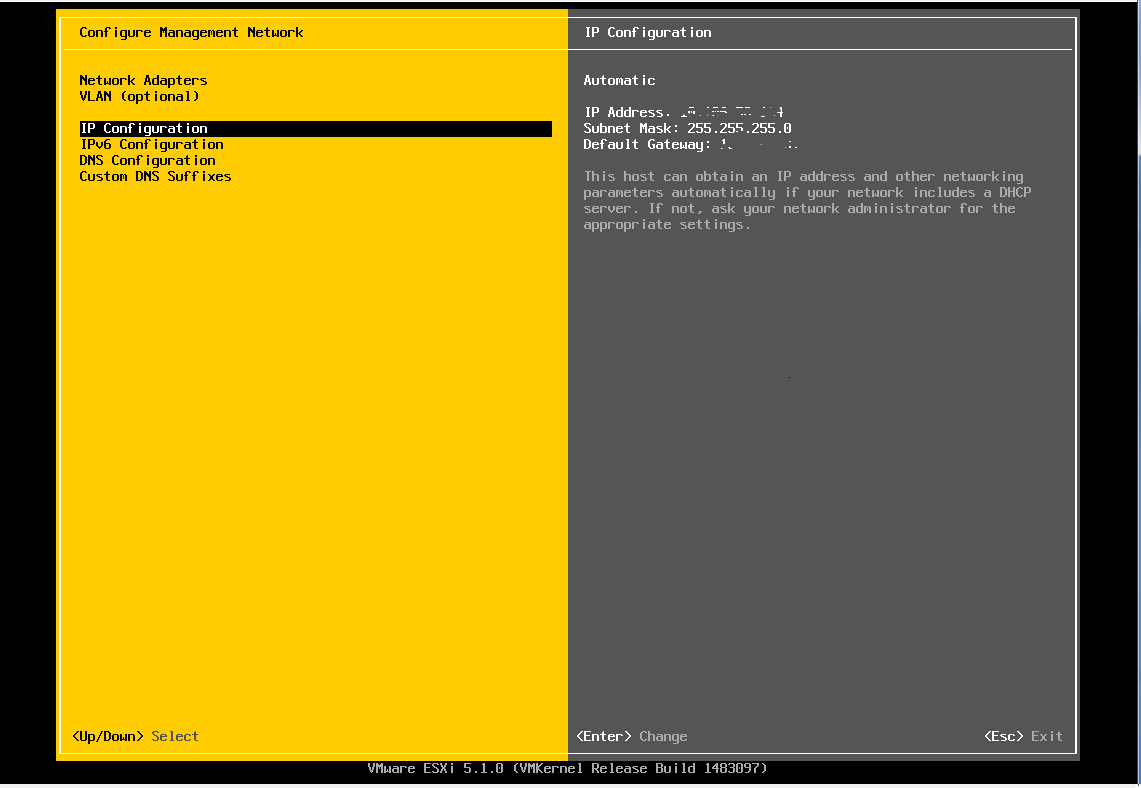
- Select “Configure Management Network” and hit Enter
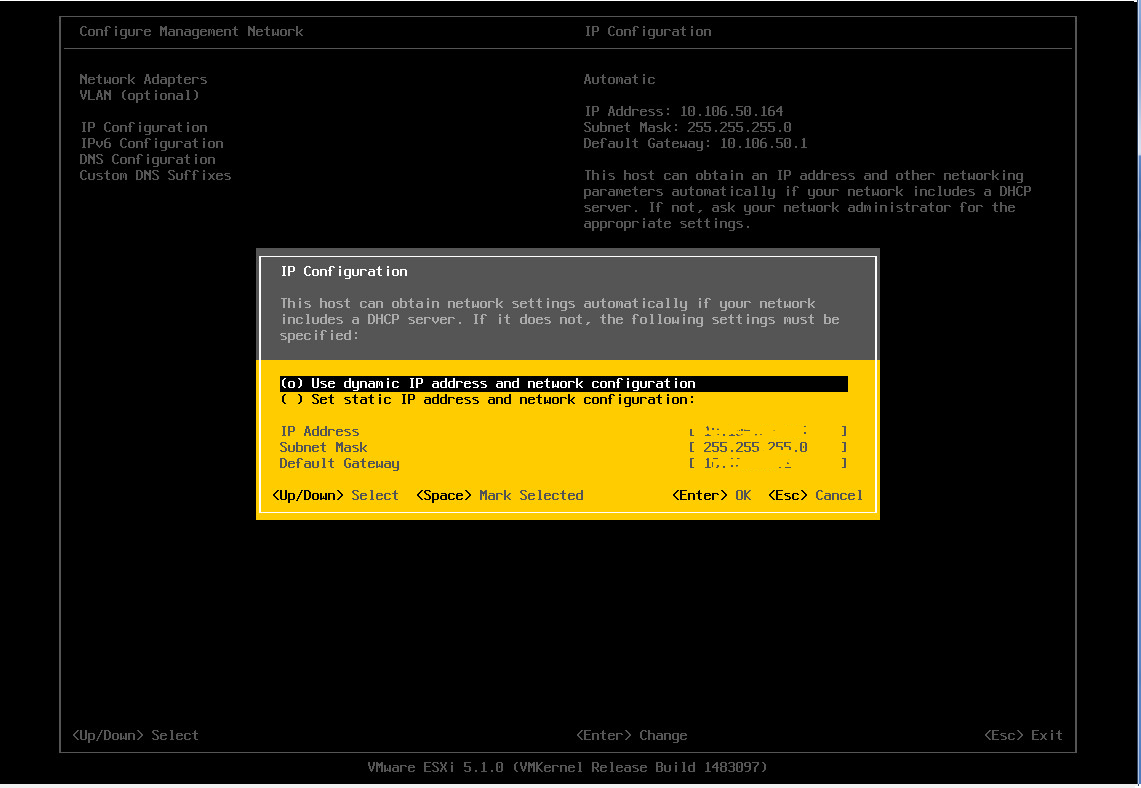
- Select “IP Configuration” and hit Enter
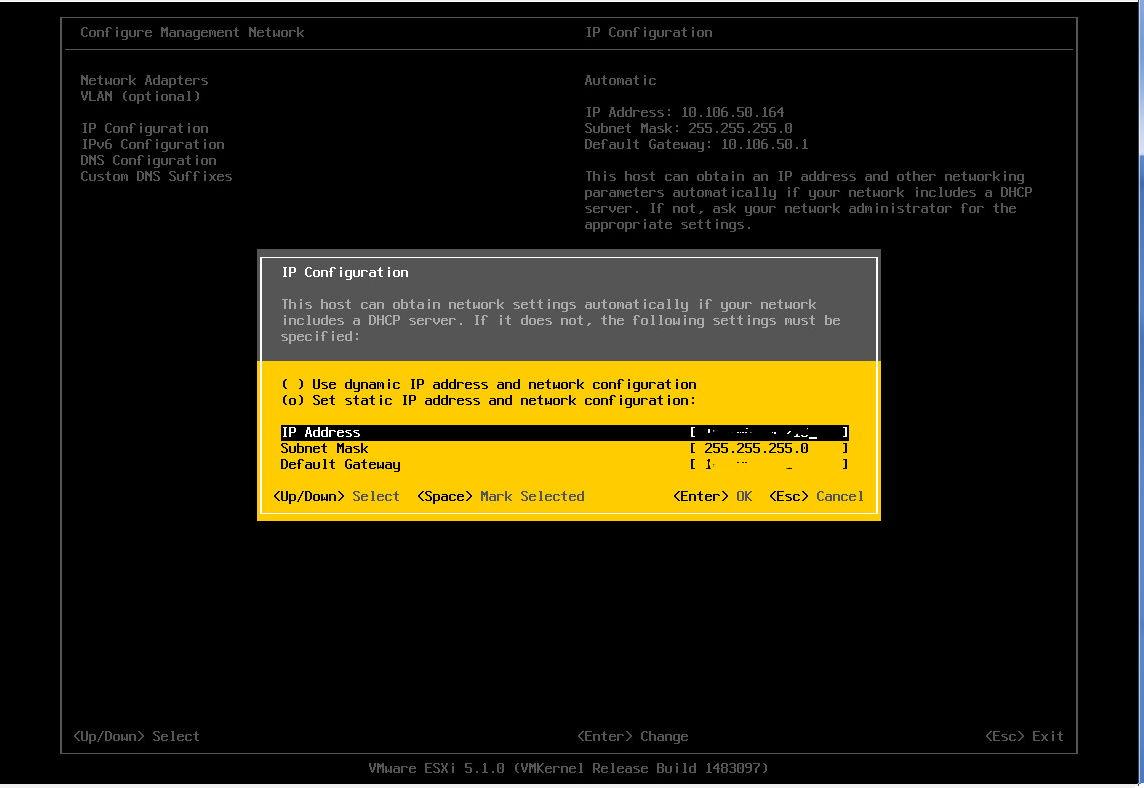
- Select “Set static IP Address and network configuration” and hit space
- Now Configure IP Address, Subnet Mask and Default Gateway.
- Hit Enter to save
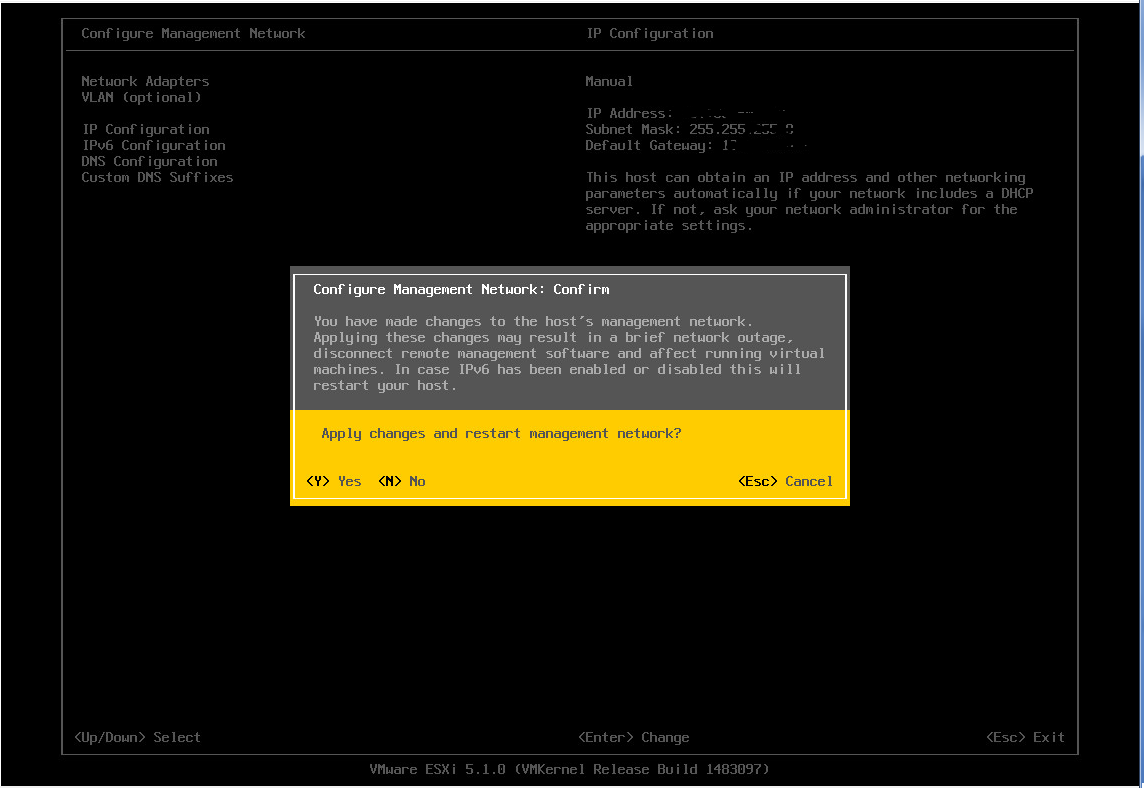
- Hit “ESC” button from your Keyboard to Exit
- Press “Y” to Apply changes and restart management network.
That’s all !! You are done with the Installation of ESXi 5.X.X Version.

I am working in an IT company and having 10+ years of experience into Cisco IP Telephony and Contact Center. I have worked on products like CUCM, CUC, UCCX, CME/CUE, IM&P, Voice Gateways, VG224, Gatekeepers, Attendant Console, Expressway, Mediasense, Asterisk, Microsoft Teams, Zoom etc. I am not an expert but i keep exploring whenever and wherever i can and share whatever i know. You can visit my LinkedIn profile by clicking on the icon below.
“Everyone you will ever meet knows something you don’t.” ― Bill Nye

Hi Avinash,
I think you should post how to install the ESXi on UCS. So you can detail the previous steps before the ESXi wizard.
Nice post, simple instructions, and I really like the ordered slideshow at the end. Great content as always!